
Overview
After creating fee accounts in QuickBooks Online, refresh Webgility’s accounting data so the accounts are available in Configure Expenses.
Steps
- In Webgility Online, go to Sync Settings > Products.
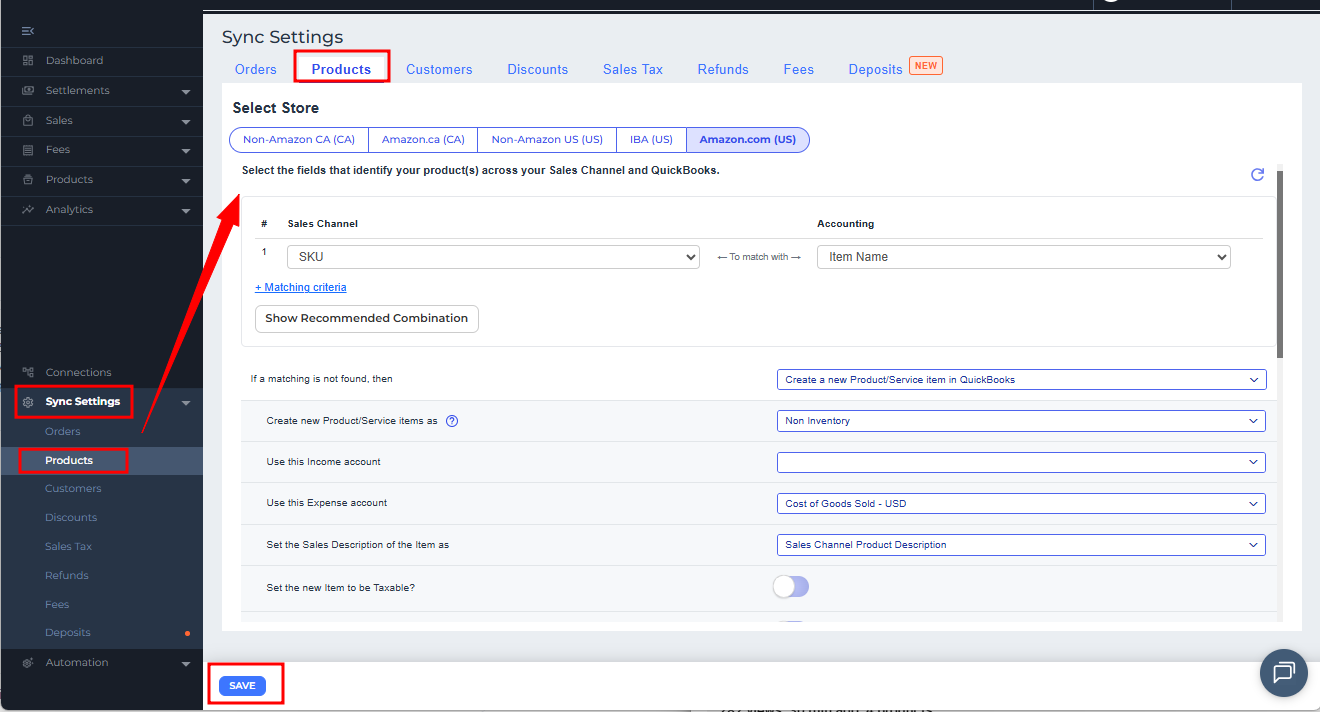
- Select Refresh Settings to download the latest data from QuickBooks. For details, see Download the Latest Data from QuickBooks in Webgility Online.
- Go to Sync Settings > Fees > Amazon.com (US) > Expense Details > Configure Expenses.
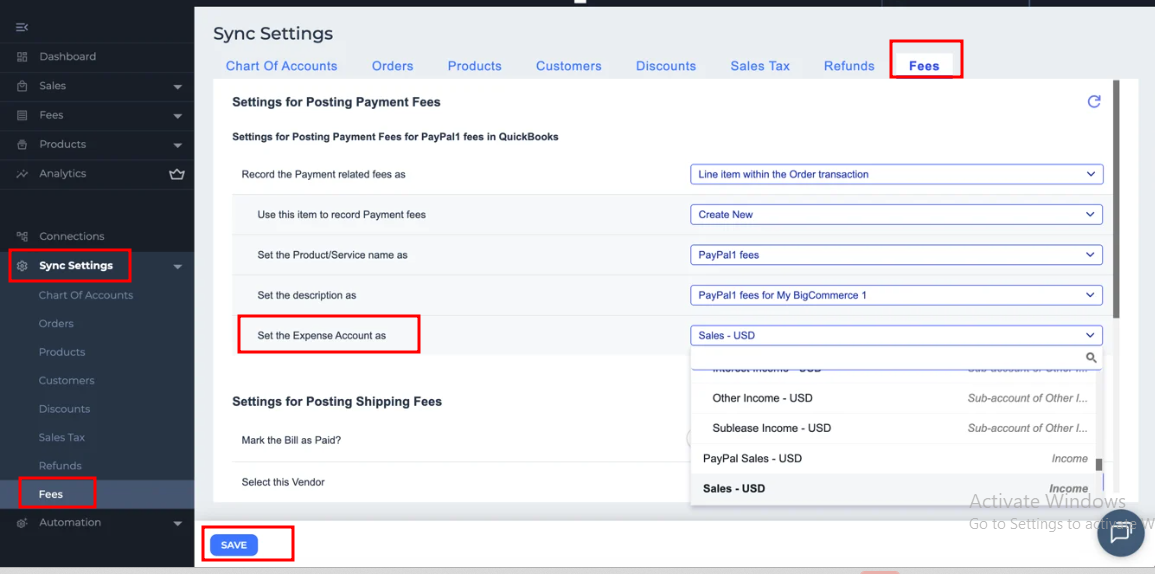
- Open the expense account dropdown, select the appropriate account for each fee, and save your changes.
If you have any questions or need more help, please contact our support team.