
Note: This article applies to Shopify channel
Overview
If your Shopify store sells in more than one currency (for example, a CAD store with US buyers paying in USD), you may notice that:
-
Foreign-currency orders post to QuickBooks in your store’s base currency, at a converted amount, instead of the amount the buyer paid.
-
Webgility creates a new customer with a currency prefix, such as CAD_Example Gifts, instead of using your existing customer.
-
The other currency (for example, USD) doesn’t appear in the currency dropdown in Webgility Online.
All three come from the same cause: multi-currency hasn’t been fully set up in Webgility Online yet. This article explains why it happens and how to fix it.
Steps to fix:
Step 1: Verify Multicurrency and Clearing Accounts in QuickBooks Online
First, make sure multicurrency is enabled in QuickBooks Online and that separate clearing accounts are available for USD and CAD.
Warning: QuickBooks Online multicurrency cannot be turned off once enabled. Consult your accountant before enabling this feature.
- Log in to QuickBooks Online.
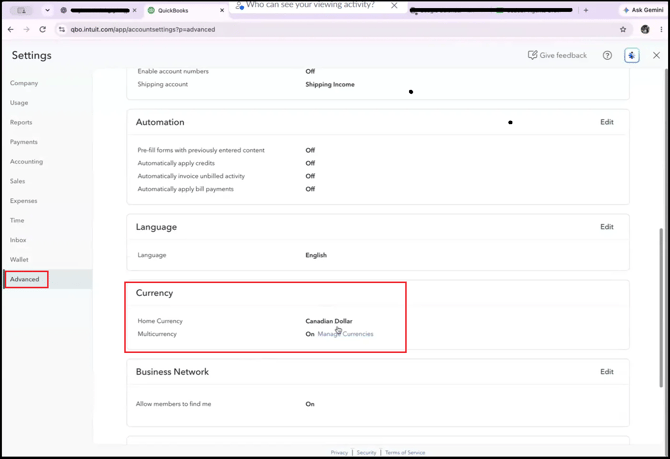
- Navigate to Settings > Account and Settings > Advanced.
- Locate the Currency section.
- Confirm that multicurrency is enabled. Kindly refer to the steps in the article: To setup multicurrency in Quickbooks.
Step 2: Enable Multiple Currencies in Webgility Online
-
Log in to Webgility Online.
-
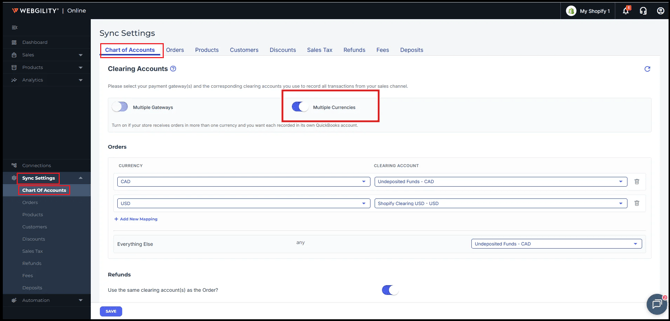
Navigate to Sync Settings > Chart of Accounts.
-
Locate the Clearing Accounts section.
-
Enable the Multiple Currencies toggle.
-
Map the appropriate QuickBooks clearing account for each currency (USD and CAD).
-
Click Save.
Kindly refer to the steps in the article: Sync Multi-Currency Orders with QuickBooks Using Webgility Online
Step 3: Redownload Your Unposted Shopify Orders
If USD is not available in the clearing account mapping:
- Navigate to the Orders page in Webgility Online.
- Click Redownload.
- Open an unposted Shopify order paid in USD.
- Verify that the order displays the original USD amount.
Note: Refresh/redownload existing unposted orders before posting them so the updated currency information can be applied.
Now try posting the order again.