
Part of How to Download, Review and Post Refunds in Webgility i.
How to fix a refund that could not post
- Click the Errors tab, then click Fix error in the refund's row.
- Read the Last error on the refund's panel, under Not in QuickBooks. It uses the same words as an order's error, about the refund, for example "A sales tax on this refund has no QuickBooks tax code" or "QuickBooks did not accept this refund", followed by what QuickBooks Online said. Click Technical details to see the exact error, or Contact support if you are not sure what to change.
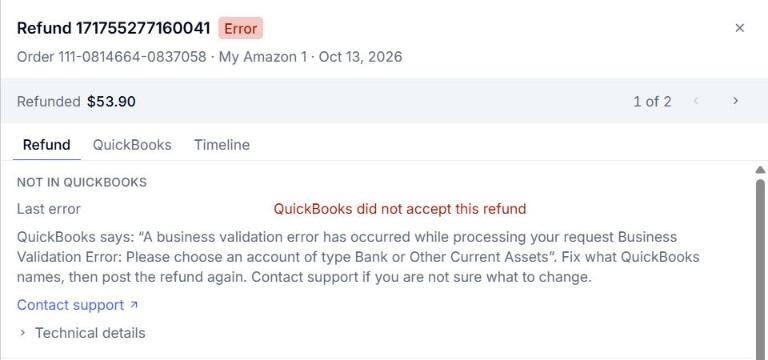
- Make the fix, then tick the refund and click Post to QuickBooks again.
Refund errors also appear in the Inbox as a row that reads, for example, "2 refunds could not post to QuickBooks". A refund that Webgility i cannot post on its own appears in the Inbox as the flag "The refund can't be posted automatically". You can ignore such a refund, or contact support. See Understanding Inbox Flags in Webgility i.