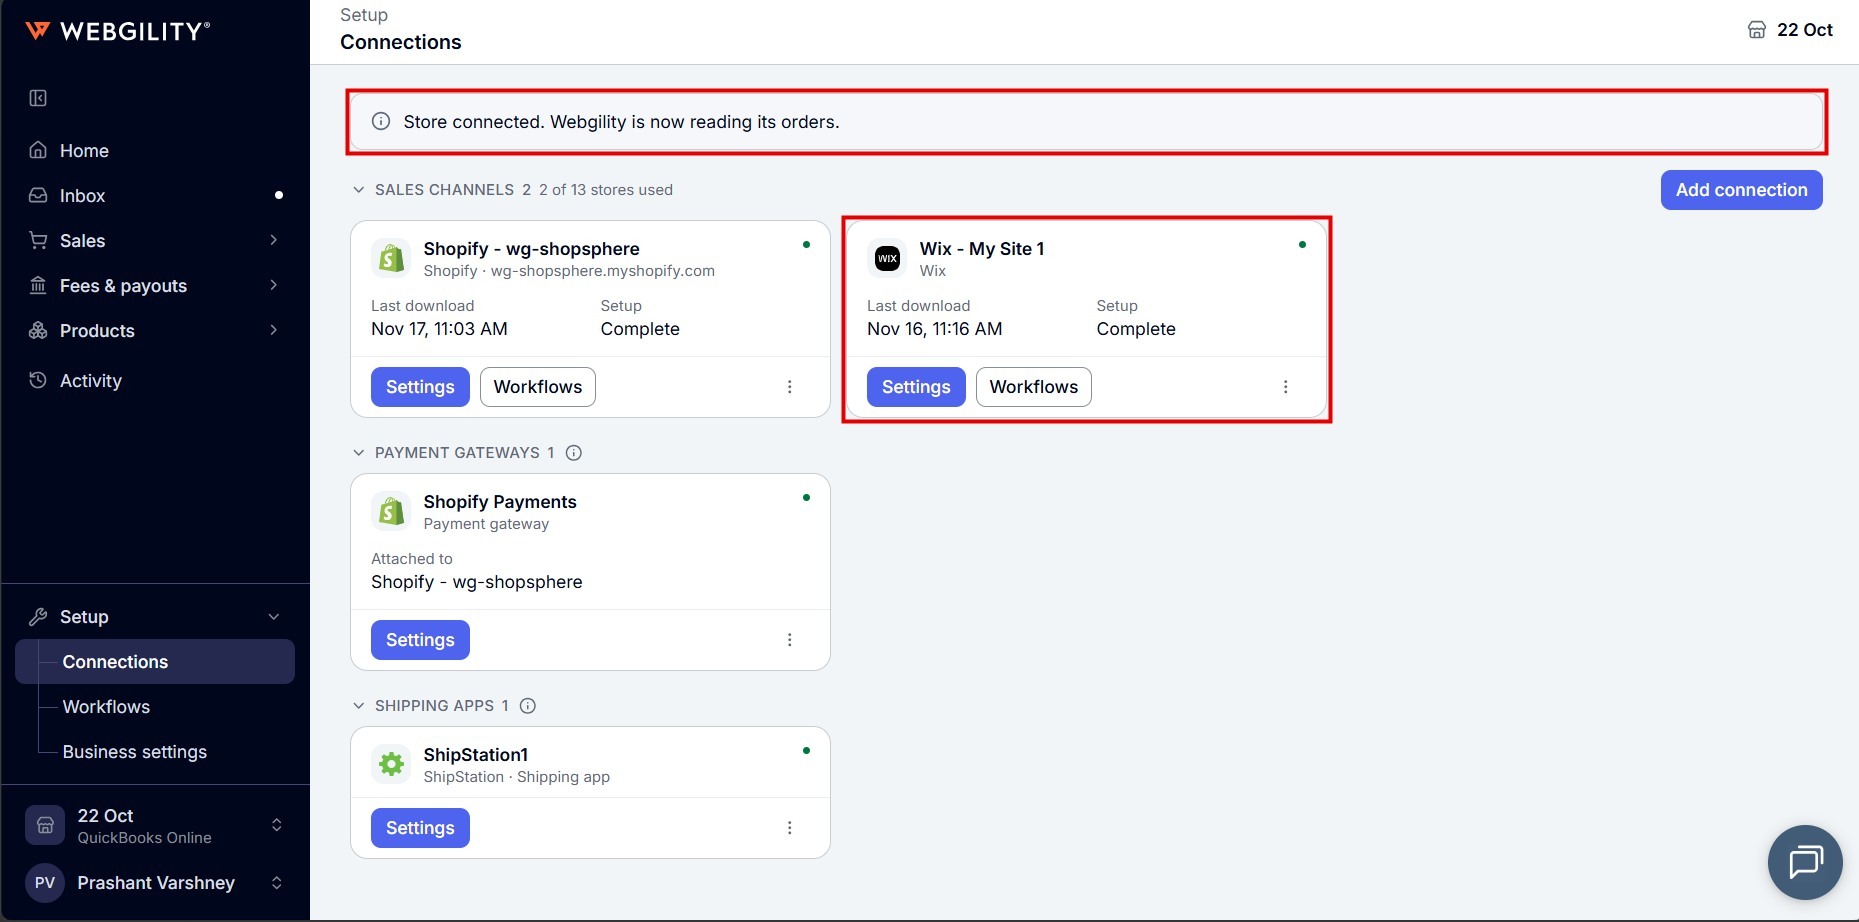
You connect a Wix site by adding the Webgility app to it. Once the site is connected, Webgility i reads its orders and products, so that you can post them to QuickBooks Online.
Note: If Wix is your first sales channel, you can also connect it from the Welcome to Webgility page when you first sign in. The steps are the same. See How to Connect Your Sales Channel to Webgility i.
Steps
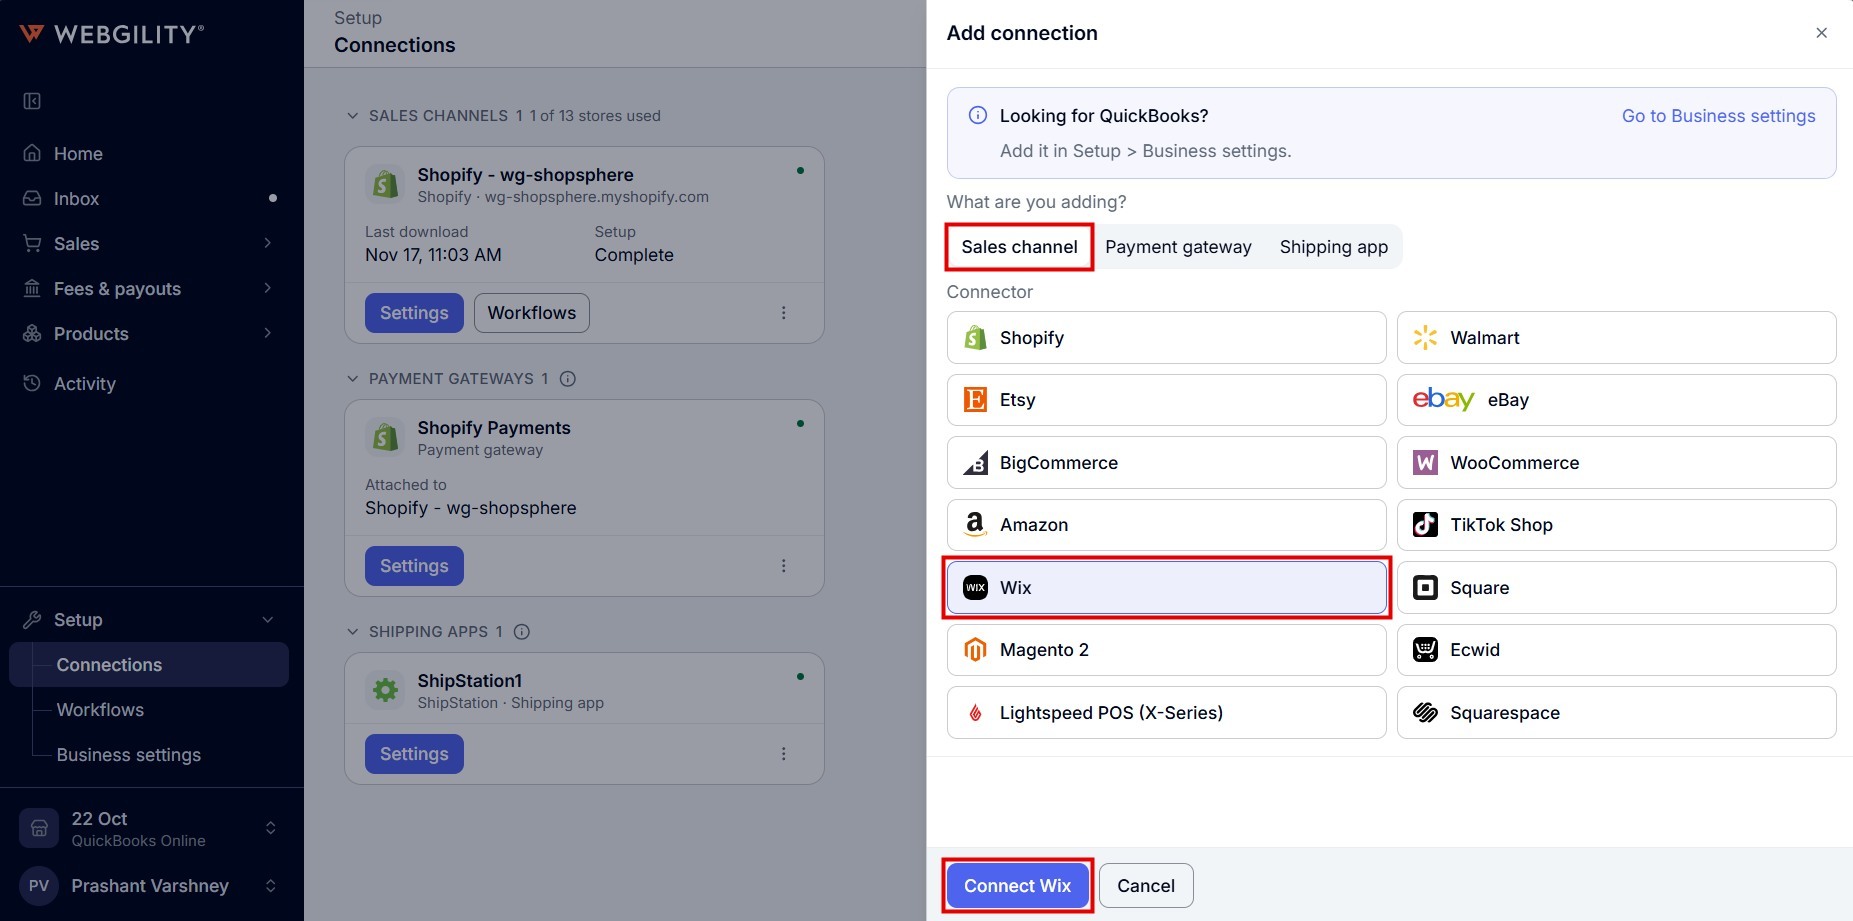
- Sign in to Webgility i, go to Setup > Connections and click Add connection. The Add connection panel opens on the right.
- Under What are you adding?, leave Sales channel selected. Under Connector, click Wix. Wix asks for no details here.
- Click Connect Wix.
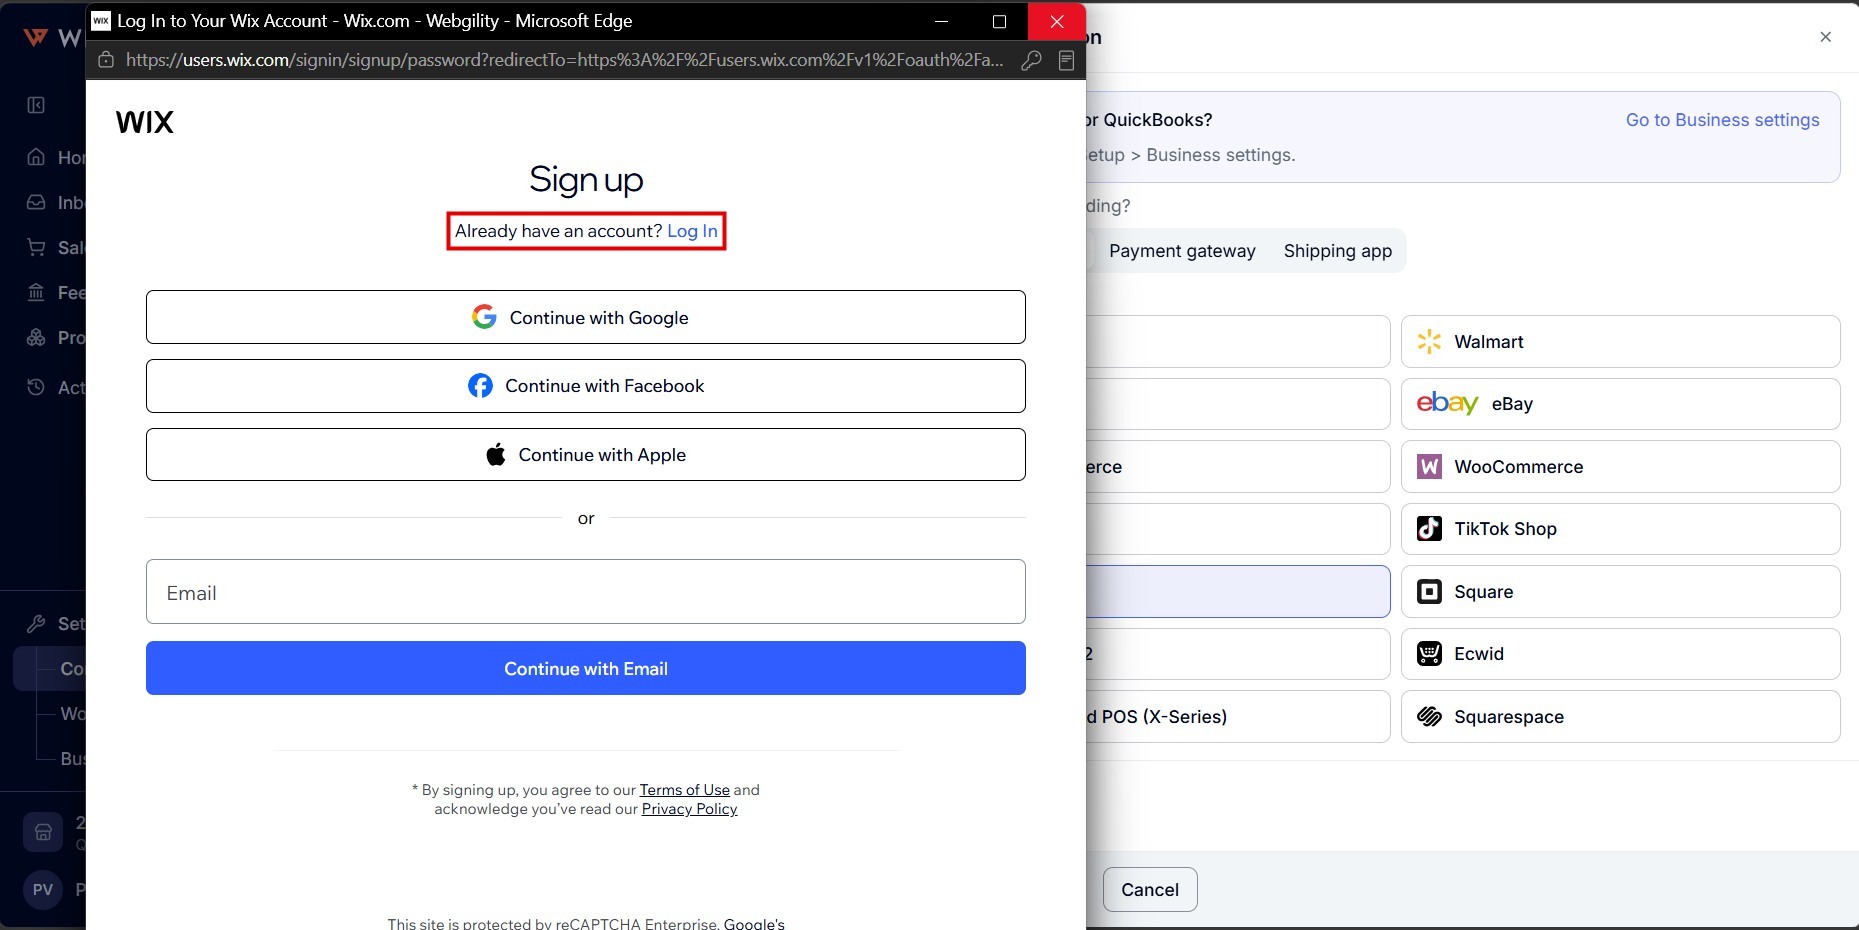
- A Wix window opens. If you already have a Wix account, click Log In and sign in to the account of your site. If your browser blocks pop-up windows, Wix opens in the same tab instead. Webgility i never sees your Wix password.
- If your Wix account has more than one site, pick the site that you want to connect.
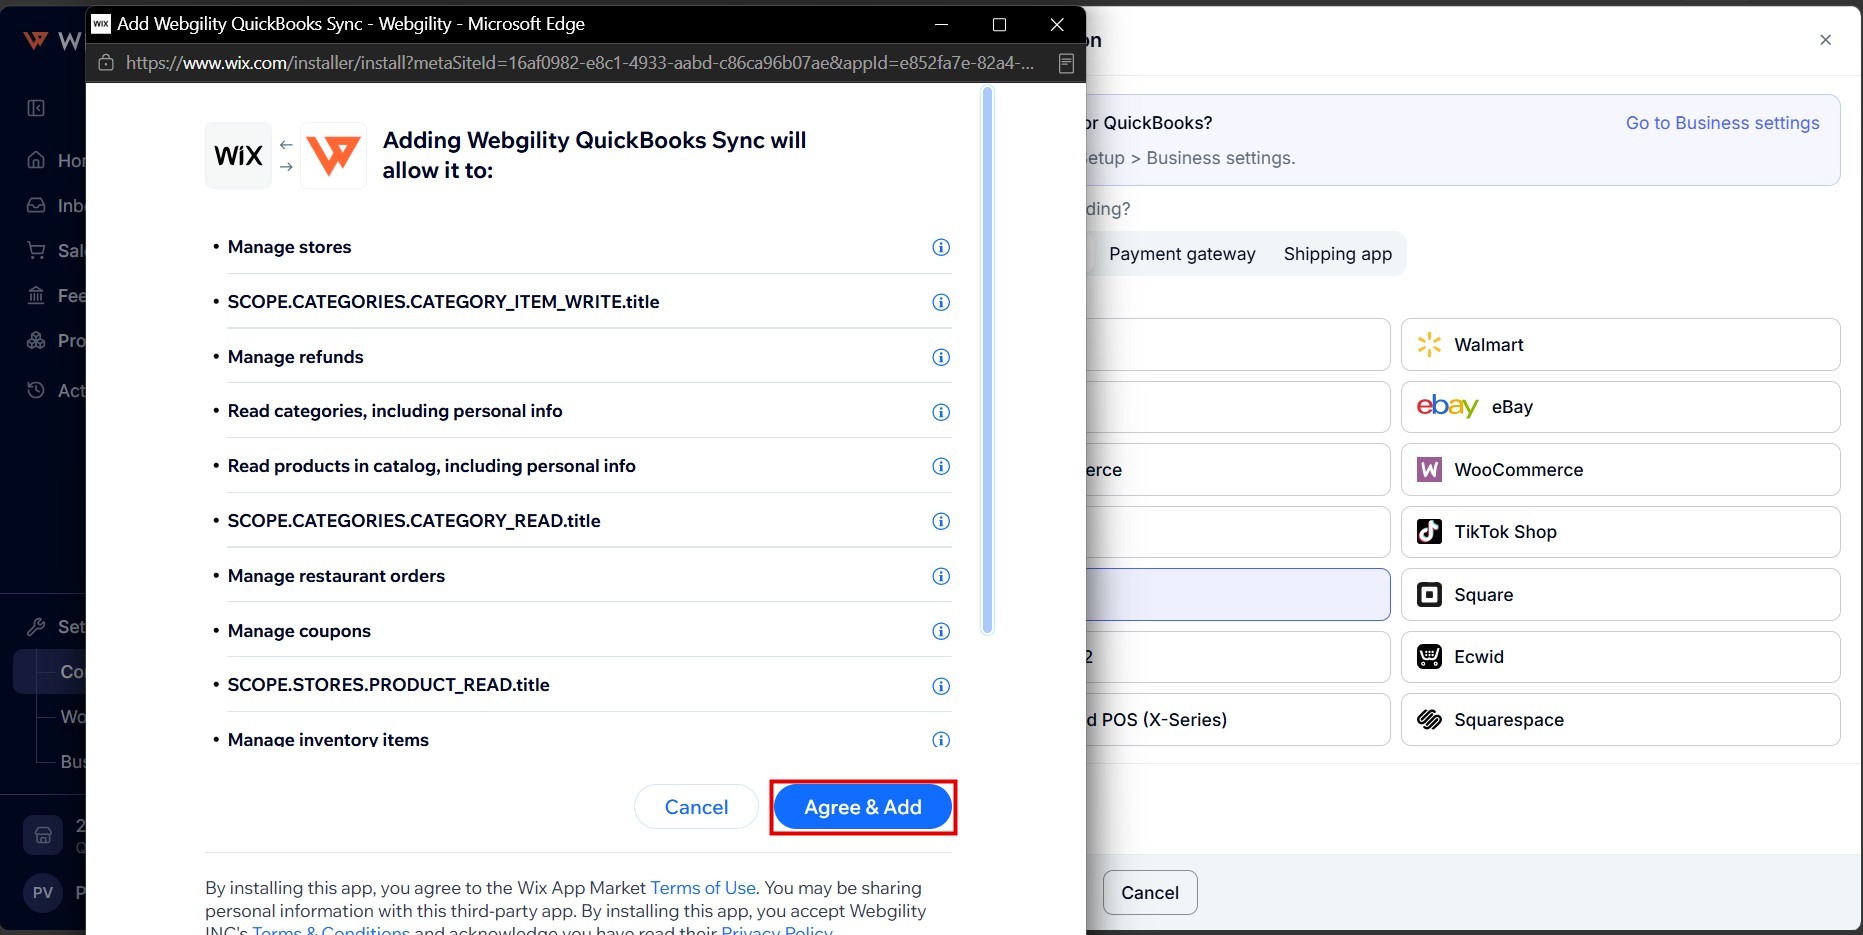
- Wix shows what the Webgility app will be allowed to do on your site. Click Agree & Add.
- Wix brings you back to Webgility i. Wait while Webgility i checks the site and saves the connection. Keep the page open.
- When the connection is complete, the Connections page shows "Store connected. Webgility is now reading its orders." The site appears under Sales channels as Wix followed by the name of your site, for example Wix - My Site 1.