
Overview
Webgility Desktop lets you configure product pricing using QuickBooks POS price levels. If you want Shopify products to use a specific price level instead of the default Regular Price, update the relevant pricing settings in Webgility Desktop and sync the product data.
Steps to Configure and Sync Item Price Levels
- Select your Shopify sales channel. Open Webgility Desktop and select the appropriate Shopify store from the sales channel selector in the top-right corner.
- Open Product Presets. Navigate to Products > Missing in QuickBooks POS > Product Presets.
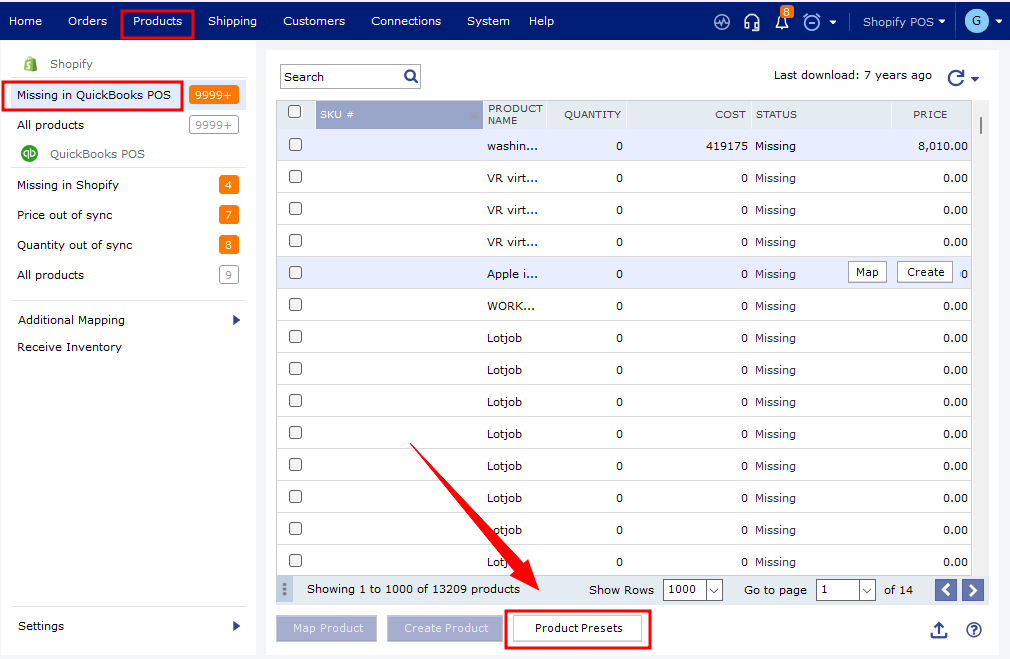
- Select the price level. Under Presets for creating new products in QuickBooks, locate the Price Level option and select the required price level instead of Regular Price.
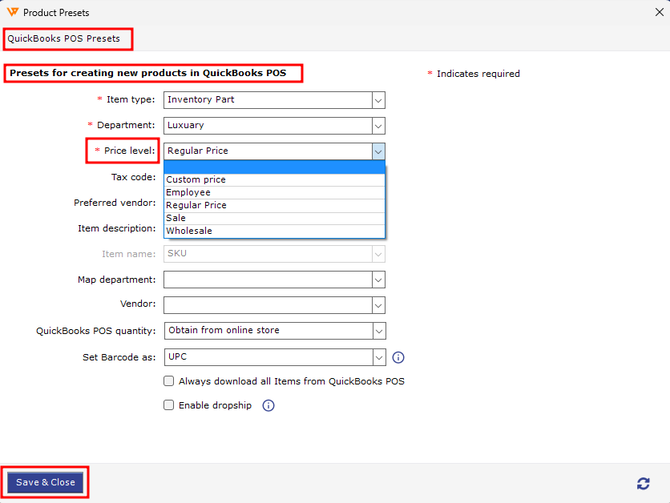
- Save your changes. Click Save & Close.
- Download the latest QuickBooks product data. To refresh product information and retrieve updated prices, follow the instructions in How to Download the Latest Accounting Data from Scratch.
-
Sync product prices. Run a product sync to update the prices on your Shopify store. Repeat these steps for each Shopify sales channel profile that requires the same configuration.
For more information, see How to Sync Products with Webgility Desktop.
Important Note
The price level configured in Product Presets applies to products created using that preset. If you want to change pricing for existing products during ongoing synchronization, review the product pricing options under Products > Settings > Sync Settings as well.
If you have any questions or need more help, please contact our support team.