
Part of How to Map a Sales Channel Listing to a QuickBooks Product in Webgility i.
Steps: Create a new product in QuickBooks Online from a listing
Use this when the product does not exist in QuickBooks Online yet. It is offered only for an Unmapped listing.
Note: Webgility i gives the new product the accounts and other values set in Create new item(s) in products & services, on the Products tab of the channel's settings. Set an income account there before you create a product. The income account in the product matching settings is not used for this.
- Open the listing's panel from the Unmapped tab, as in steps 1 to 3 above.
- Click Create new product. A confirmation titled Create followed by the listing's name opens, with What gets created: the Name and SKU the new QuickBooks product will get.
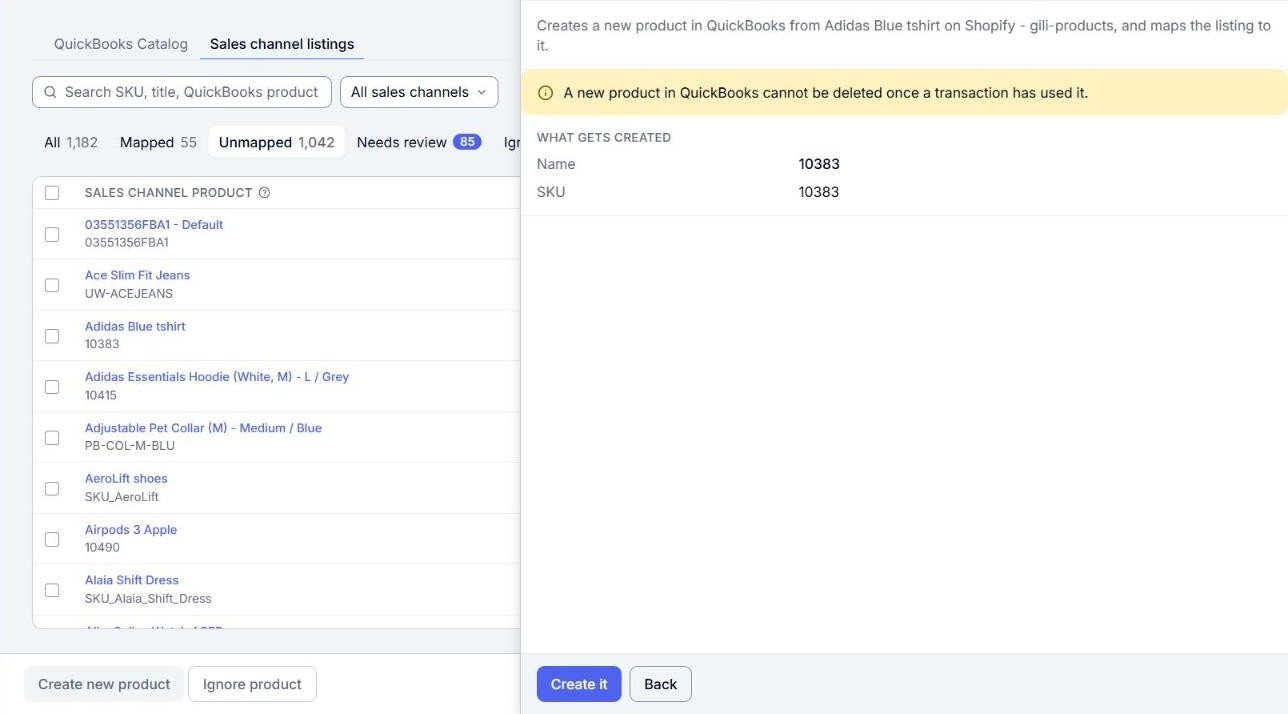
- Check the name and SKU, then click Create it, or click Back to return to the listing. The new product is created in QuickBooks Online, and the listing is mapped to it. Click Close.
Note: A new product in QuickBooks Online cannot be deleted once a transaction has used it. Create a product only when it does not already exist in QuickBooks Online.
Note: If QuickBooks Online already has a product with that name, the confirmation says so and offers Map it or Map to that product instead, and nothing new is created.
To create products for several listings at once, select their boxes on the All or Unmapped tab and click Create new product at the bottom of the page. Review the list in the confirmation and click the button to confirm. A listing whose product is also listed on another sales channel is left out: create its QuickBooks product from the listing's panel instead.