
Part of How to Connect a Payment Gateway to Webgility i.
Steps: Connect PayPal
- Go to Setup > Connections and click Add connection. The Add connection panel opens on the right.
Note: You can also open this panel from the Welcome to Webgility page. Click Add a sales channel connection, then click Payment gateway.
- Under What are you adding?, click Payment gateway. Under Connector, click PayPal.
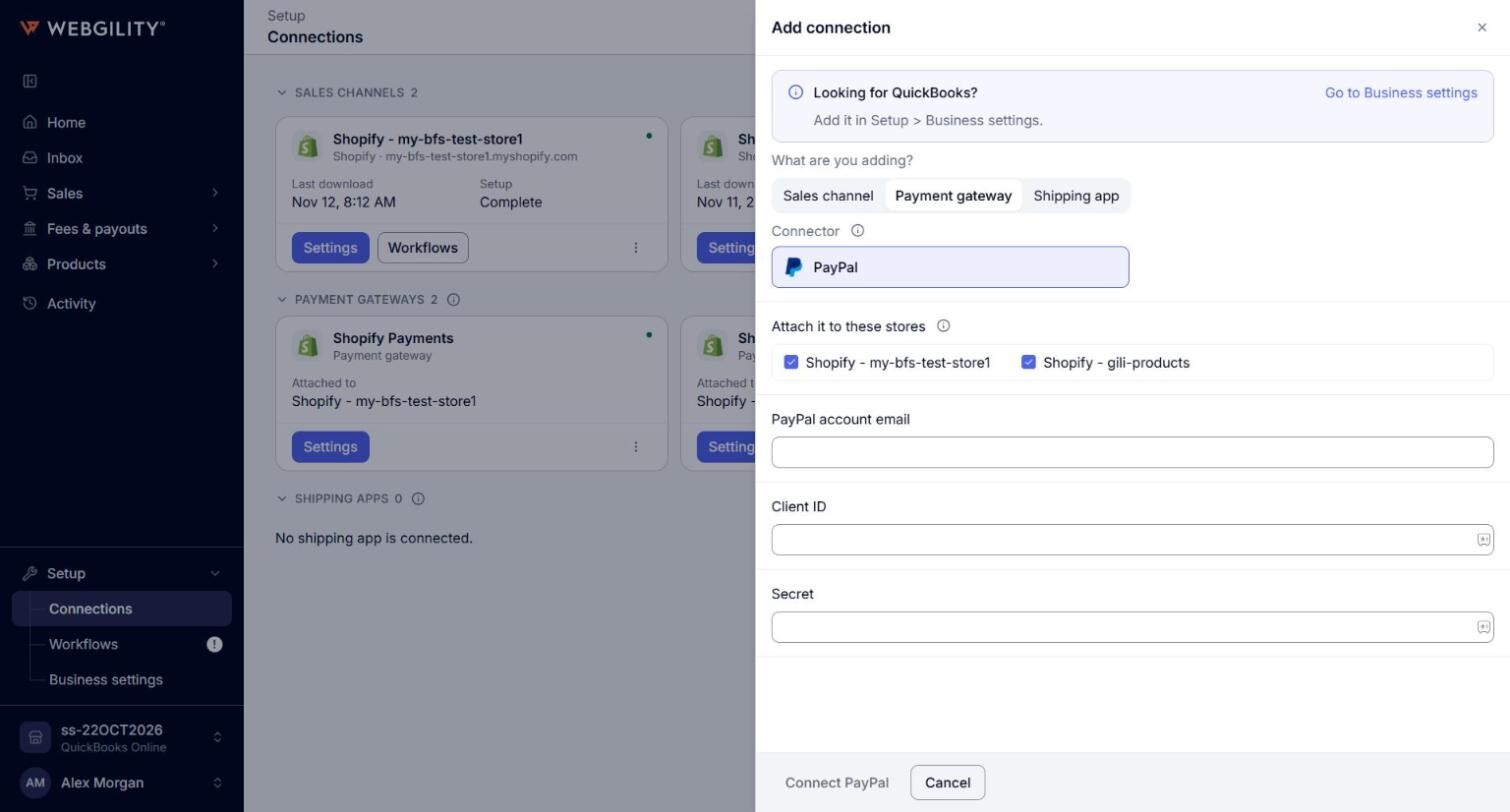
- Under Attach it to these stores, keep ticked each store whose payment fees Webgility i should read from this gateway. Every store of the business is ticked at first.
- Enter the PayPal account email, and the Client ID and Secret of your PayPal REST app. The REST app needs Transaction Search turned on in its features at developer.paypal.com. PayPal can take a few hours to turn Transaction Search on.
- Click Connect PayPal. Connecting takes up to a minute.
- When the connection is complete, the page shows "The payment gateway is connected. Its fees arrive with the next orders." The gateway appears under Payment gateways, with the stores it is attached to under Attached to.
Some steps happen inside PayPal, such as creating the REST app. See the Webgility help article for PayPal.