Cause of the error:
This error usually occurs while posting orders or Shopify payouts/ Amazon settlement reports.
-
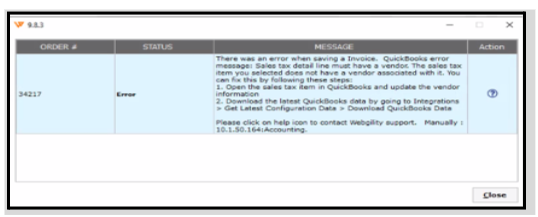
The error message "Sales tax detail line must have a vendor" can occur when syncing orders in QuickBooks Desktop if the vendor for the Sales Tax item has not been specified.
-
QuickBooks Desktop requires that each sales tax type item be associated with a vendor to manage tax payments and details properly.
Steps to fix this error:
To update the vendor in the sales tax item in QuickBooks Desktop, follow these steps:
- Open QuickBooks Desktop: Launch your QuickBooks Desktop application.
- Go to the Lists Menu: Click on the Lists menu at the top of the screen.
- Select Item List: From the dropdown, choose Item List.
- Find the Sales Tax Item: Scroll through the list to find the sales tax item you want to update. You can also use the search function if you have many items.
- Edit the Sales Tax Item: Right-click on the sales tax item and select Edit Item.
- Alternatively, you can select the item and then click on the Item button at the bottom left and choose Edit Item.
- Update Vendor Information: In the Edit Item window, you will see various fields. Locate the vendor field (usually labeled as Vendor or Tax Agency). Update it with the correct vendor information.
- Save Changes: After making your changes, click OK to save.
- Verify Changes: To ensure the update was successful, revisit the Item List and confirm that the sales tax item reflects the new vendor information.
- Download items from scratch in Webgility Desktop from Quickbooks Desktop. Kindly refer article
- Now try to post the order again into QuickBooks Desktop.
Note: If you encounter any issues, make sure the user is logged in as the admin and has the necessary permissions to edit items.