Overview
This error typically occurs when Webgility Desktop is unable to establish a connection with your accounting software (i.e QuickBooks Desktop) due to incorrect settings, missing configurations, or network issues.
Note: Take a backup of QuickBooks Desktop before going ahead with the troubleshooting steps. Back up your QuickBooks Desktop company file
Error Message: The requested connection type could not be found.

Note: Any of the steps followed may resolve the issue. It's not necessary to complete all the troubleshooting steps unless the issue persists after each one.
Steps to resolve the error message
01. Restart Both Programs:
Sometimes a simple restart of both Webgility Desktop and QuickBooks Desktop can resolve the connection issue.
02. Check QuickBooks Desktop Connection
Ensure that QuickBooks Desktop is running with the correct company file open. Ensure QuickBooks Desktop is Running with the correct company file open and logged in. To verify the company file. Kindly refer: How to Test QuickBooks Connection in Webgility Desktop
03. Run Webgility Desktop as Administrator
Right-click on the Webgility Desktop icon and choose Run as Administrator. This ensures that Webgility Desktop has the necessary permissions to access QuickBooks Desktop.
04. Check for Updates
Make sure both Webgility Desktop and QuickBooks Desktop are updated to their latest versions. Compatibility issues can arise if either software is out of date.
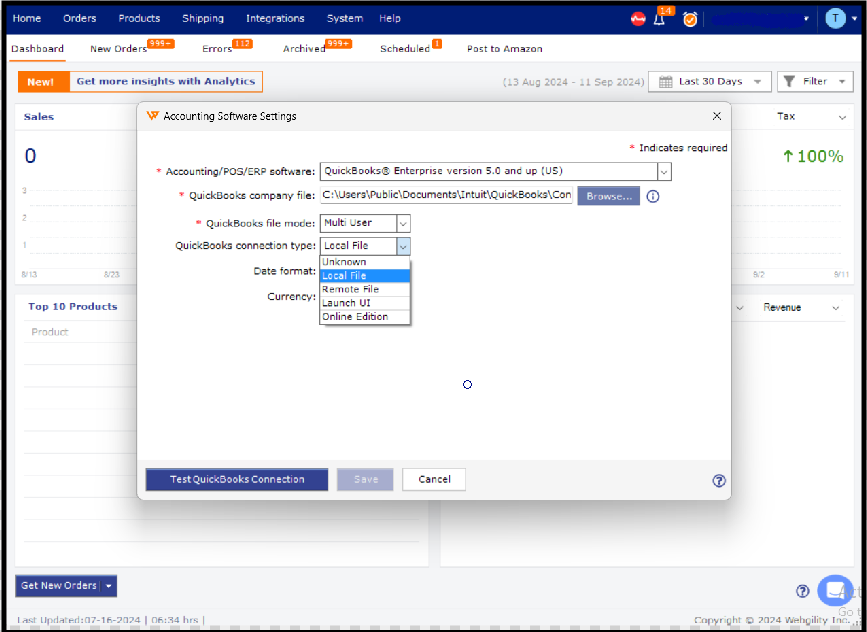
05. Verify the Connection Type and test the connection:
Navigate to Connections > Accounting/POS/ERP > Edit Connection and verify that the connection type is correctly selected. It should be set to “Local File”.
Ensure that the accounting software you are trying to connect to is properly set up in Webgility Desktop.
06. Check Network Settings
Ensure that the computer where QuickBooks Desktop is installed is properly connected to the same network as Webgility Desktop.
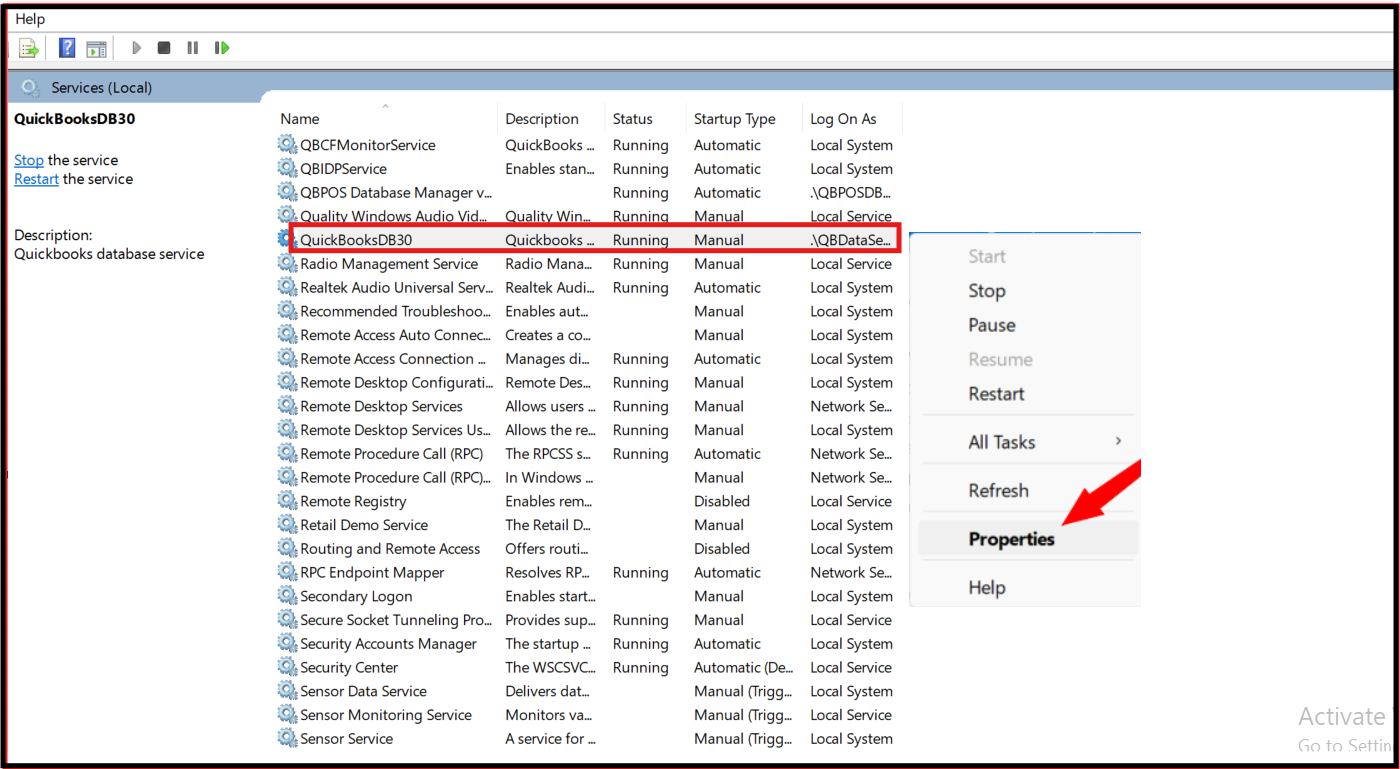
If using QuickBooks Desktop, ensure that the QuickBooks Desktop Database Server Manager is running and properly configured.
-
Select the Windows Start menu.
-
Search for and open services.
-
Right-click the QuickBooks DesktopDBXX service and then select properties. Note: XX is the year of your Database Server Manager. For example, the 2021 version is QuickBooks DesktopDB31.
-
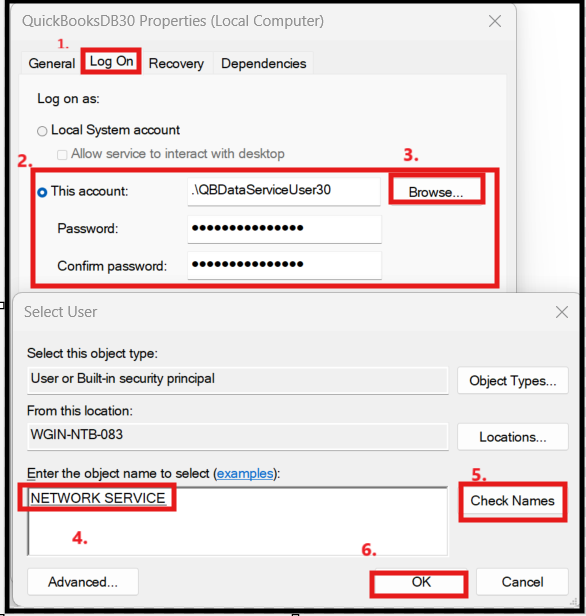
Click the second tab, Log On & select This Account, click Browse & under the object name, type Network, click Check Names, select Network Service, click OK, remove "Password and Confirm Password” and click Apply & OK.
If QuickBooks Desktop Database Server Manager doesn't restart, restart your server computer. Then follow these steps again.