Overview:
SQL services enable multiple users to securely access and manage data from a single database. It helps with tasks like creating tables, modifying them, and running data queries. Security features, such as authentication and encryption, ensure that data remains safe.
Steps to Set Up:
1). Type "services" in the Windows search bar and open it.
2). In the Services window, find SQL Server [Instance name for Webgility], right-click it, and select Properties.
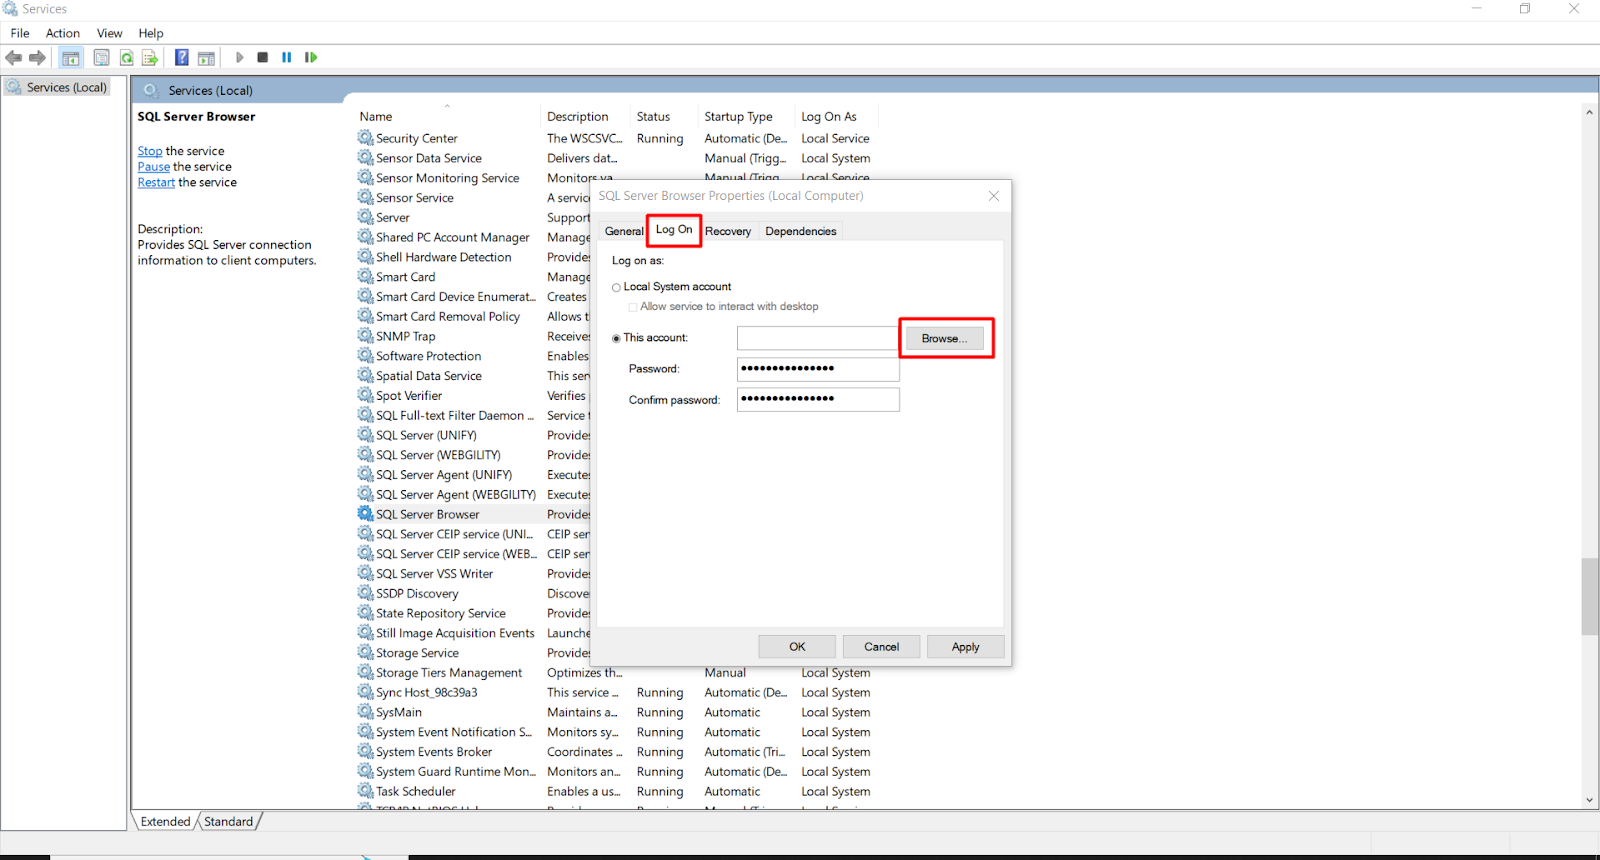
3). Go to the Log On tab, then click Browse.
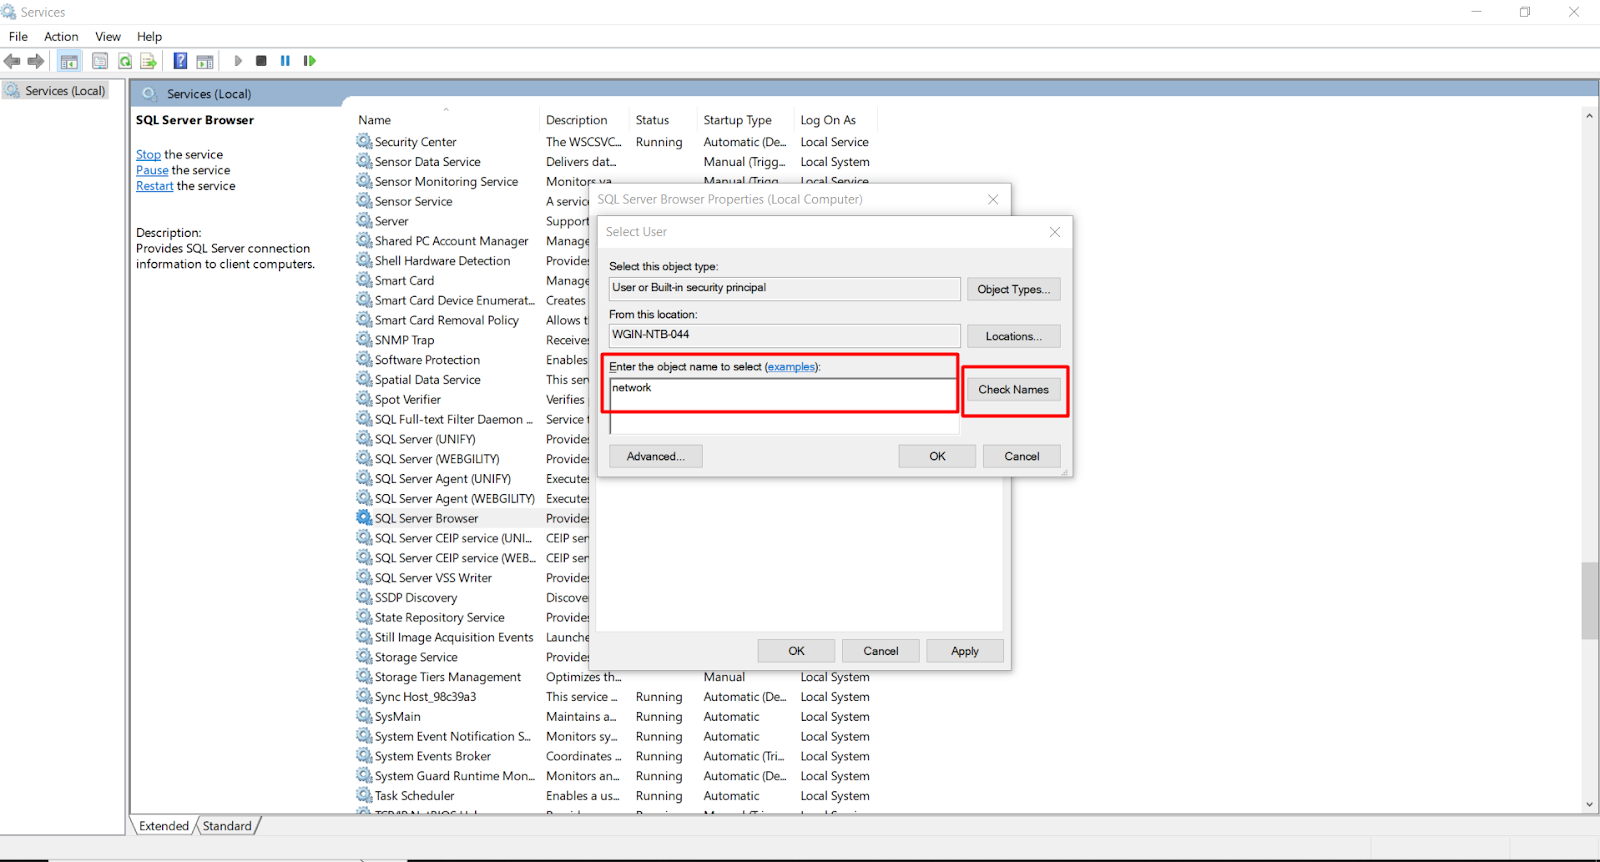
4). Type "Network" and press Check Names.
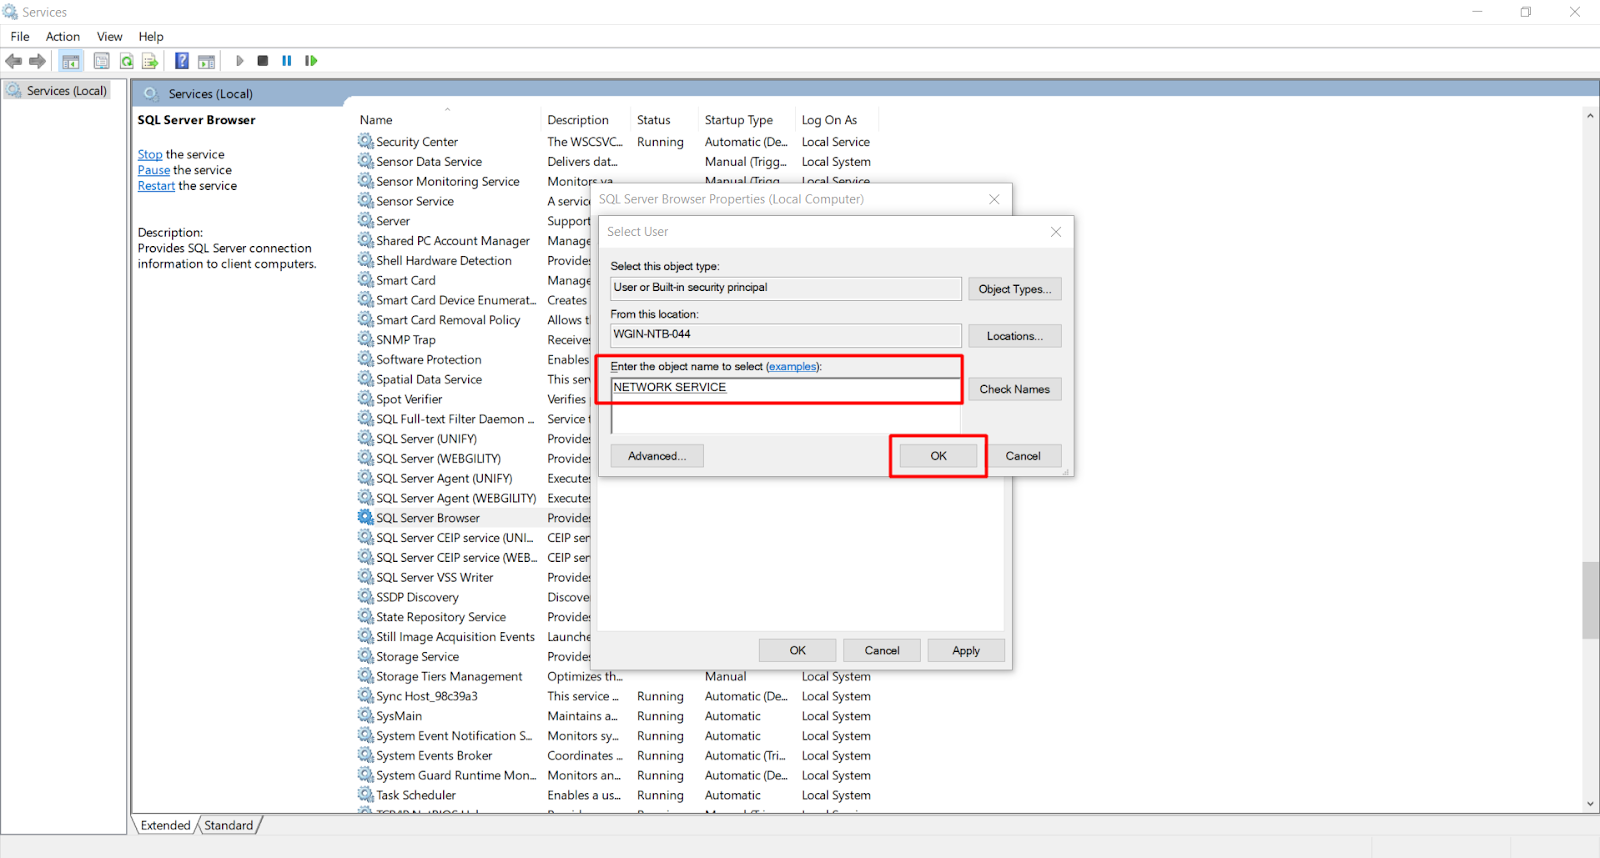
5). Select Network Service and click OK.
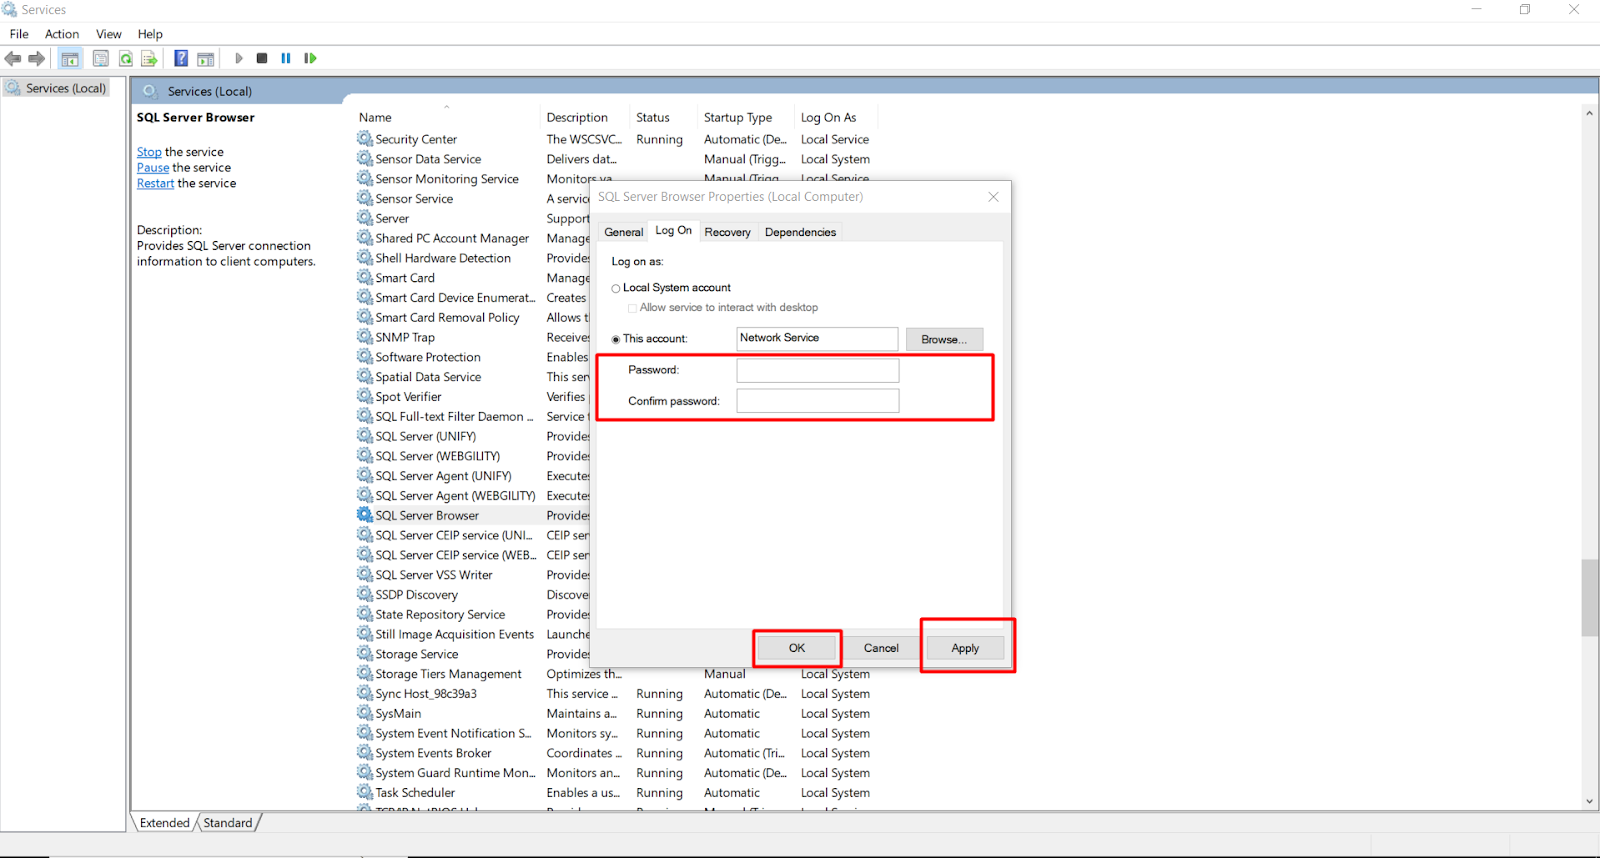
6). Clear the password fields and click Apply, then OK.
7). Right-click the SQL Server and select Restart to enable network mode.

8). Repeat the same process for SQL Browser.