Overview:
What is a 403 Forbidden Error?
A 403 Forbidden error is a common HTTP status code that indicates the Sales Channel server understands the request but refuses to authorize it.
When using Webgility Online with WooCommerce, this error often occurs due to insufficient permissions assigned to the Webgility Extension in the backend of the Sales Channel.
Common Causes of 403 Forbidden Error
Incorrect File or Directory Permissions
WooCommerce requires proper permissions for files and directories. Incorrect permissions may trigger a 403 error.
Security Plugins or Firewall Restrictions
Overly strict security plugins or server firewalls may block valid requests to your WooCommerce site.
Incorrect Server Configuration
Misconfigured servers (e.g., wrong mod_security settings or strict rules) can result in a 403 error.
Plugin Conflicts
Incompatible or improperly configured plugins may clash with WooCommerce, causing access issues.
Step-by-Step Guide to Fix the Error
Update the Webgility Extension
-
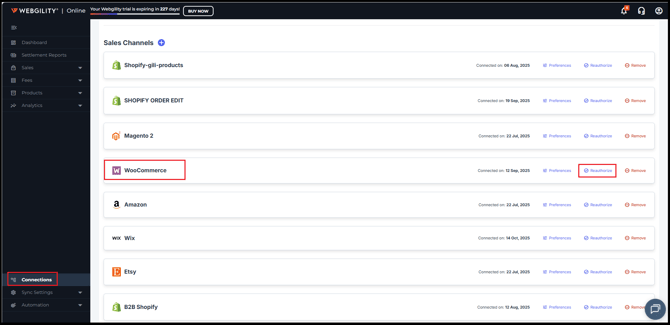
Navigate: Connections > Sales Channel > Reauthorize.
-
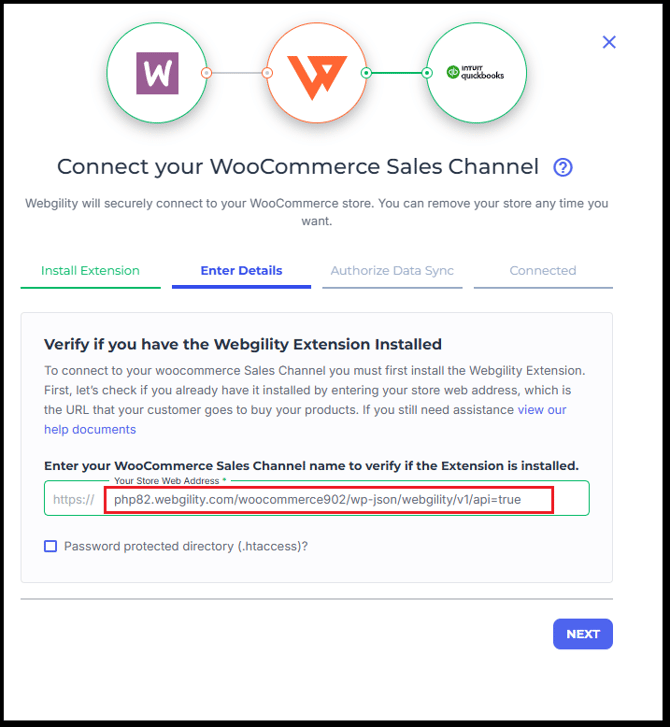
Copy the URL for Webgility Module Location.
-
Paste the URL in your browser → Check the displayed version number.
b) Download the Latest Version
-
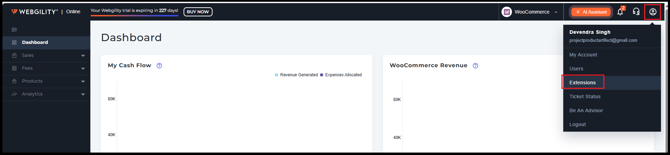
Go to: Profile Icon > Extensions
-
Select WooCommerce as your Sales Channel type.
-
Download the latest Webgility Extension.
-
Compare its version number with your current one.

c) Upgrade the Extension
-
Log in to WooCommerce admin → Plugins > Webgility.
-
Click Deactivate → then Delete the old extension.
-
Install the latest Webgility Extension downloaded from your portal.
-
(For detailed instructions, refer to the article How to Connect Webgility Online with WooCommerce.)
d) Handle Custom Versions
-
If your extension version ends with “C” or “I”, it’s a custom version.
-
Do not upgrade directly → Contact Webgility Support for assistance.
Manage Security Plugins & Firewalls
-
If using additional security plugins or server-level firewalls:
-
Temporarily disable them, or
-
Create exceptions for the Webgility Extension and its files.
-
Final Recommendation
By keeping your Webgility Extension updated, verifying file permissions, and adjusting security restrictions, you can usually resolve the 403 Forbidden error in your WooCommerce Sales Channel.