How to Connect Webgility Online with WooCommerce
This article helps Webgility Online users install and configure the Webgility Extension for WooCommerce. The extension is required to establish a secure and functional connection between a WooCommerce store and Webgility Online. By following the steps outlined, users can download, install, and activate the plugin on their WordPress site, then complete the setup within the Webgility dashboard. This process enables seamless data sync for orders, customers, and products between WooCommerce and Accounting System through Webgility Online. In addition to installation, the article also provides guidance on how to update an existing Webgility Extension to ensure continued compatibility and performance.
f you are connecting WooCommerce for the first time then you will need to install Webgility Extension on your WooCommerce site as a plugin.
Note: If you’re looking to update the existing Webgility Extension, please scroll to the end of this article for detailed instructions.
Steps:
1. Go to the Connections section and click on the ‘+’ symbol located beside the Sales Channel option.
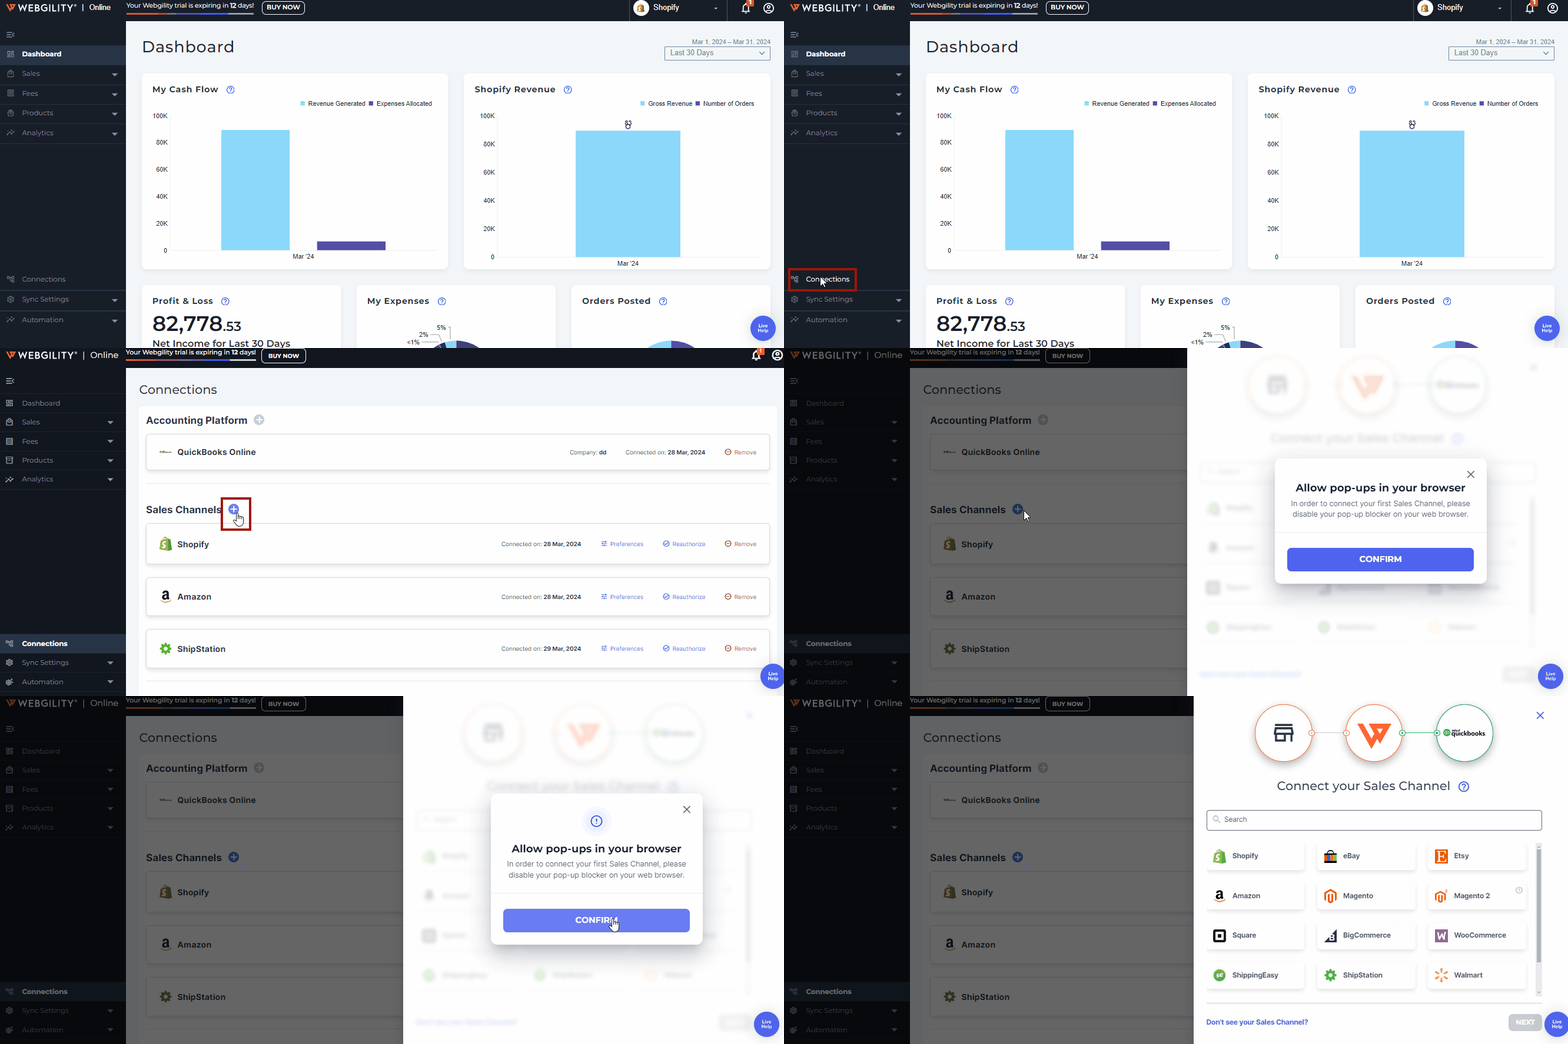
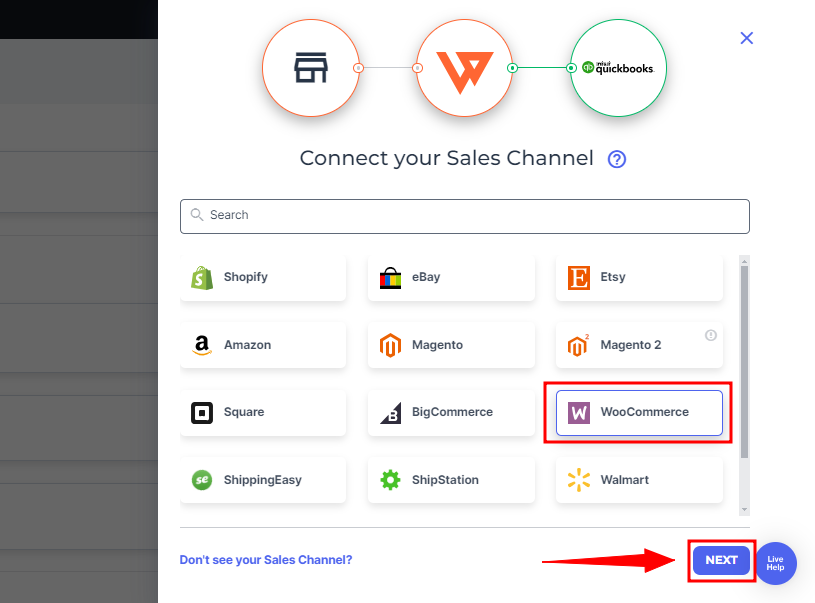
2. Select WooCommerce, then click Next.
3. You’ll be redirected to the Webgility Extension Tab.
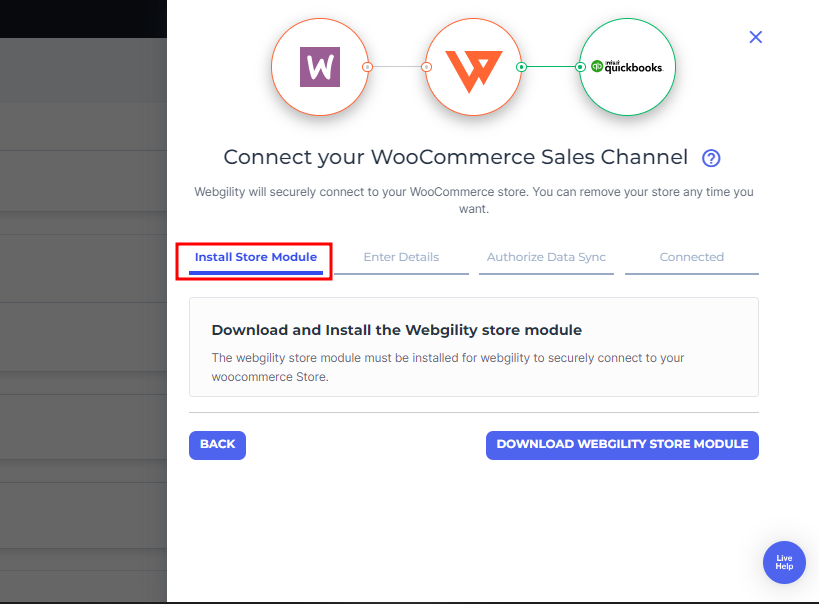
4. The subsequent step involves downloading the Webgility Extension file and installing it as a WooCommerce extension.
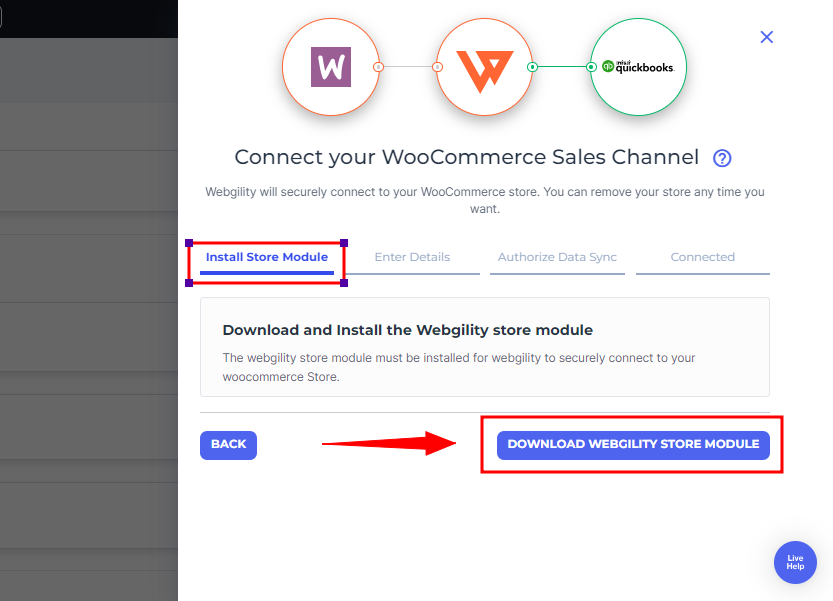
5. To install the Webgility Extension as a WooCommerce extension. Follow these steps:
-
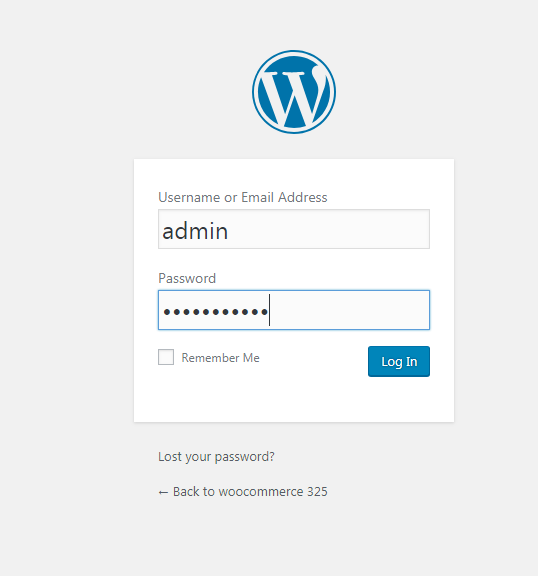
Log in to your WooCommerce admin panel.
-
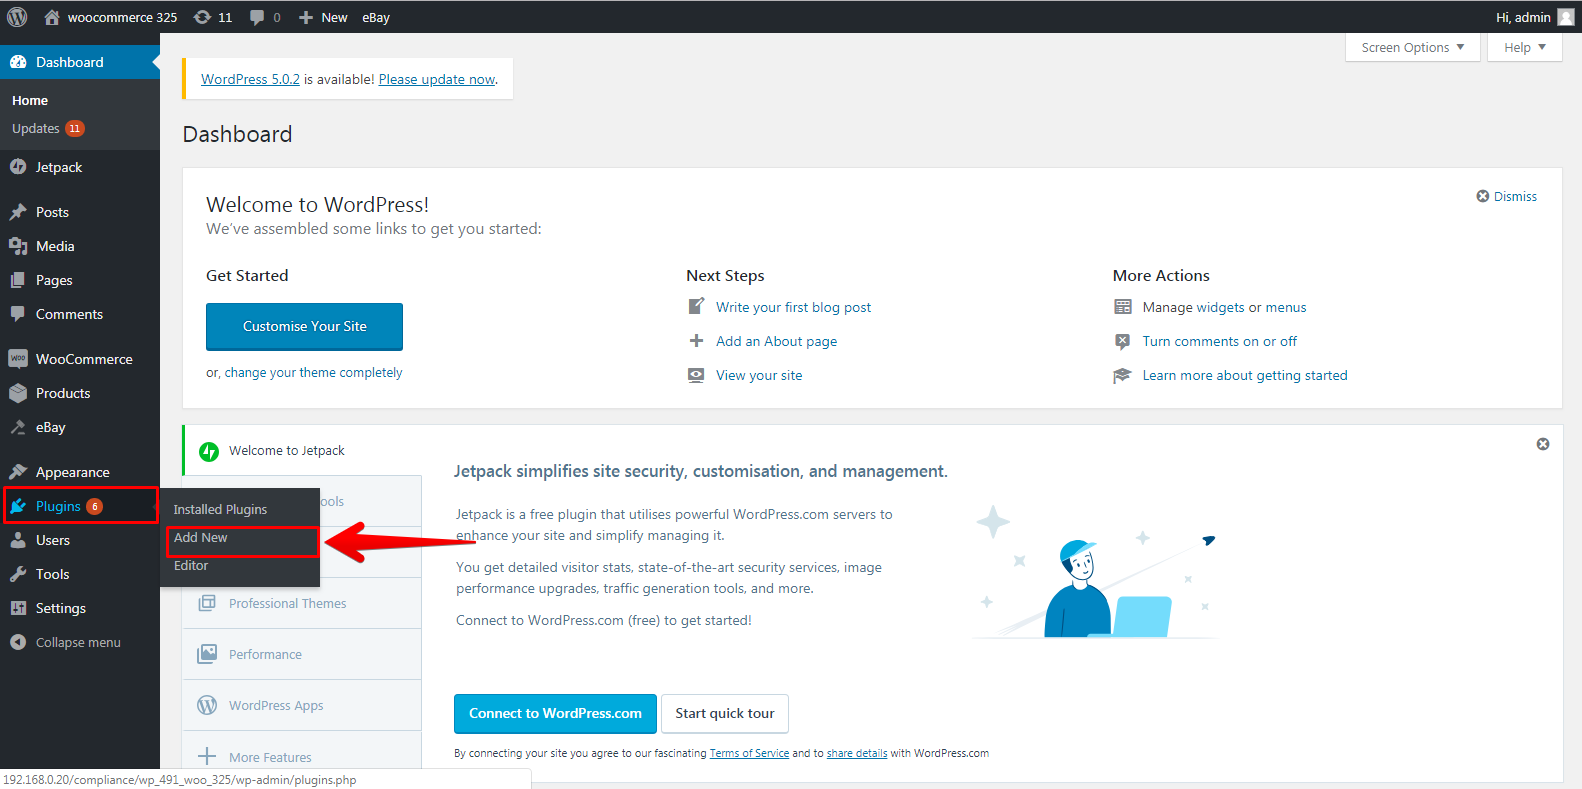
On the left navigation panel, scroll down and click Plugins.
-
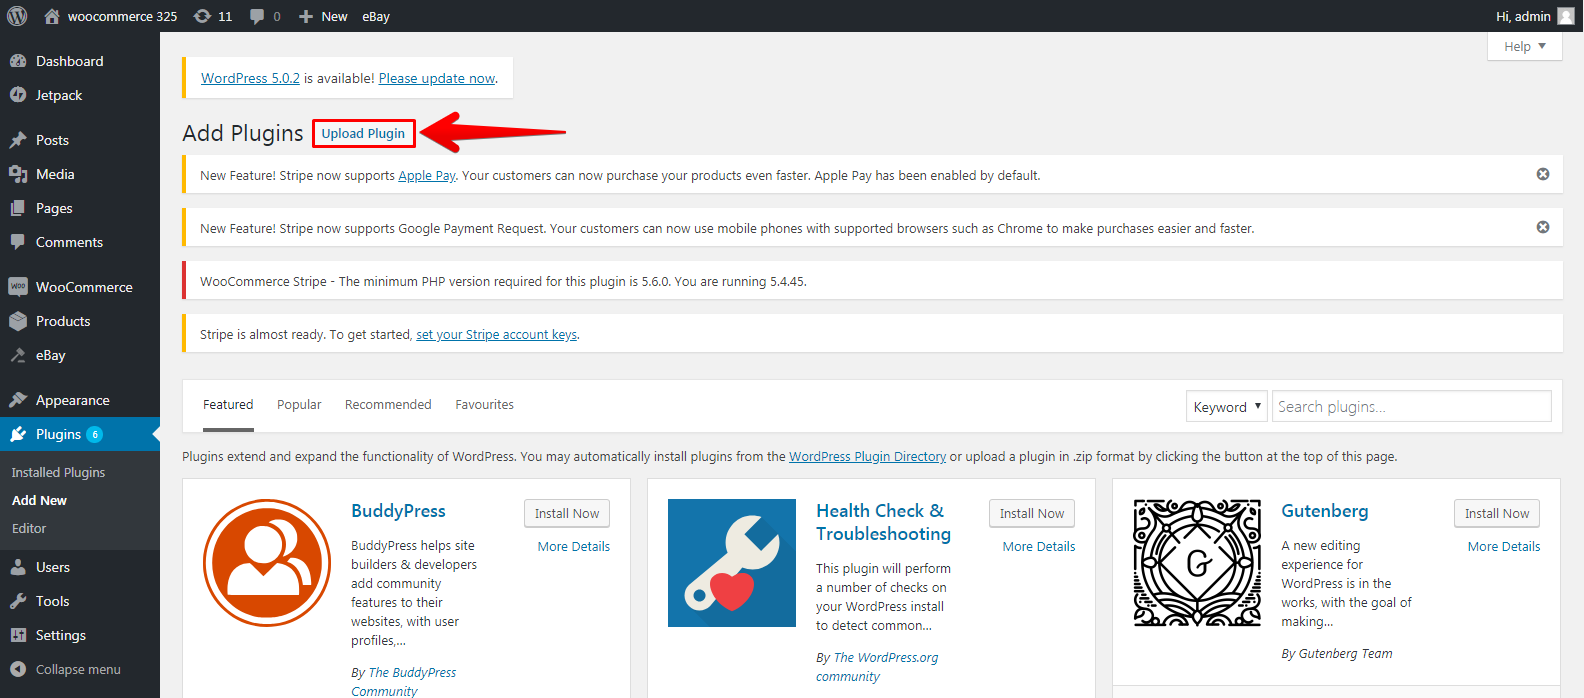
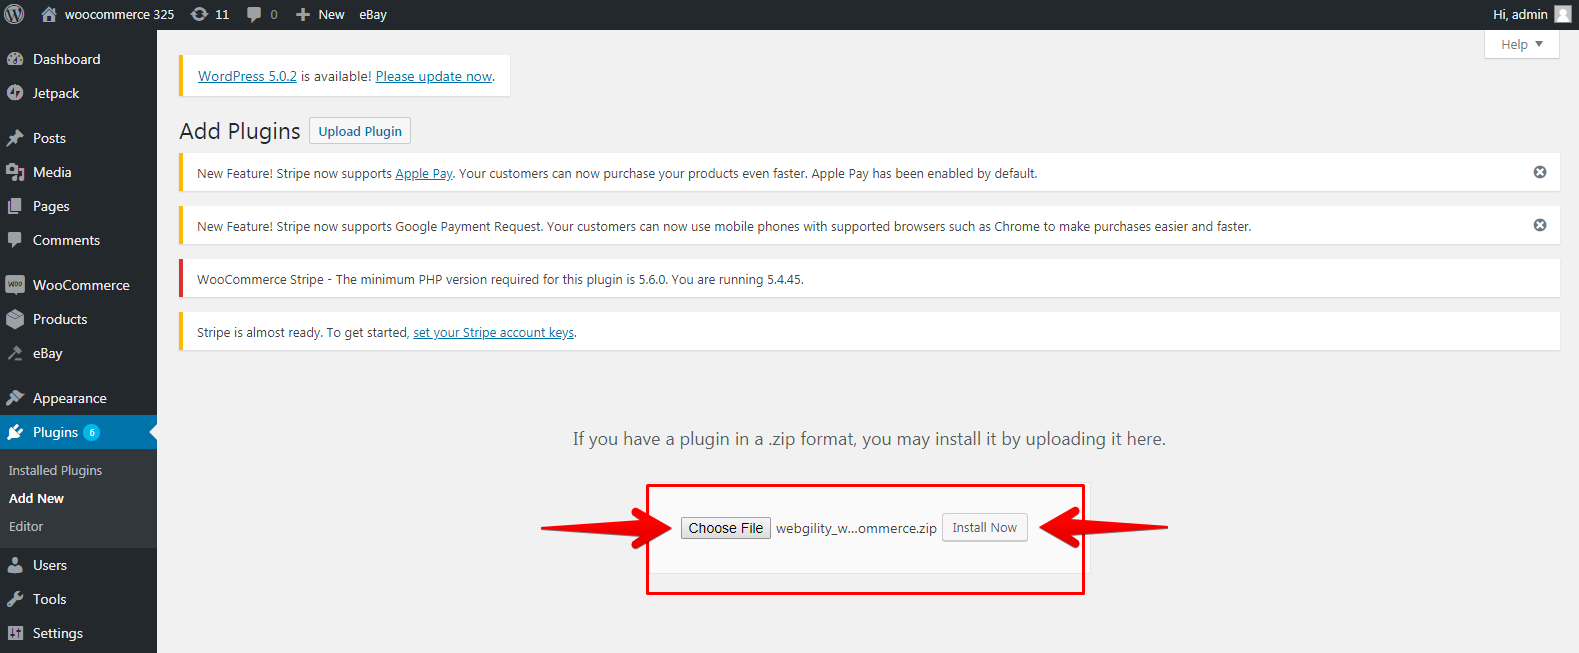
At the top of the page, click Add New to install the Webgility Extension you downloaded.
-
Navigate to the Webgility Extension.zip file that was downloaded and select it. Then click Upload Plugin.
-
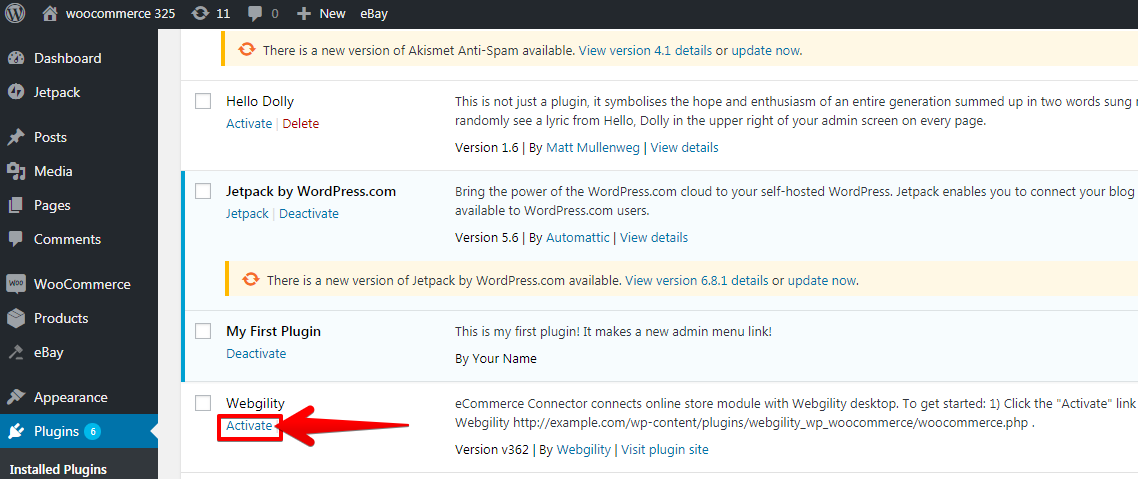
Navigate to your installed plugins and find the Webgility plugin. Click Activate.
-
Once activated, select Settings below Webgility then select Copy URL.

-
In your WooCommerce account, go to your Installed Plugins in the left tab. Copy the Webgility Extension URL and enter that information as the Webgility Extension

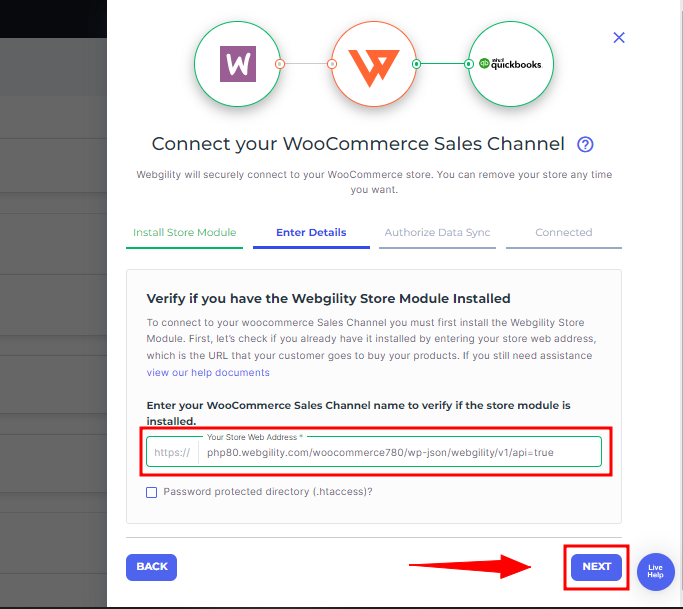
6. Once you've copied the URL of the Webgility Extension, return to the Webgility Online connection process. Begin by inputting the necessary details to integrate WooCommerce with Webgility Online. Paste the Webgility Extension URL and continue with the Next option.
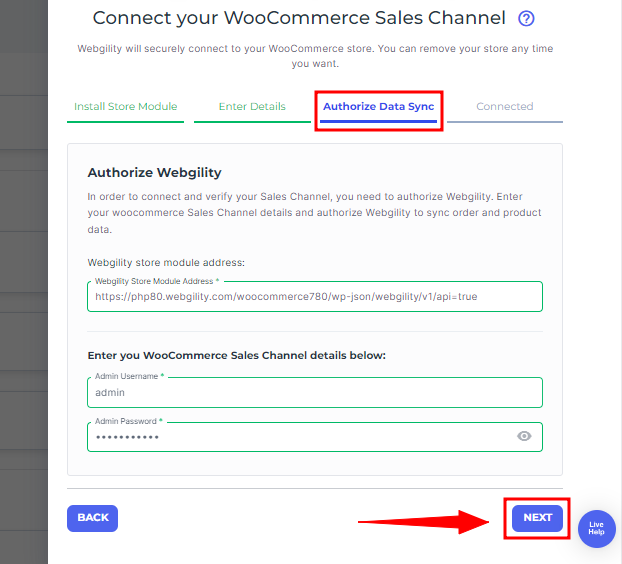
7. Once the Webgility Extension URL is installed and linked, you'll be prompted to the Authorize Data Sync tab provide the admin/primary login credentials of your WooCommerce account, and proceed with the Next option.
8. Another pop-up will appear, giving you the option to copy your sync settings from another connected sales channel within Webgility Online. If you want to duplicate the existing settings, toggle the button to enable it, then choose the sales channel from the drop-down menu. Otherwise, just select the "Finish" option.
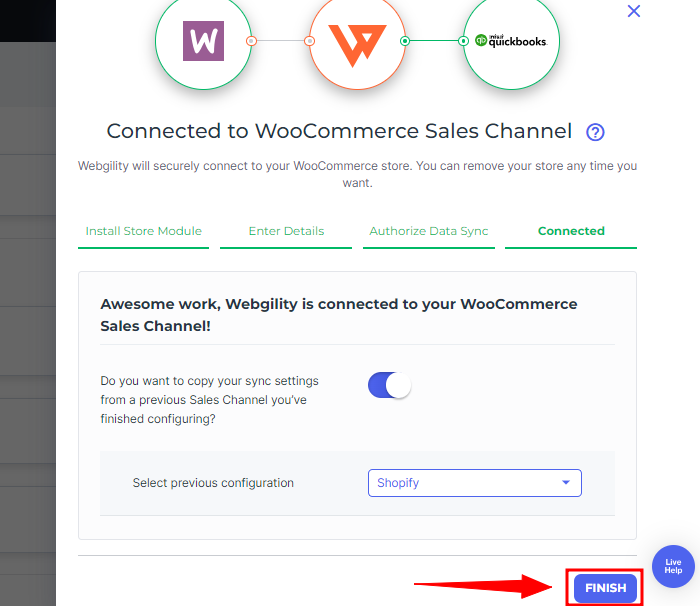
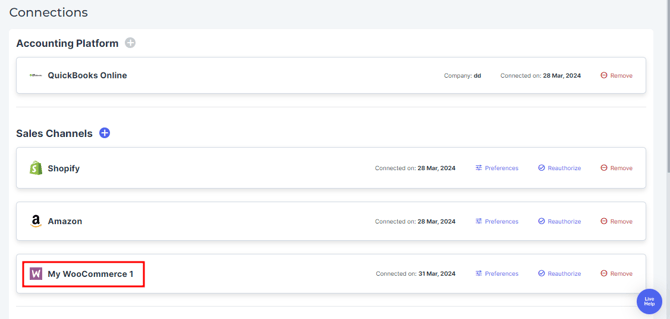
9. Upon successful connection of the sales channel, a notification window will confirm the connection, and you will find the WooCommerce sales channel profile listed under the Sales Channel column.
Updating an Existing Webgility Extension
If a user needs to update the Webgility Extension on their WooCommerce site, the existing plugin must first be removed before the updated version can be installed. This ensures the new version installs correctly and functions as expected.
Follow these steps to update the plugin:
-
Log in to the WordPress Admin Panel
Use the site administrator credentials to access the WordPress dashboard. -
Deactivate the Existing Webgility Extension
-
Go to Plugins → Installed Plugins.
-
Locate the Webgility plugin.
-
Click Deactivate.
-
-
Delete the Plugin
-
After deactivation, click Delete next to the Webgility plugin.
-
Confirm the deletion when prompted.
-
-
Download the Latest Version of the Webgility Extension
-
Reinstall and Activate the Plugin
-
Copy the Webgility Extension URL Again
-
Reconnect the WooCommerce Sales Channel in Webgility Online

