Reason:
Users get this error while logging into Webgility Desktop on the Add-on machine or while connecting to the existing database. Webgility Desktop is sending requests to connect to the existing SQL database installed on the primary computer or Webgility Desktop Server but is unable to get a response promptly, or the SQL services on the Webgility Desktop server are not running.
The user needs to check the SQL services on the Webgility Desktop server to see if they're running or not. If SQL Services aren’t running, then the user needs to restart the SQL Services and also check whether sqlservr is added to the firewall as an exception if CX is using the firewall as malware protection. Restart the Webgility Desktop server to fix the issue.
Troubleshooting:
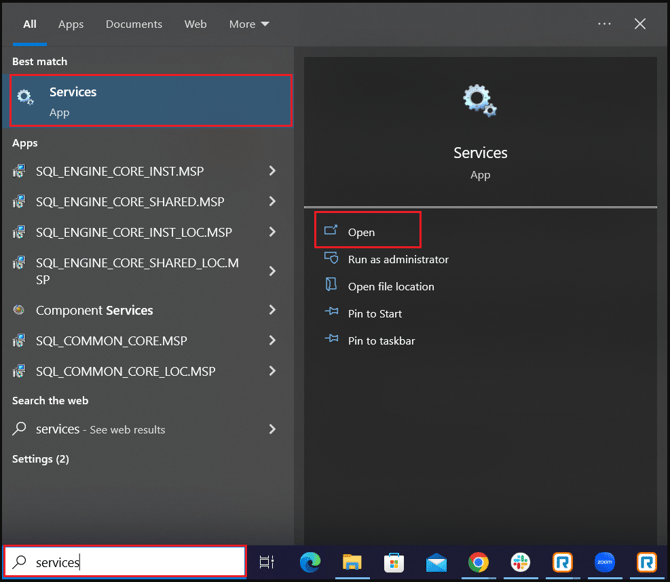
1). Check the SQL Services on the Webgility Desktop Server. Type "Services" in the Windows search box, which is on the taskbar. Click on “Open” or hit “Enter” to open the services.
2). Scroll down to find SQL Server (Unify/Webgility) and SQL Server Browser.
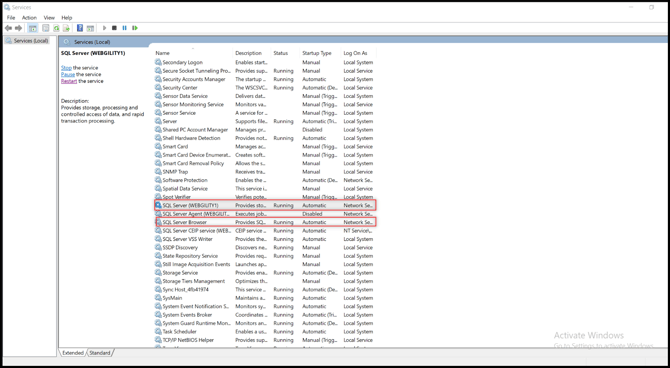
3). Check whether the “SQL Services” are on the network or not. If not, then please move services to Network Service. After moving the SQL services on the network, please restart the SQL services for SQL Server (Unify/Webgility) and SQL Server Browser by clicking on "Restart".

4). Check if the Webgility Desktop and the SQL services are added as exceptions in the antivirus or in the firewall (if running) or not. Disable the antivirus or firewall if enabled, if the user doesn’t want to disable the antivirus or the firewall then need to add an exception. (whitelist)
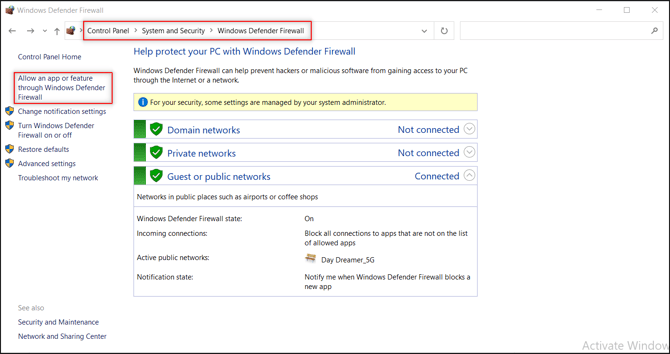
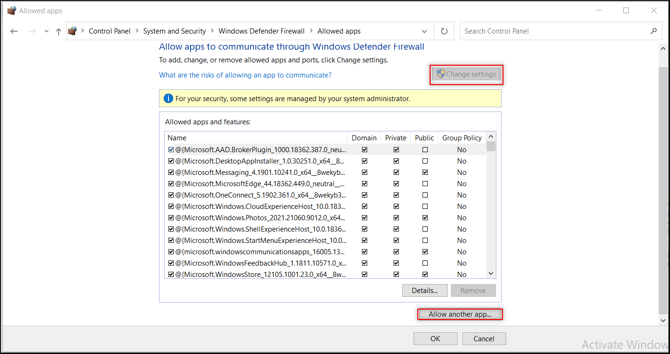
5). Check with the IT team to add exceptions in the antivirus and users can also add exceptions in the firewall. Check whether the “sqlservr” exception is added in the firewall or not. Go to Control Panel\System and Security\Windows Defender Firewall and click on “Allow an app or feature through Windows Defender Firewall” to add the exception.
6). Follow the steps mentioned below to add exceptions.
7). The below screen will open after clicking on “Allow an app or feature through Windows Defender Firewall”. Click on “Allow another app” to add an exception and if it’s grayed out then click on Change settings then click on “Allow another app”.
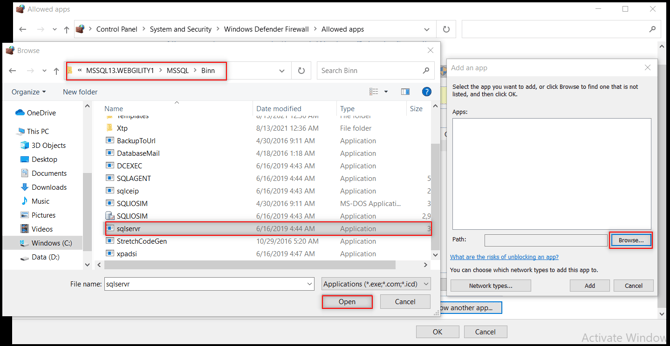
8). Click on "Browse,” then follow C:\Program Files\Microsoft SQL Server\MSSQL13.Webgility1\MSSQL\Binn path and select “sqlservr” and then click on “Open”.
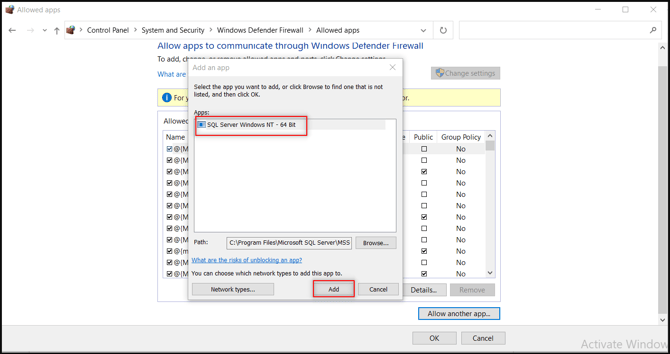
9), Click on “Add” to add SQL Server Windows NT - 32 Bit or 62 Bit as an exception in the firewall.
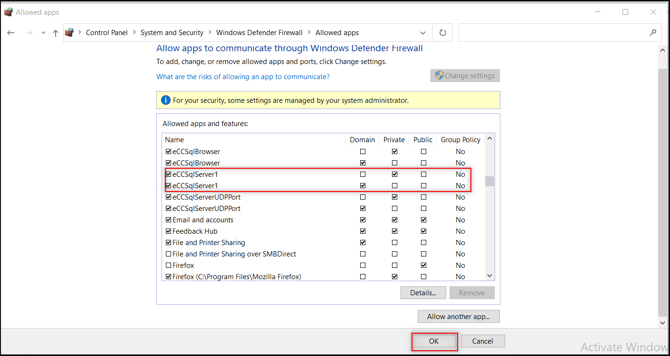
10). Check the Domain, Private, and Public checkboxes, and then click OK to add SQL Server to the firewall.
11. The Webgility Desktop Server restart is required as we added the exception and moved SQL Services onto the network. Launch the Webgility Desktop app on the server, then launch the Webgility Desktop app on the Add-on machine, and then log in to Webgility Desktop with the admin credentials to see if it’s opening the Webgility Desktop dashboard or not.
12. Restart Webgility Desktop Server
13). Log in to Webgility Desktop with the primary user credentials.