Overview:
This guide explains how to troubleshoot connection issues between the Webgility Desktop application installed on an add-on computer and the database located on the master (server) computer.
Key Concept:
The database is installed only on the master (server) computer, and all add-on computers must connect to the same Local Area Network (LAN) to access the database.
Steps to Troubleshoot:
A) Verify Network Connection
Ensure the add-on computer is on the same LAN as the server.
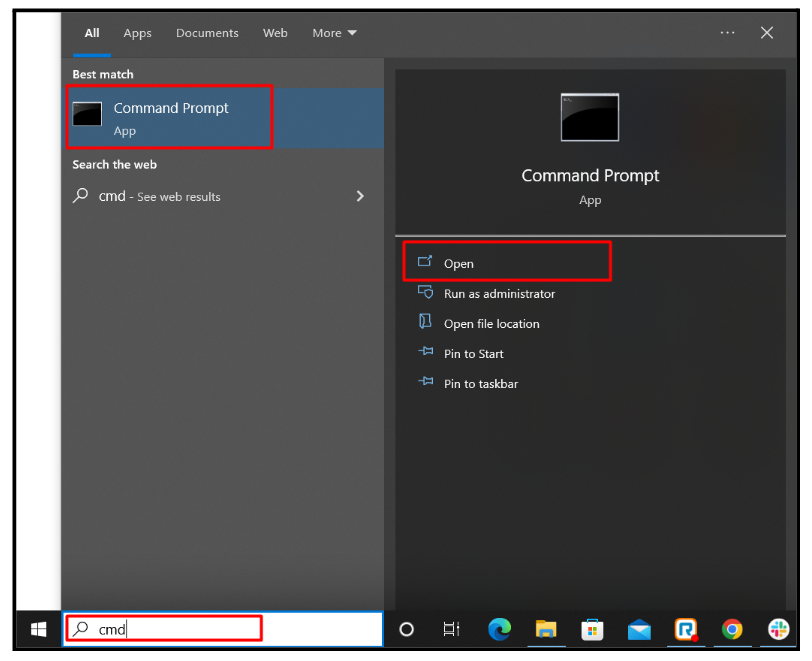
1. Open Command Prompt on the add-on computer by typing cmd in the search bar.
2. Type ipconfig and press Enter to get the IP address of the add-on computer.

3. On the server computer, open Command Prompt and type ping [IP address] (replace [IP address] with the one from the add-on computer, e.g., ping 192.168.0.30).

4. If the computers are on the same network, the Lost percentage should be zero.
B) Activate SQL Protocols
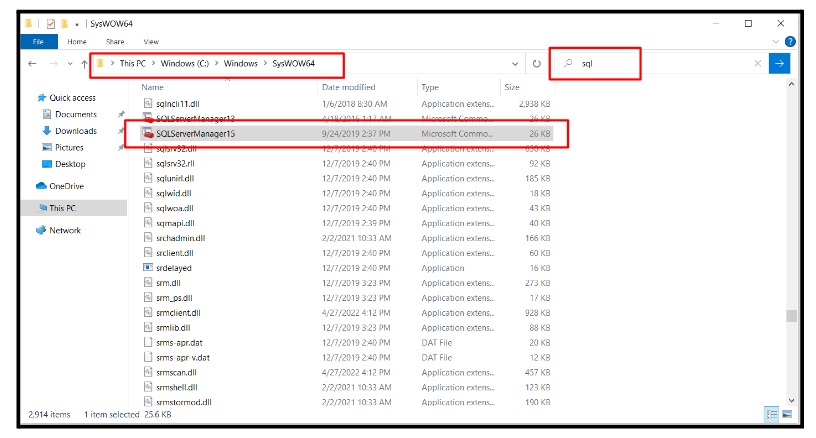
1. On the server computer, go to C:\Windows\SysWOW64, type sql in the search bar, and open SQLServerManager.
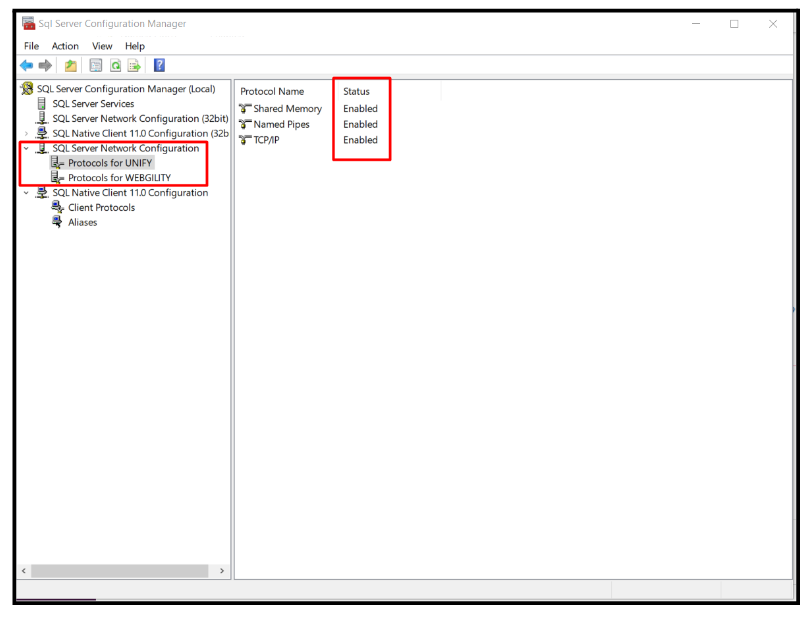
2. In the left-hand menu, expand SQL Server Network Configuration.
3. Under the appropriate protocols (e.g., Protocols for WEBGILITY or Protocols for UNIFY), right-click on Shared Memory, Named Pipes, and TCP/IP and enable them.
C) Configure Windows Firewall Rules
If the Windows Firewall is enabled, then add the required ports and permissions for Webgility Desktop database. Follow the steps in this helpful article on: Unable to Connect Add-On Computer with SQL Database
D) Restart SQL Services
Important: Ensure the SQL Server Browser is running in Network Mode. If it is running as a local service, Follow the steps in this helpful article on: How To Put SQL Services On Network , then restart the service.
E) Configure the Add-On Computer
-
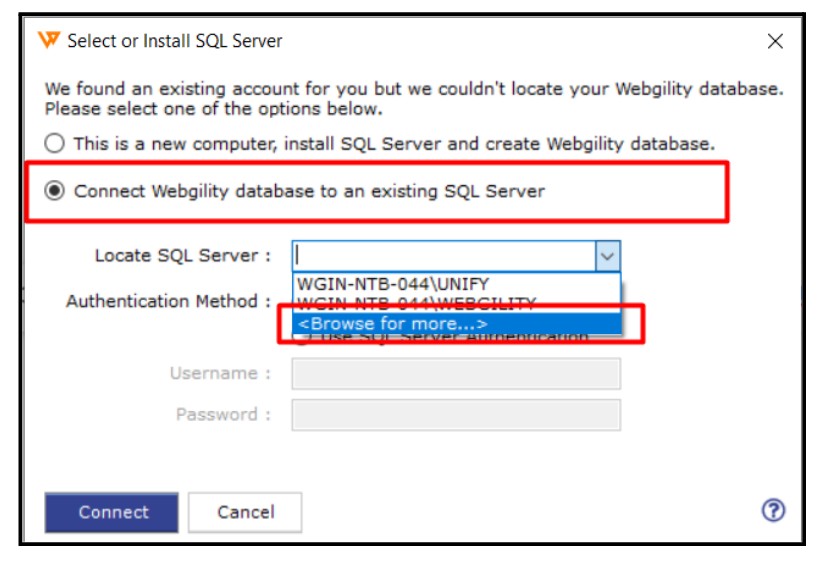
Open the Webgility application on the add-on computer and log in. The Database Configuration Form will open.
-
Select Connect Webgility database to an existing SQL Server.
-
Click the dropdown under Locate SQL Server, then select Browse For More.
-
Choose the correct instance, which will be a combination of the server’s name and the database name (e.g., SERVERNAME/DATABASENAME).
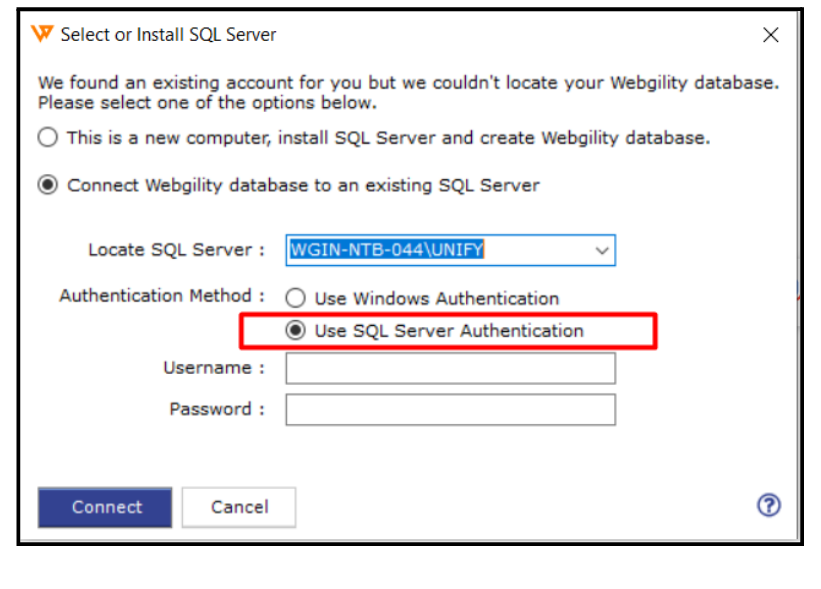
-
Select SQL Server Authentication and enter:
-
Username: sa
-
Password: Webgility2011
-
-
Click Connect.
The add-on computer should now connect to the database on the server.
Additional Steps:
If the above steps don’t work, try restarting the server and manually adding the necessary ports. Follow the steps in this helpful article on: How to Add Ports in the Firewall for Webgility