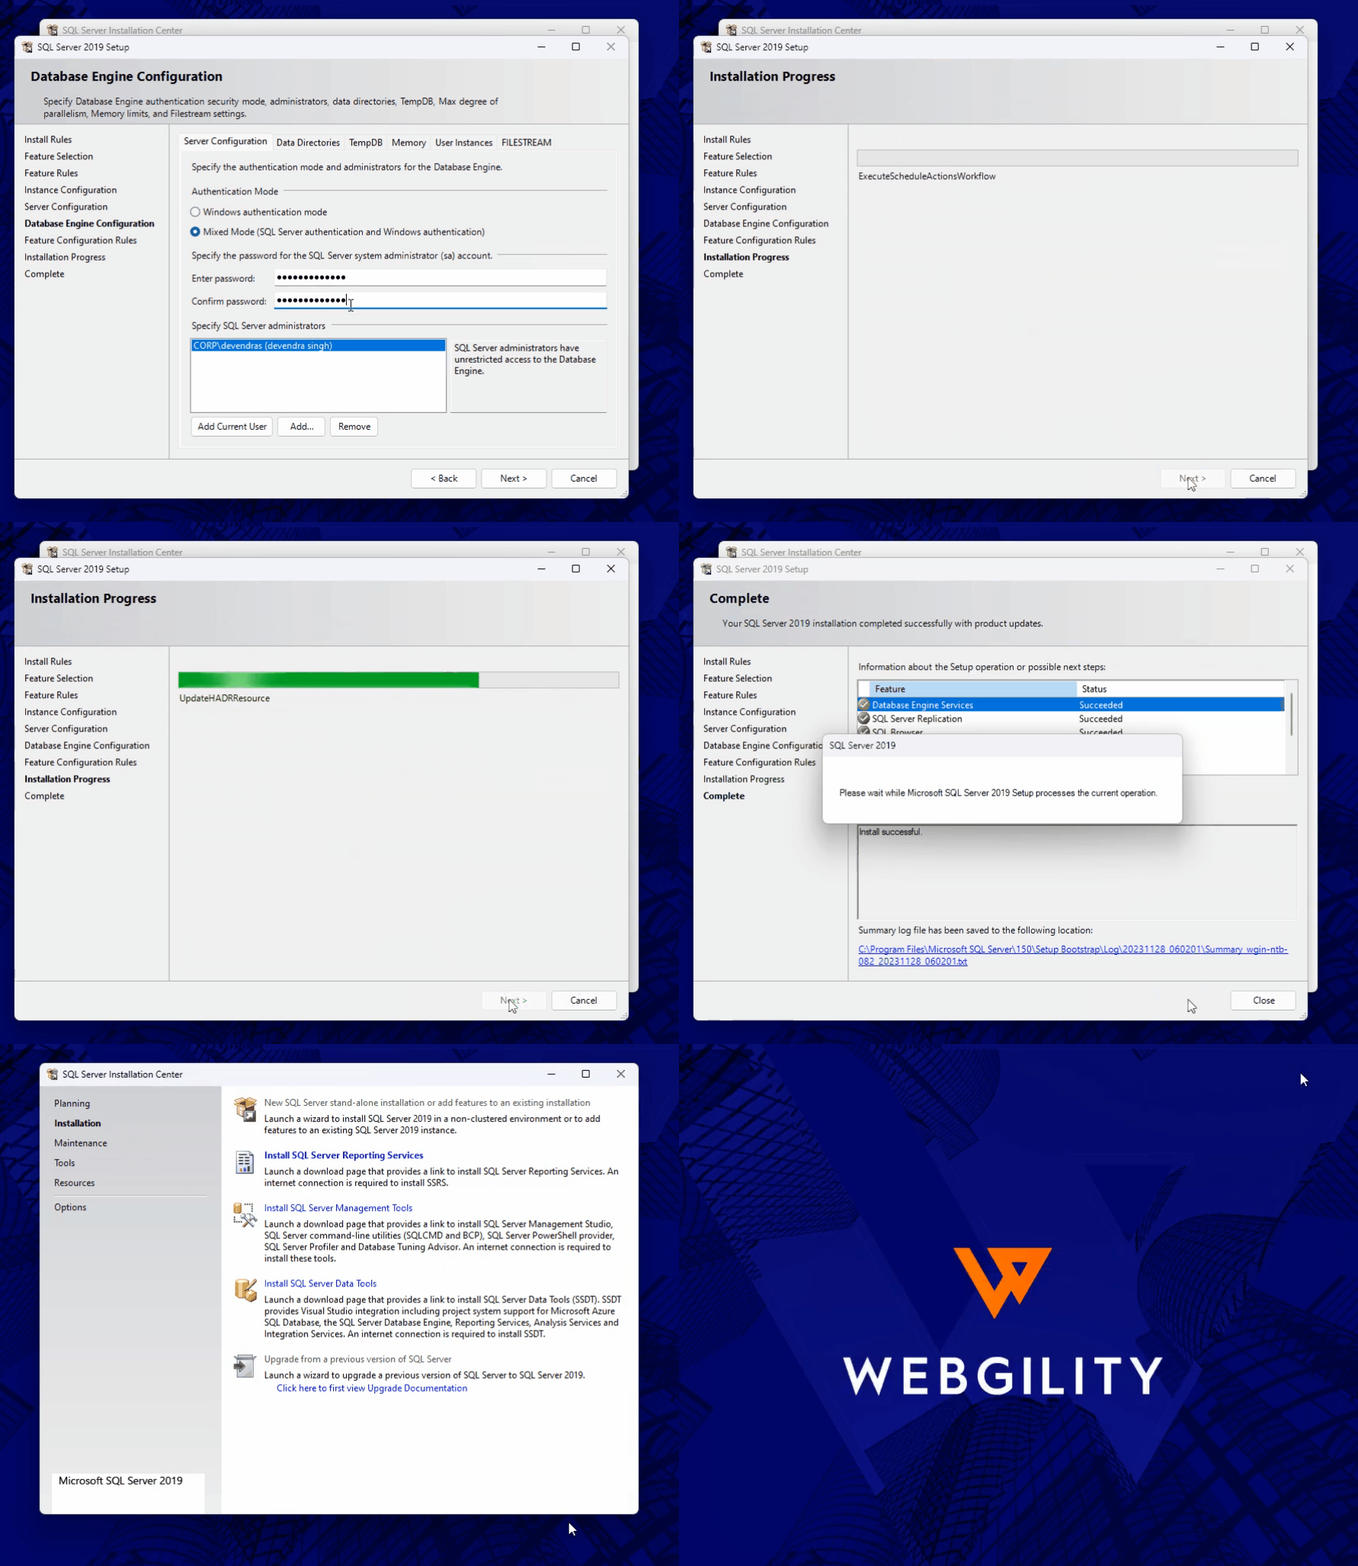
How to Manually Install SQL 2019 for Webgility Desktop.
This article helps Webgility Desktop users manually install SQL Server 2019 Express when Webgility Desktop app. is unable to install it automatically. It provides step-by-step instructions to complete the required setup and ensure Webgility Desktop functions properly.
Why install SQL manually?
If Webgility has encountered an issue installing the SQL server automatically, the SQL server must be installed manually.
System Requirements for SQL Server 2019 (click here)
Steps to Install the SQL Server
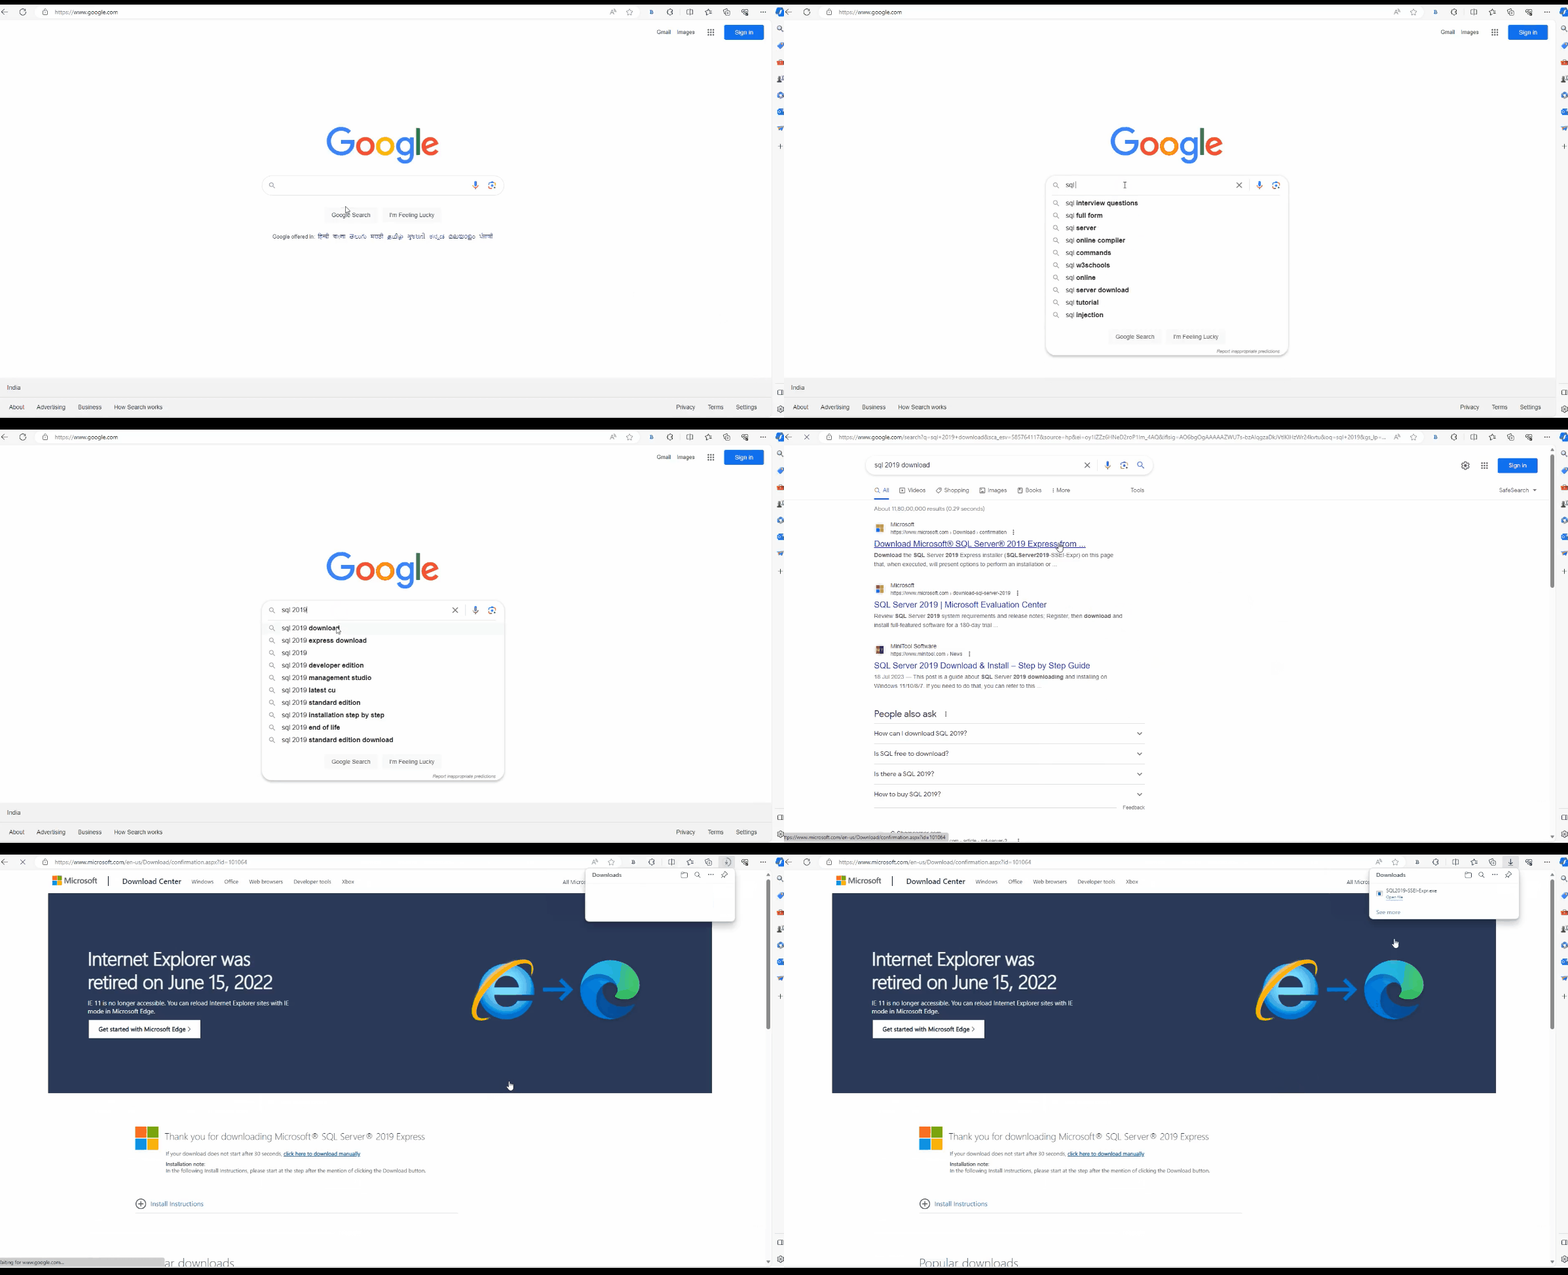
1). Download the SQL Server 2019 express edition installer directly from Microsoft website
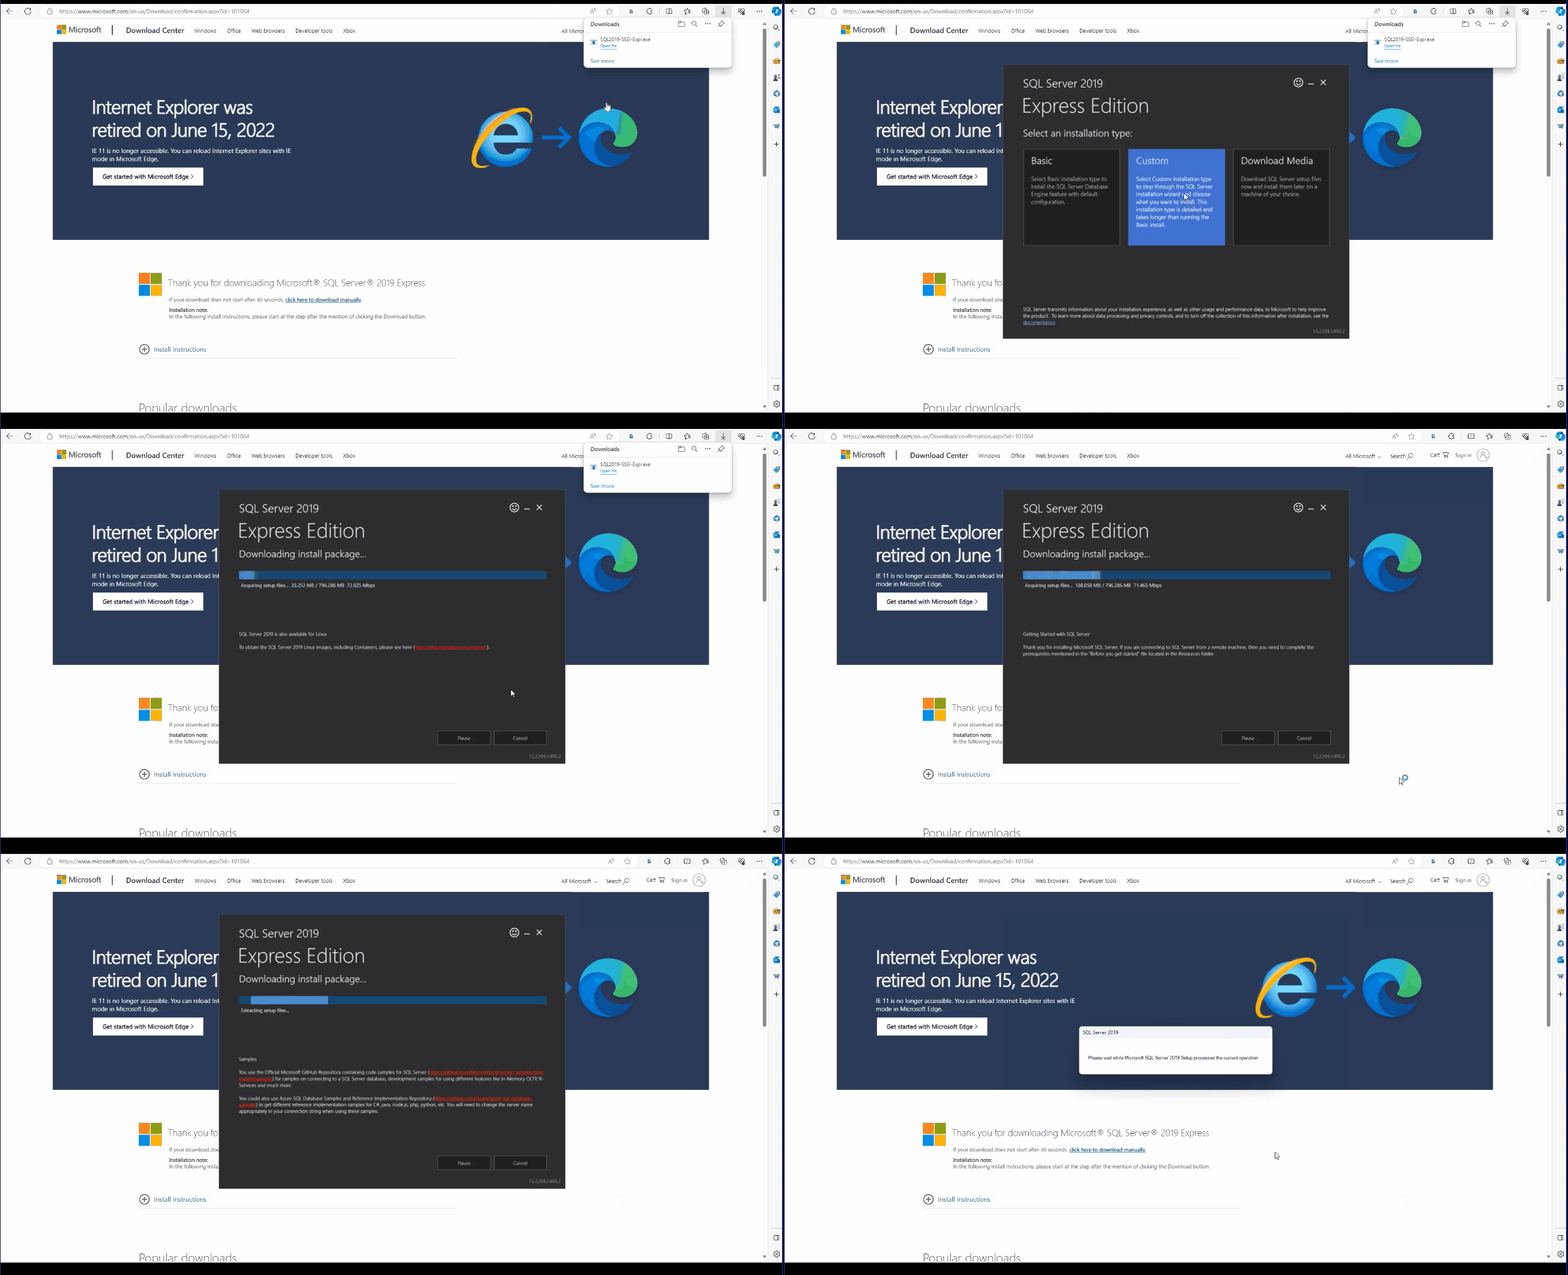
Step 2: Launch the Installer
Once the installer opens, select the Custom installation option, then click Install. This begins downloading the full setup package, which may take a few minutes depending on your internet speed.
Step 3: Start a New SQL Server Installation
After the download completes, the SQL Server Installation Center will launch. Select:
New SQL Server stand-alone installation or add features to an existing installation
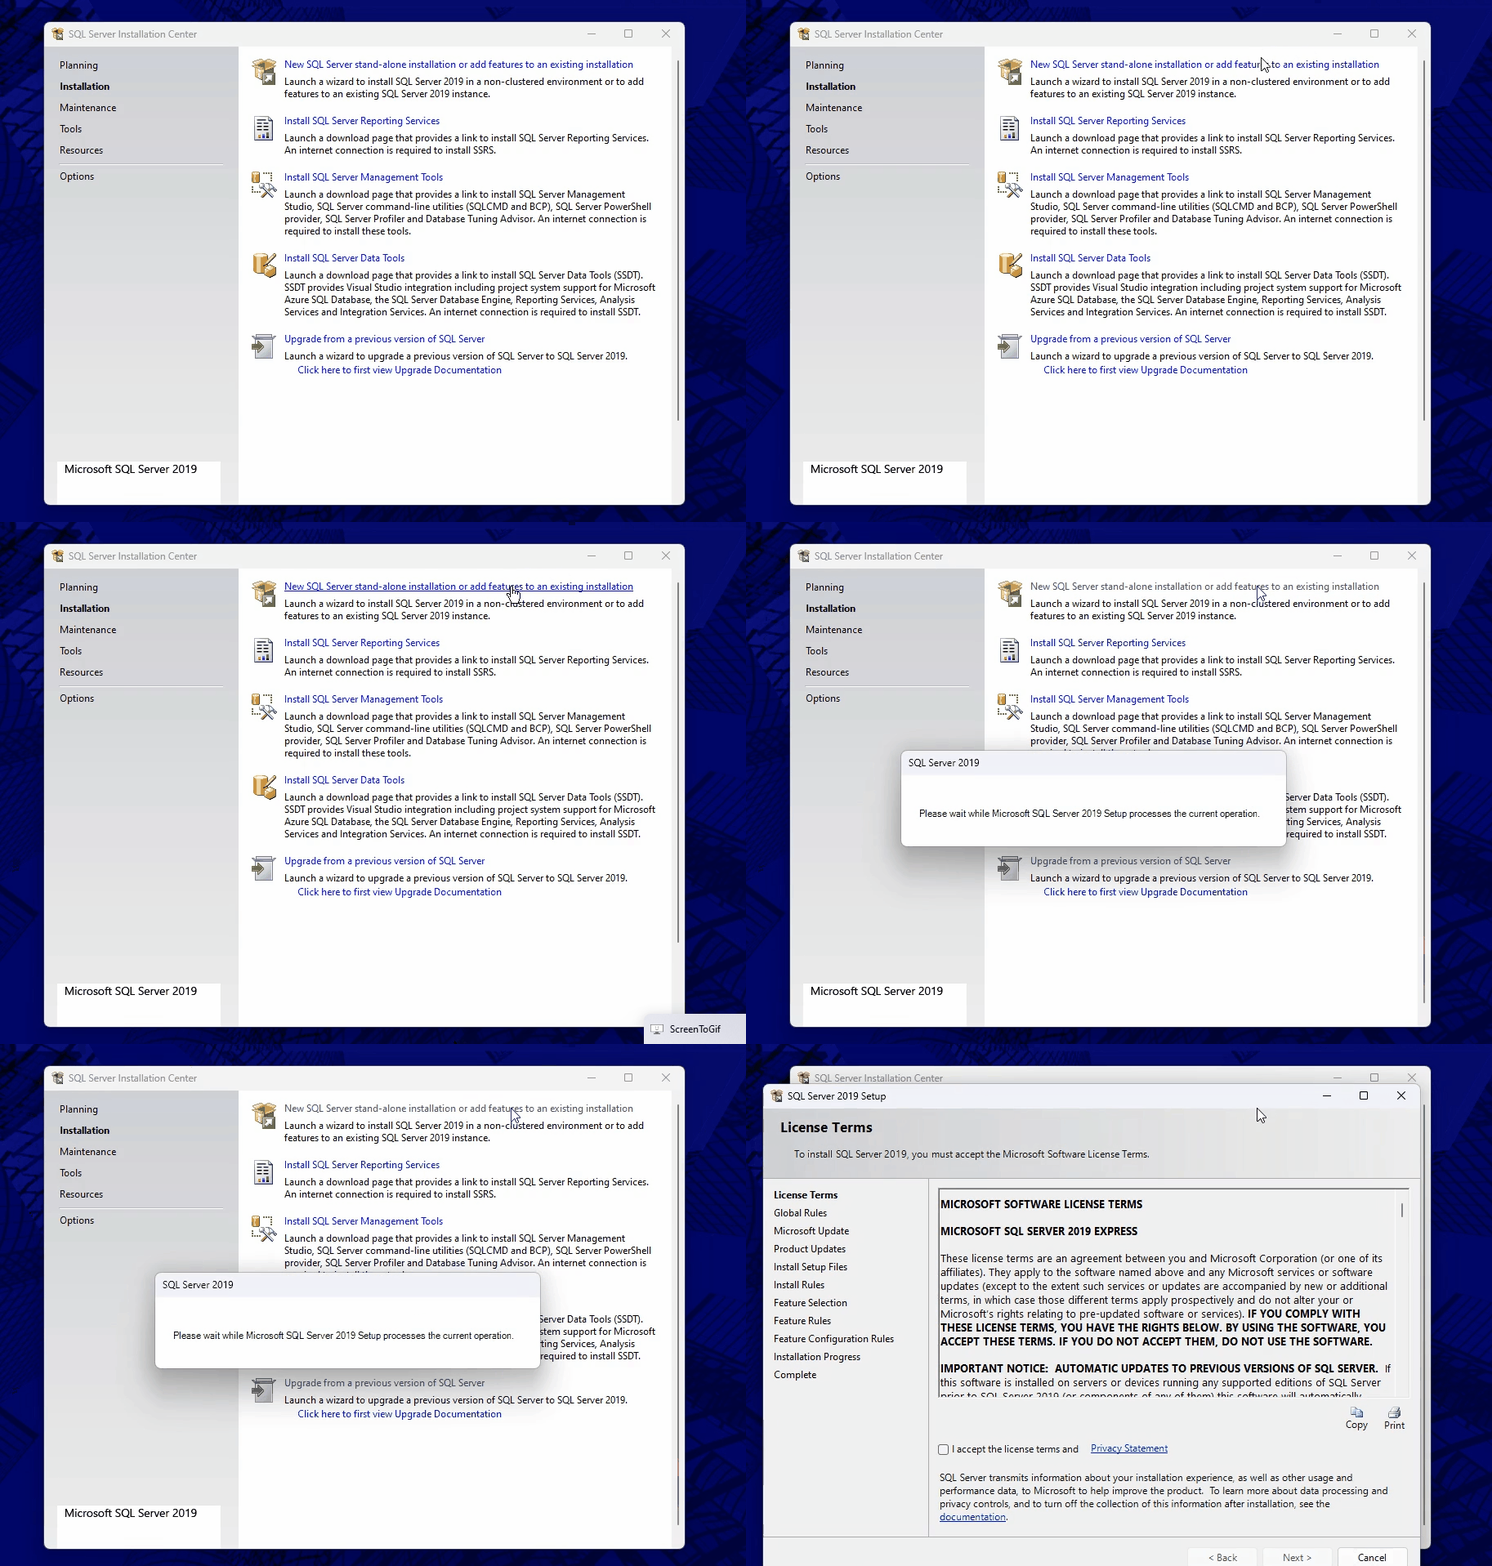
Step 4: Accept Terms and Run Checks
Check the box to accept the license terms and privacy policy. Click Next through the update check and installation rule verification screens.
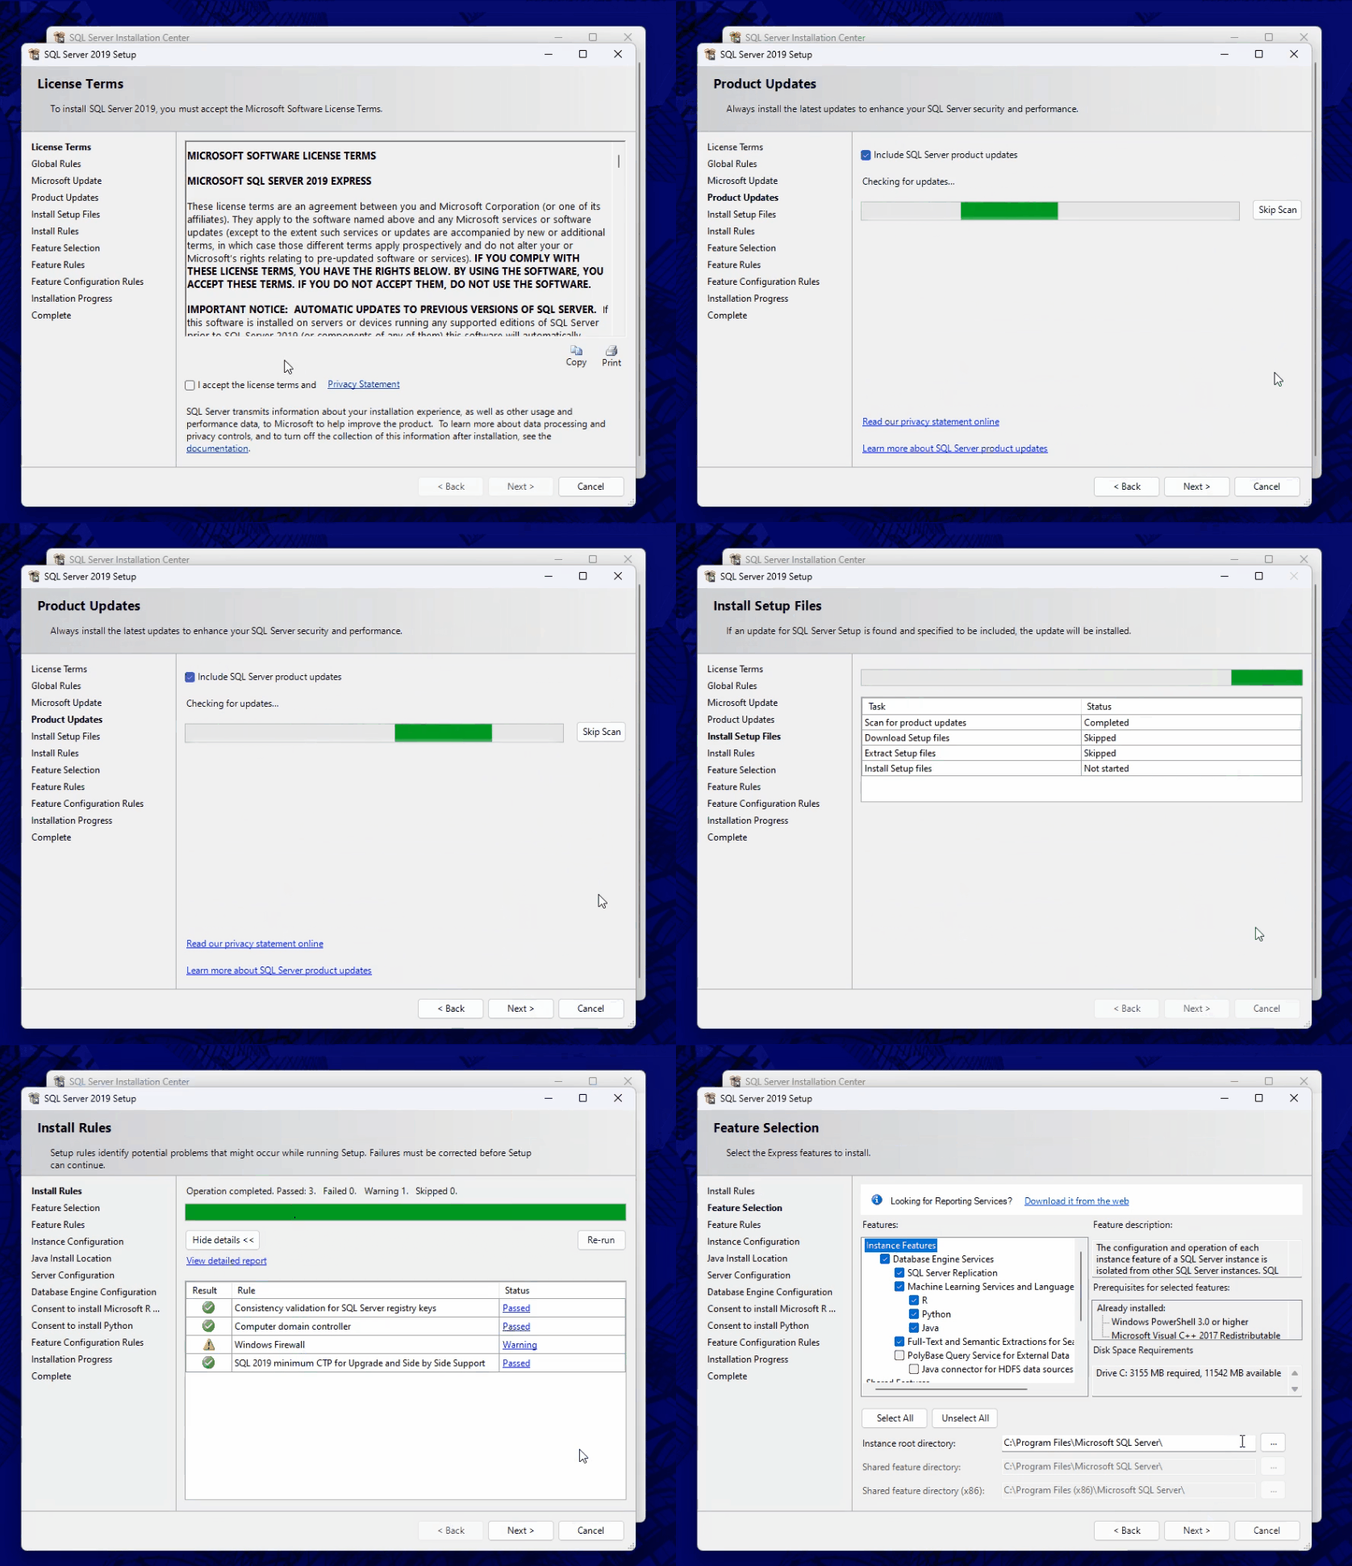
Step 5: Feature Selection
In the Feature Selection screen, uncheck the following:
-
-
Machine Learning Services.
-
Language & Full-Text Semantic Extractions and Click Next to continue.
-
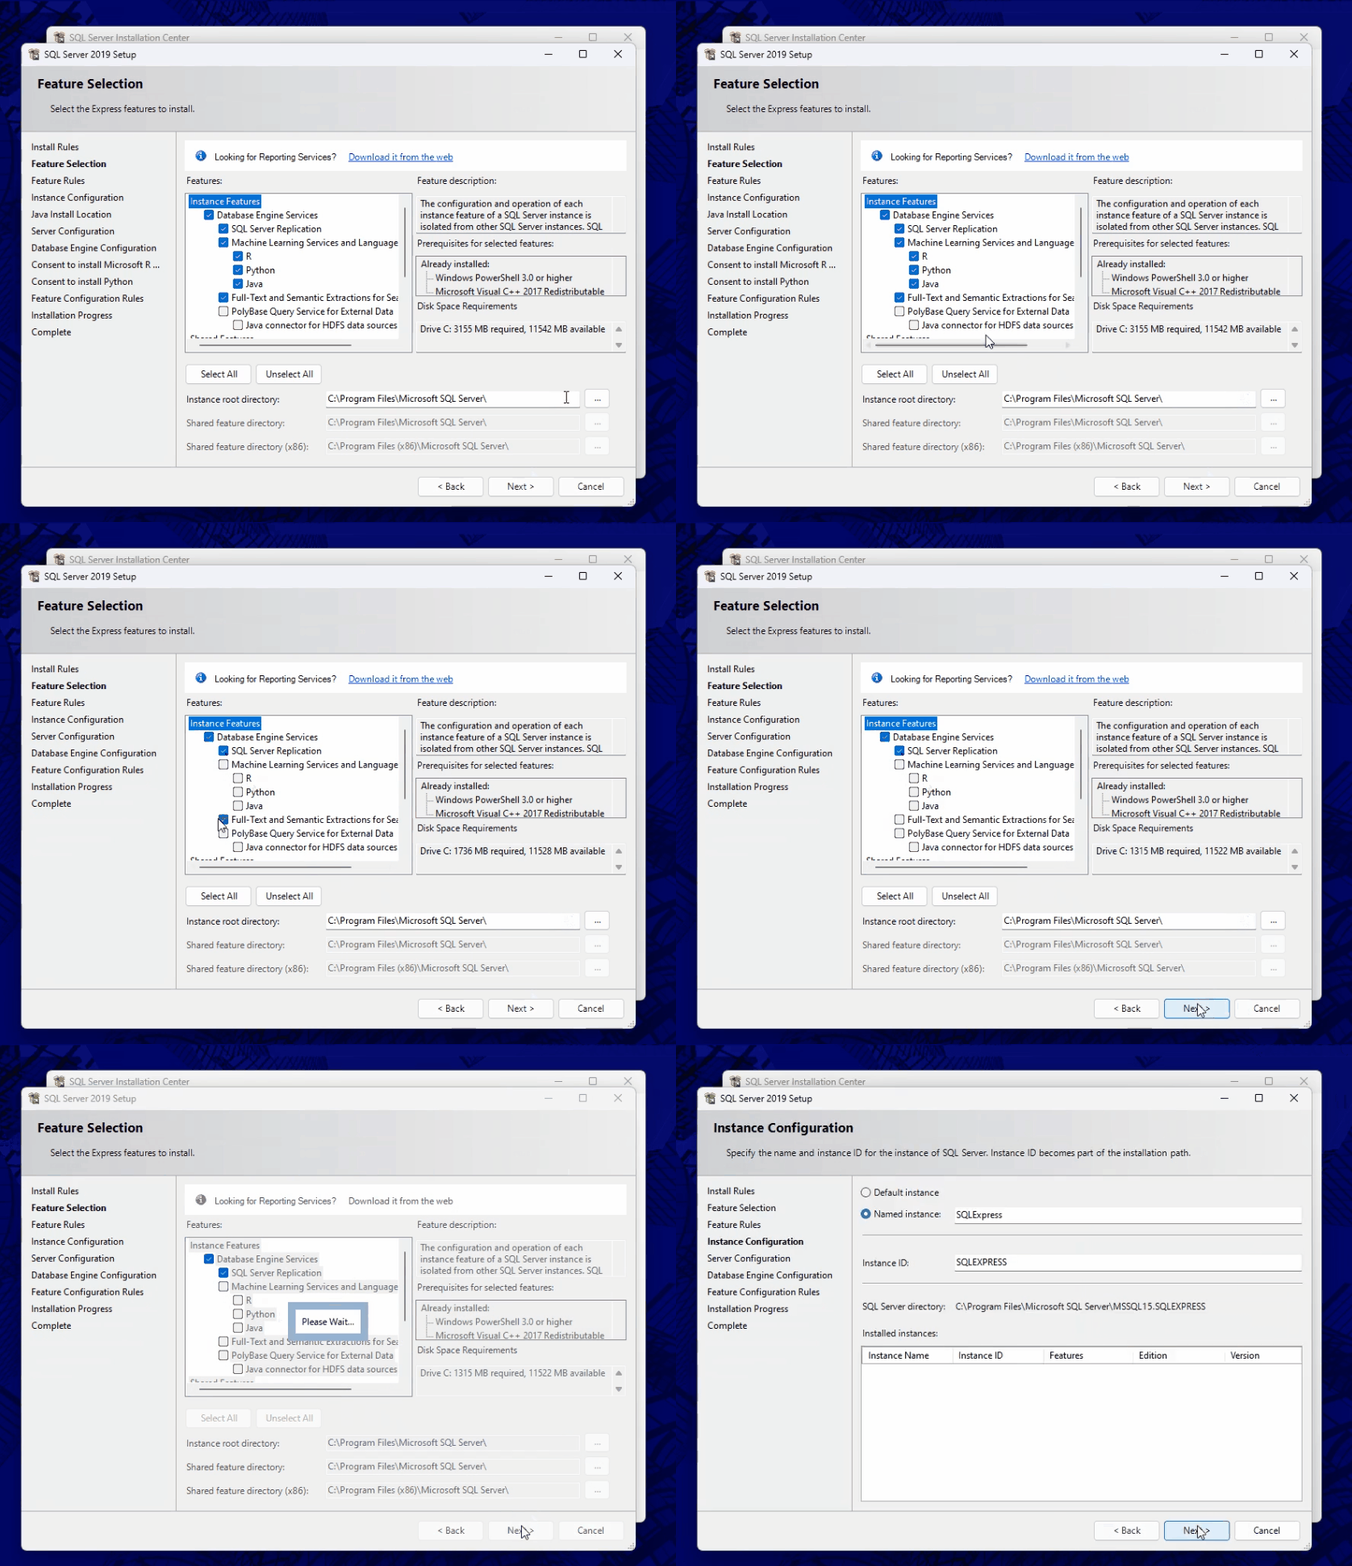
Step 6: Instance Configuration
In the Named Instance field, enter WEBGILITY.
Press Tab on your keyboard the Instance ID will autopopulate with the same name. Click Next.
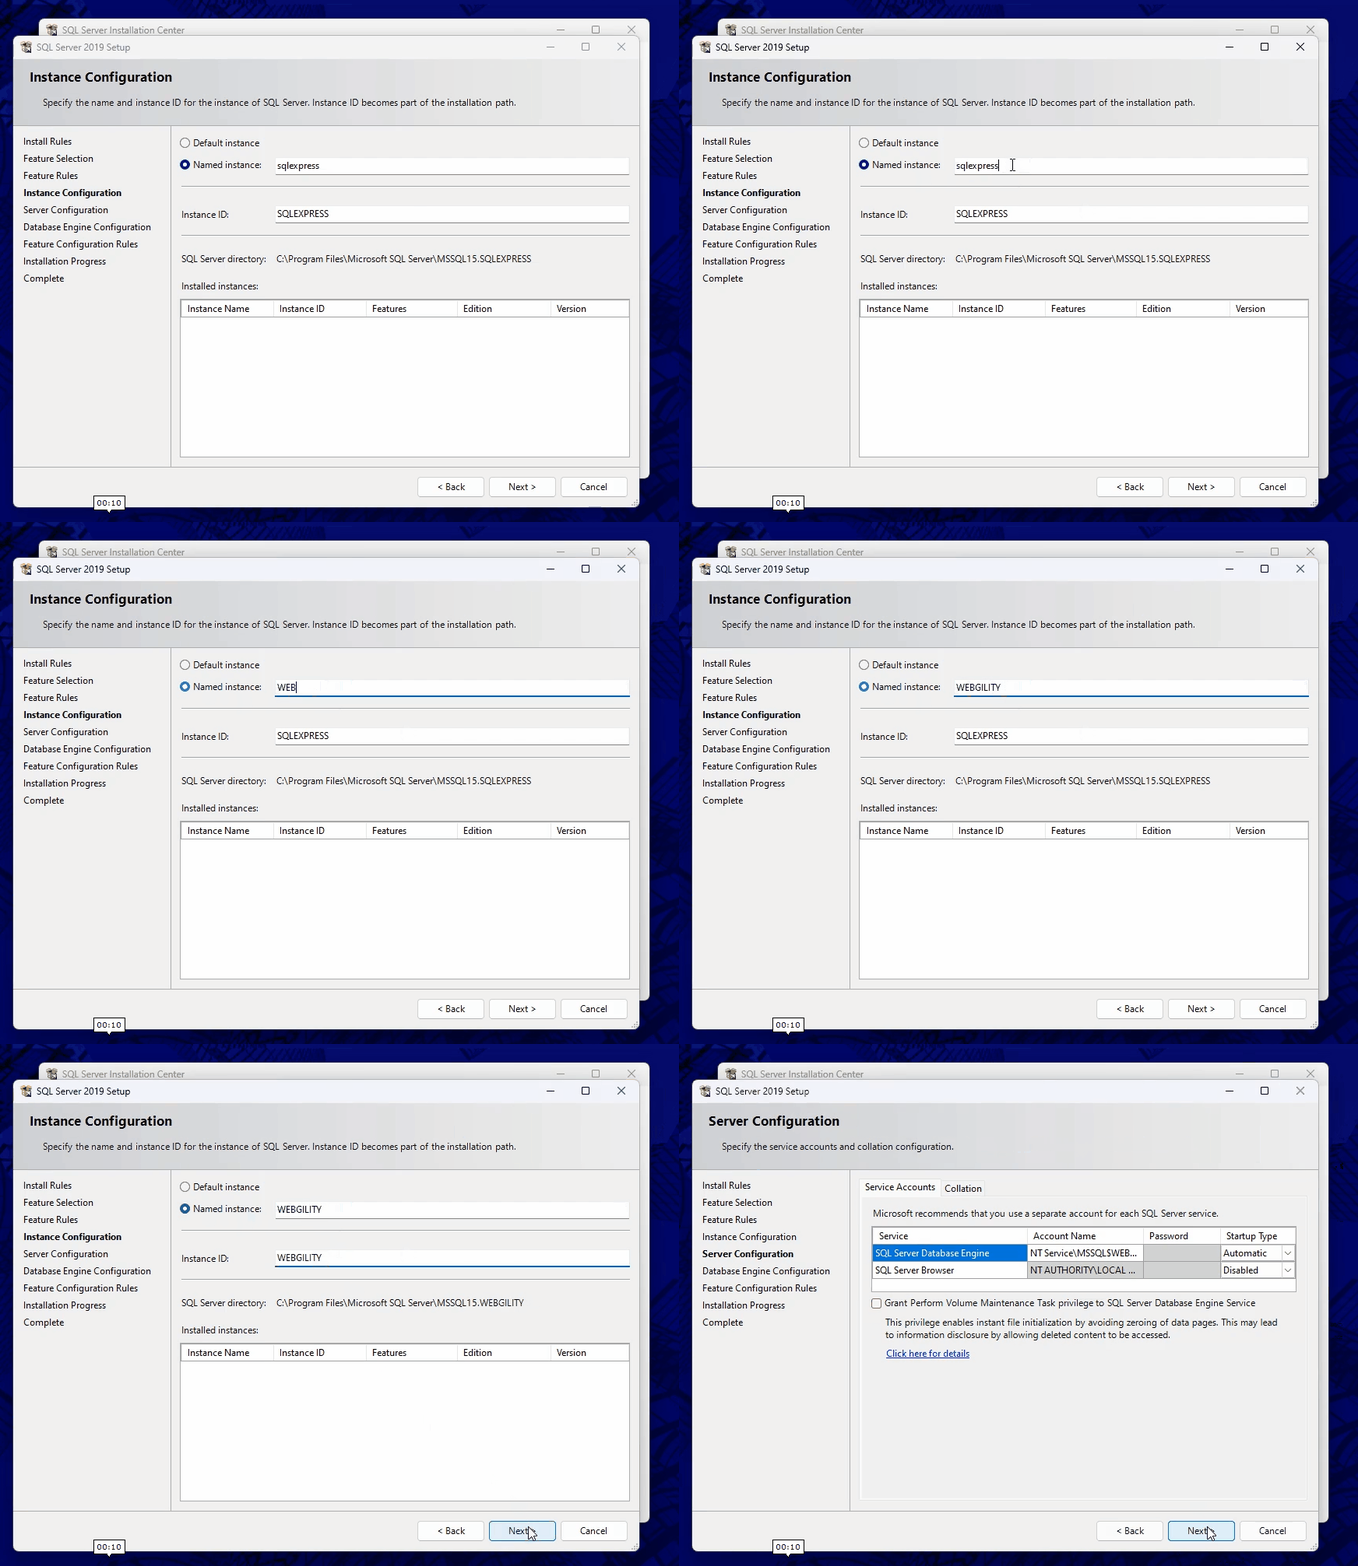
Step 7: Server Configuration
In the Server Configuration window:
-
Set SQL Server Browser → Startup Type to
Automatic
Click Next to proceed.
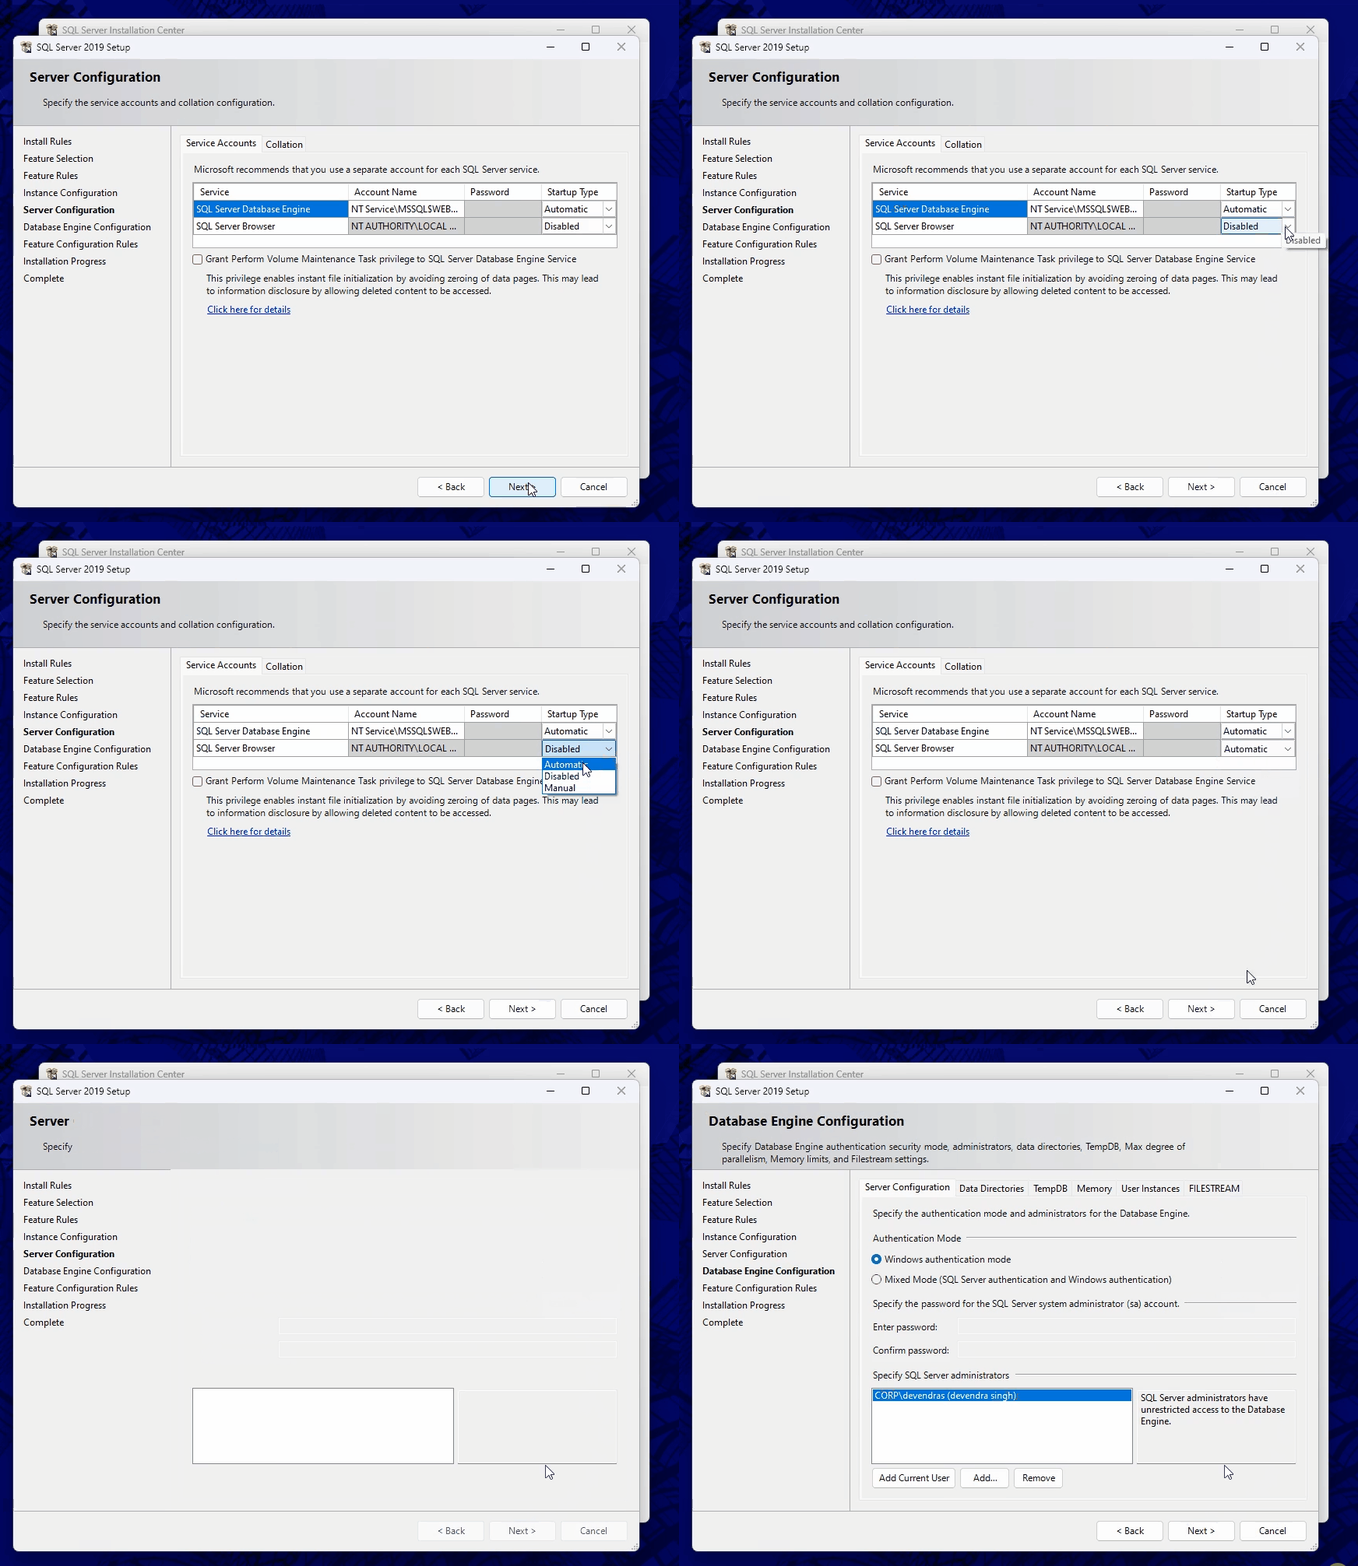
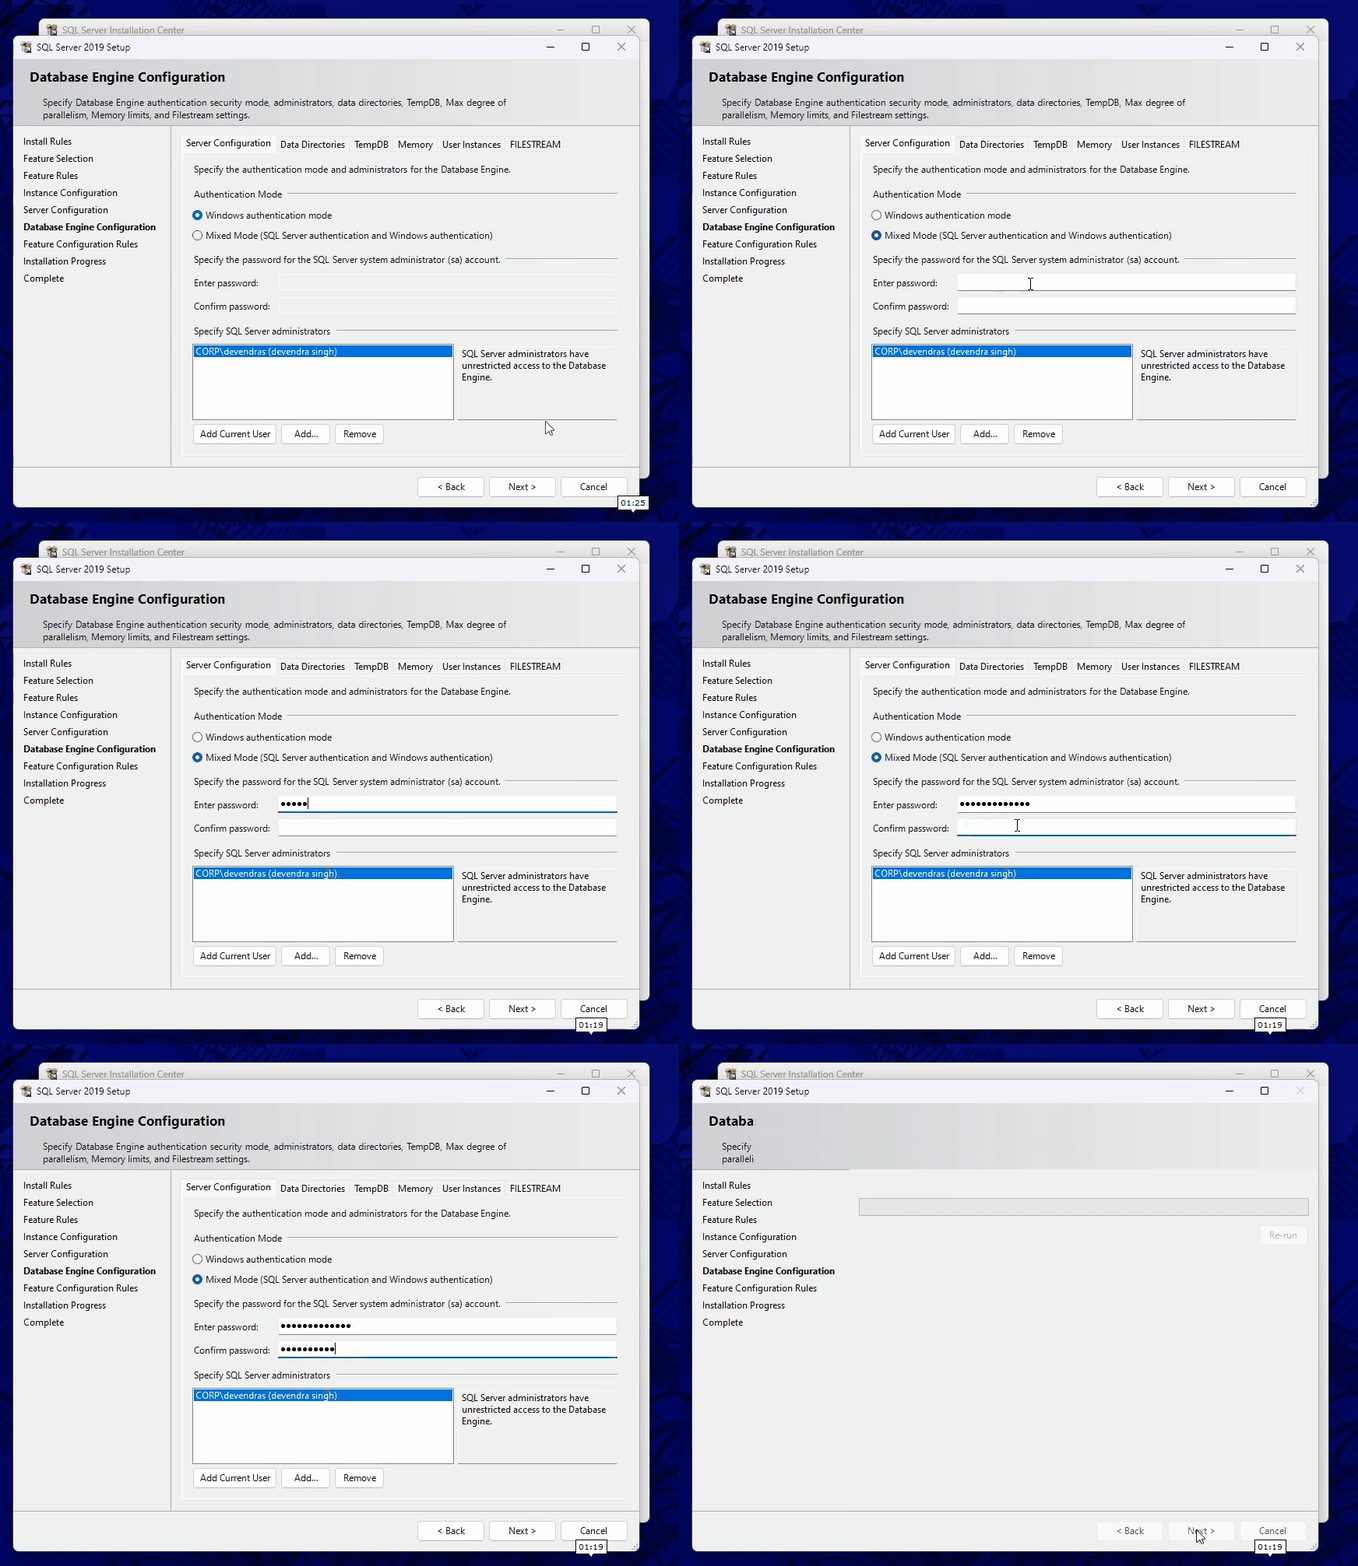
Step 8: Database Engine Configuration
-
Choose Mixed Mode authentication, username will be sa.
-
Set the password as
Webgility2011in both fields
Click Next to continue.
Step 9: Complete the Installation
The installation will now begin and may take 5 to 10 minutes.
Once completed, verify that all components show the status Succeeded. Click Close to exit the setup and close the SQL Server Installation Center.
