Manage User Privileges and Login Details
This article guides the main user of Webgility Desktop in managing permissions and login details for additional users. It explains how to grant or restrict access to modules, control sales channel access, configure shipping permissions, and view login history. Step-by-step instructions cover setting privileges, managing sales channel access, and reviewing last login details.
Overview:
The main user of Webgility Desktop can define permissions for additional users of Webgility Desktop. These permissions can either limit or provide access to specific modules within the Webgility Desktop application.
Note: If an admin user grants all permissions, the Add-on user will still have restrictions and will not be able to perform the following:
-
Manage Sales channels or add new Sales channels
-
Make changes to Webgility Desktop application settings
-
Adjust QuickBooks or Sales Channels connections
-
Run the scheduler
When provided permissions to utilize the shipping module, the Add-on user can perform the following:
-
Configure shipping providers
-
Set default settings for QuickBooks shipment manager and retrieve tracking ID
-
Adjust printers and label save locations
Steps to set the permissions and sales channel access:
You have the option to allocate privileges to extra users by enabling or disabling their permissions for Webgility Desktop features and Sales Channel access.
Permission Management:
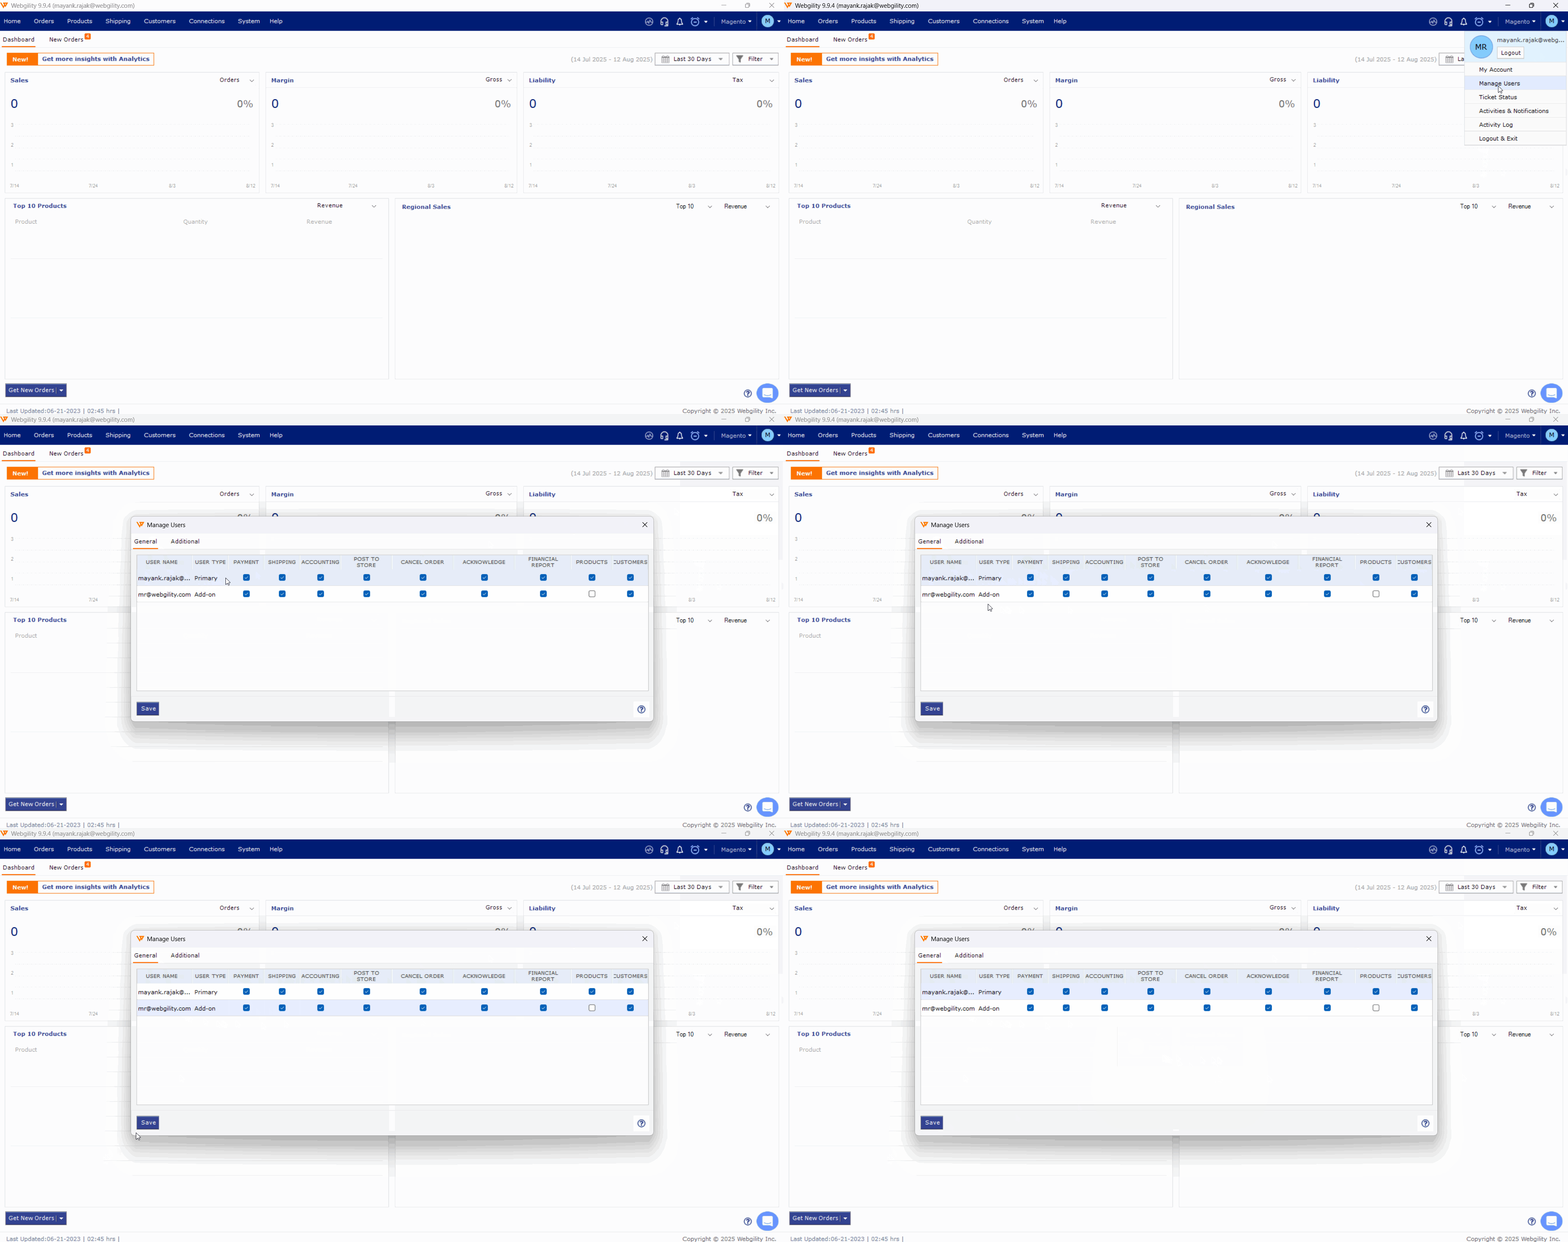
At this point, you can assign specific responsibilities to each Add-on user. For instance, you can activate or deactivate access to the shipping section for a user.
- Open Webgility Desktop.
- Click in the top right corner of the interface.
- A dropdown menu will appear. Select Manage Users from the options.
- Click on General

Note: By default, the product module is disabled for Add-on users. However, it can be enabled from the above area.
Sales Channel Access Management:
If you have more than one Sales Channels then you can enable and disable access to specific Sales Channels for specified users.
- Open Webgility Desktop.
- Click in the top right corner of the interface.
- A dropdown menu will appear. Select Manage Users from the options.
- Click on Additional
- To enable or disable Sales Channels for users, simply click on the checkbox next to the relevant Sales Channel.
View Login Details
- Click in the top right corner of the Webgility Desktop Application.
- Click on My Account. Go to Last Login Details.
- When you click Last Login Details, you will see the following screen with login details for the main user, as well as all additional users. The login date and time as well as the user status - active or inactive, are shown here as well.

