Note: This article uses Shopify channel as example
Overview:
If you are working with Shopify and other sales channels (aside from Amazon) and there is a refund or return where you do not want to retain the inventory or record the refund, then Webgility can help you in marking the existing sale which is posted in QuickBooks (against which the refund is received) as Voided or create a void entry for the order in QuickBooks if the refund and the order both download at the same time in Webgility.

Auto Refund posting is where the setting is selected to Void the transactions.
1. In Webgility Desktop, navigate to Connections> Accounting/POS/ERP> Sync Settings> Orders

2. Under Posting Rules > Enable Related Transactions, enable "Automation Refund Posting" and this will activate a new tab at the top with the same name.

3. Under Auto Refund Posting tab select "Void transaction" and Save and Continue

4. Now navigate to the Order that has refund on it, open order details and you will see a Refunds Tab so at the bottom click on Post Refund.

5. This will open another window where you need to choose Void Transaction and this will void the respective transaction inside QuickBooks Desktop.

5. And you will get a success message that the transaction has been voided successfully.

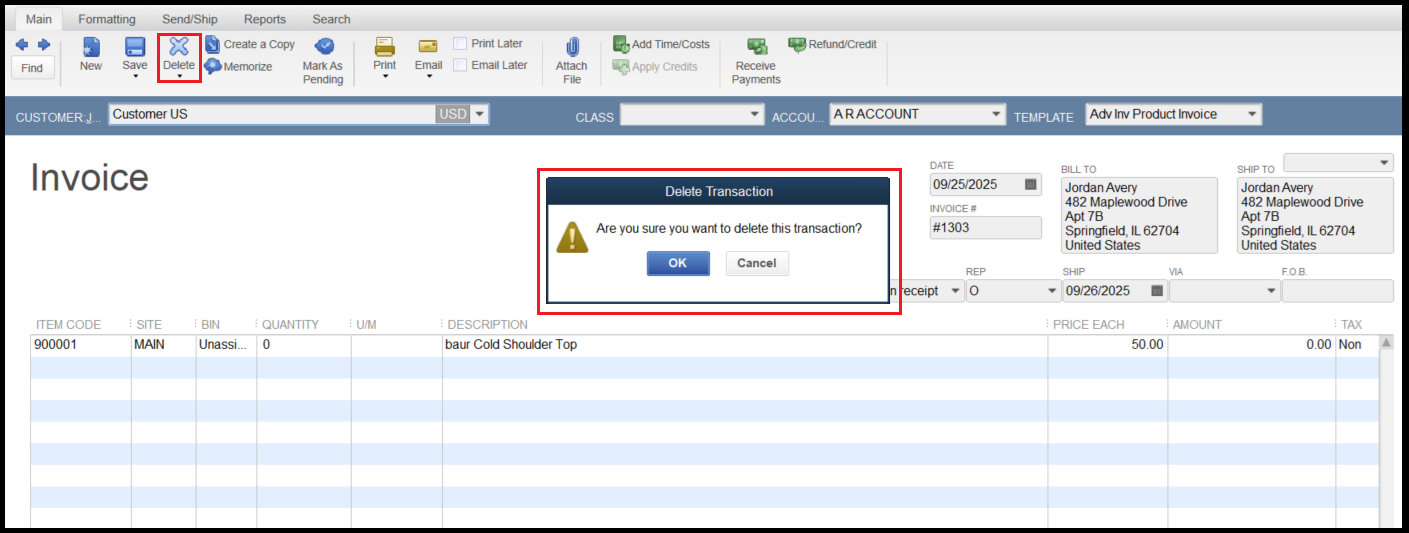
6. You will see the Voided transaction in QuickBooks as shown below.

Note: All the Voided transactions can never be posted back again to QuickBooks and will go to the error tab. (As they were already posted as an order previously)

In case you want to post and record a refund you should delete the order manually from QuickBooks first.
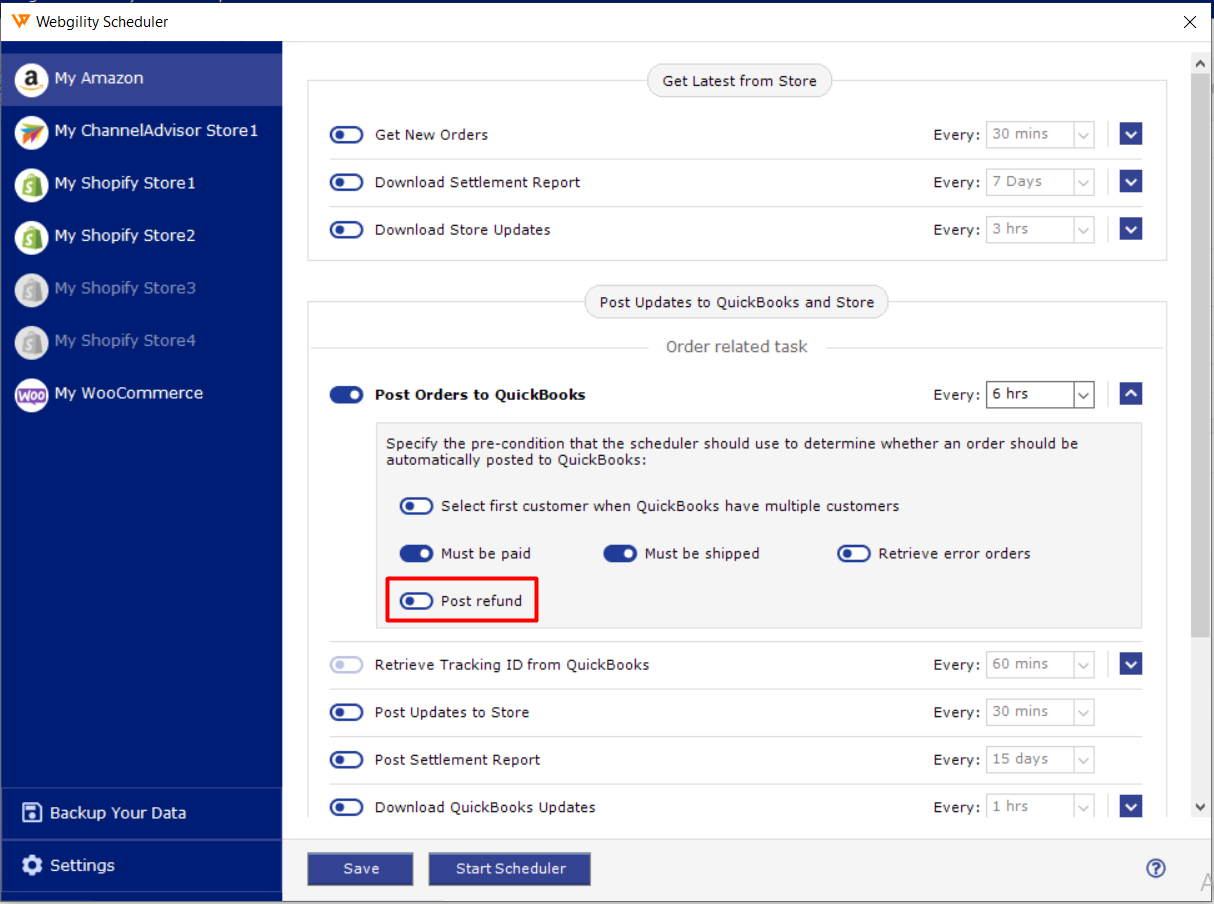
With Webgility Scheduler you can setup and post Refunds which eventually will Void the existing transaction if the above settings are applied.