1). Login to Webgility Online:
2). Click on the humanoid icon at the top right corner.
3). Click on My Account.
4). Users, If you want to add an add-on user for your Webgility online account, then enter the email address in the email field and click SEND to send the invite to additional users.
5). An invitation will be sent, and the user will be added to the user list. Add-on users need to accept the invitation and create a password for Webgility online login. The status will change to active as soon as the user accepts the invitation.
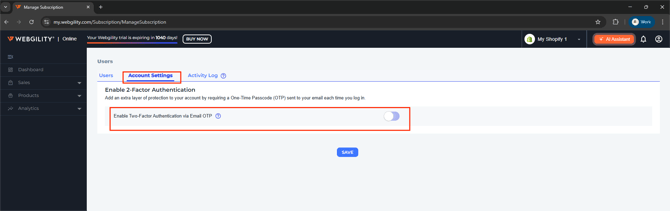
6). Account Settings (Enable 2 Factor Authentication):
-
In the Account Settings section, enable the toggle button Enable Two-Factor Authentication via Email OTPthe box labeled
-
Click Save.
When 2FA is enabled, a one-time passcode will be sent to the registered email address every time you log in to Webgility Online. You’ll need to enter that passcode to access your account.
7) In the activity log, the user's activity can be tracked user-wise or for all users. Admins can check the activity log for all the users, but add-on users can only check the logs for the activity performed on the add-on user account.
You can check the activity for a specific date by applying the filter “custom date range” where it says “All”. You can also check the activity log for a week, month, or year.