To post each order separately as a sales receipt or invoice to QuickBooks and record sales tax using Webgility Online for QuickBooks Online, follow the steps below:
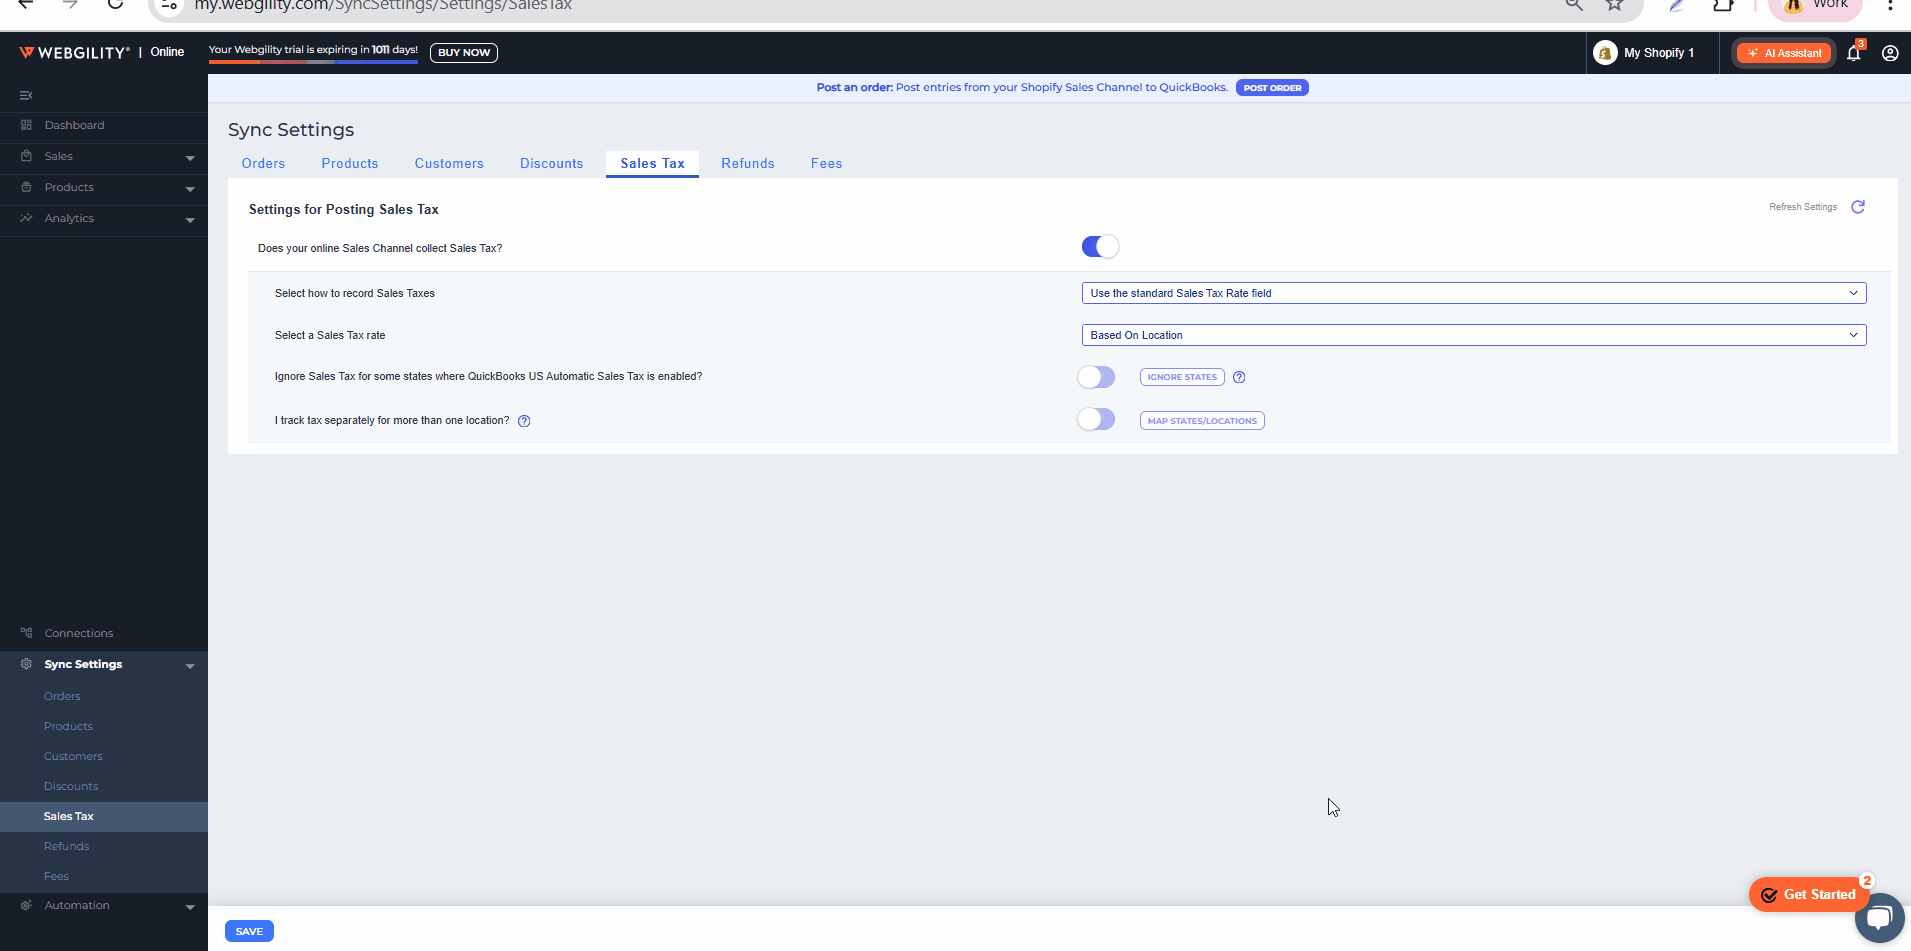
In Webgility Online navigate to Sync Settings > Sales Tax

- Enable “Does your online Sales Channel collect Sales Tax?”
- After enabling this, you will find several choices for recording sales tax as outlined below:
- Select how to record Sales Taxes
- Select a Sales Tax rate:
- Ignore Sales Tax for some states where QuickBooks US Automatic Sales Tax is enabled.
- I track tax separately for more than one location.

-
- “Select how to record Sales Taxes”, provides two alternatives for recording sales tax: either
- “Use the standard Sales Tax Rate field”, or “Record the exact amount collected as a line item”
Record the exact amount collected as a line item: This option bypasses the QuickBooks tax engine so you can be sure to show the collected sales tax amount that always matches what your sales channel collected.
Select the drop-down menu and choose a QuickBooks Online Sales Tax item code within the 'Use the line item to record Tax in QuickBooks' option.
Record Tax with Sales Tax Rate: By selecting the "Based on Location" option in Webgility Online, the sales tax code for posted orders will be determined by the location, specifically relying on the "Shipping address" of the online order.
Ignore Sales Tax for some states where QuickBooks US Automatic Sales Tax is enabled: To exclude specific states from tax recording, select the 'Ignore Certain States for tax sync' option. Activate this option and select the states where you prefer not to record sales tax.
I track tax separately for more than one location: Enabling this option allows you to document sales tax in various locations. Toggle the button to activate the settings and click on "MAP STATES/LOCATIONS" to configure the preferences.

Note1: When mapping sales tax codes using state, city, county, and zip code, the order of preference is as follows: zip code, county, city, and then state.
Note2: Selecting a state is mandatory. For the other categories, such as city, county, or zip code, you can map them as needed and leave the remaining fields blank.