Webgility Desktop offers the option to record inventory adjustments in the selected merchant account in QuickBooks.
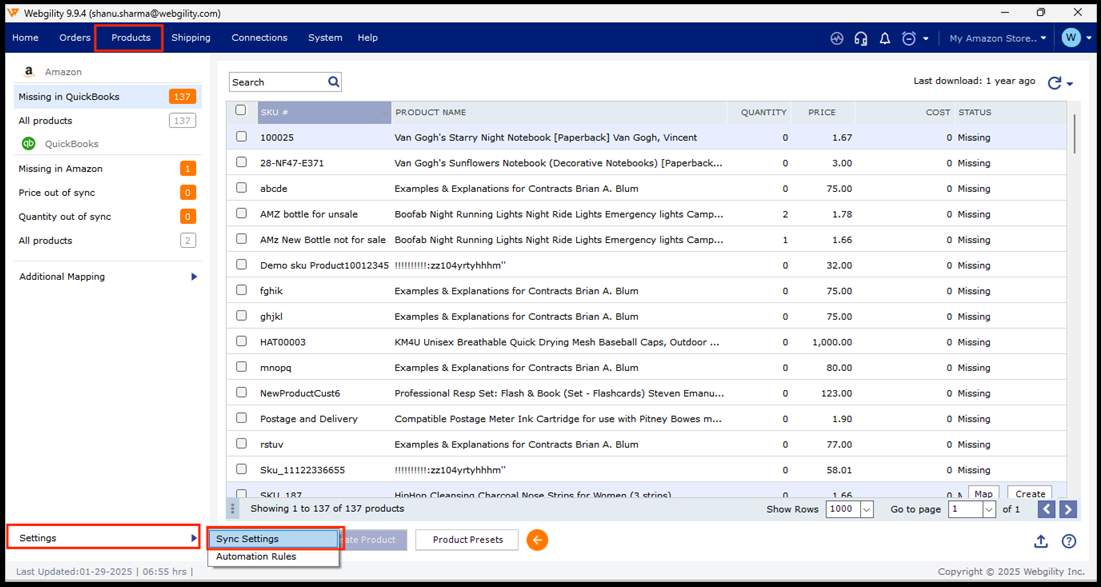
1. To set up an inventory adjustment account inside the sync settings, Navigate to Products> Settings> Sync Settings
2. Select Enable adjustment account option and choose an adjustment account from the drop-down options
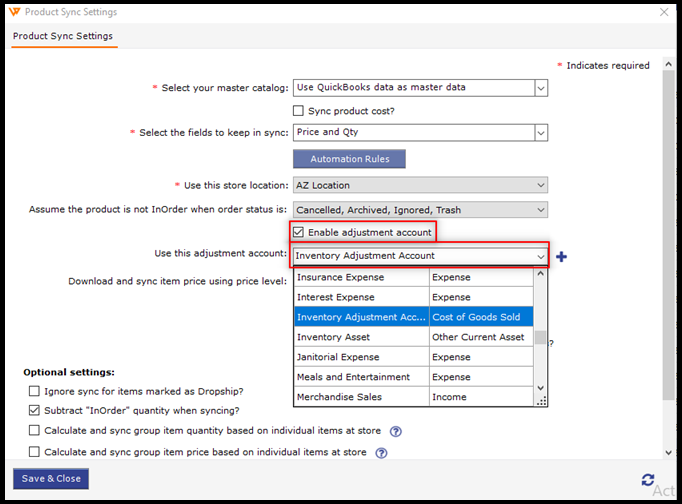
3. Enable adjustment account is available for some sales channel connections. When performing inventory sync, this will add an entry into the selected QuickBooks account for inventory adjustments.
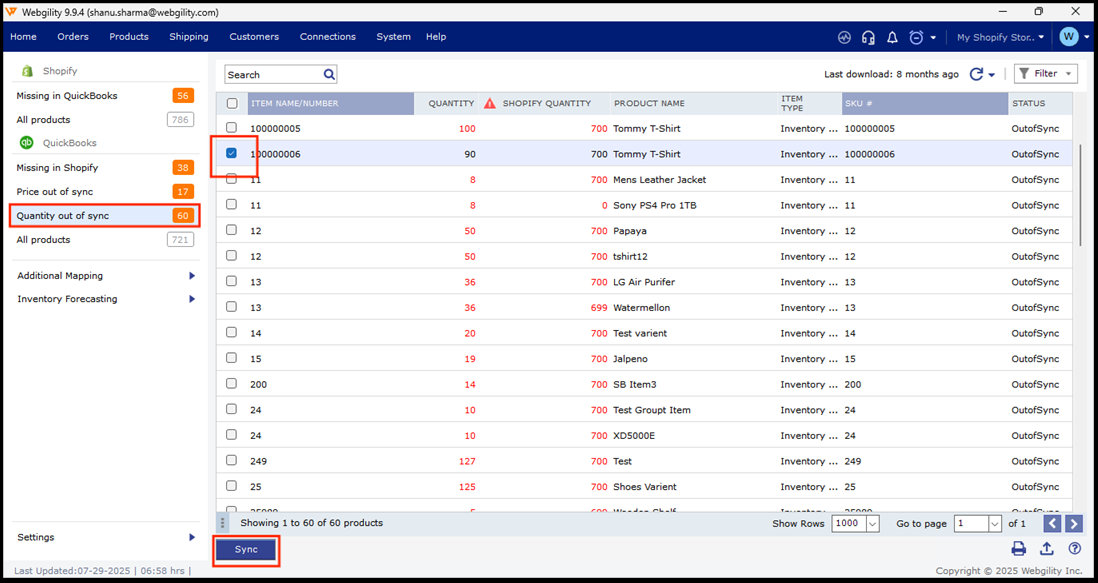
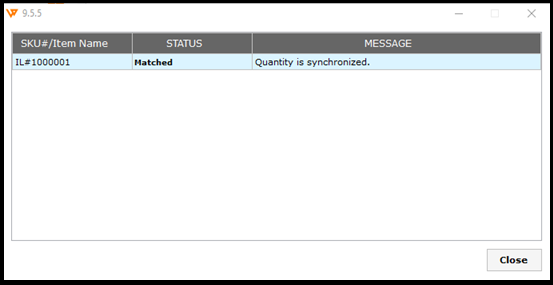
You can go to the Quantity out of Sync page after the Inventory Adjustment account has been selected in the sync settings and synchronize the items from the list based on the conflicting quantities.
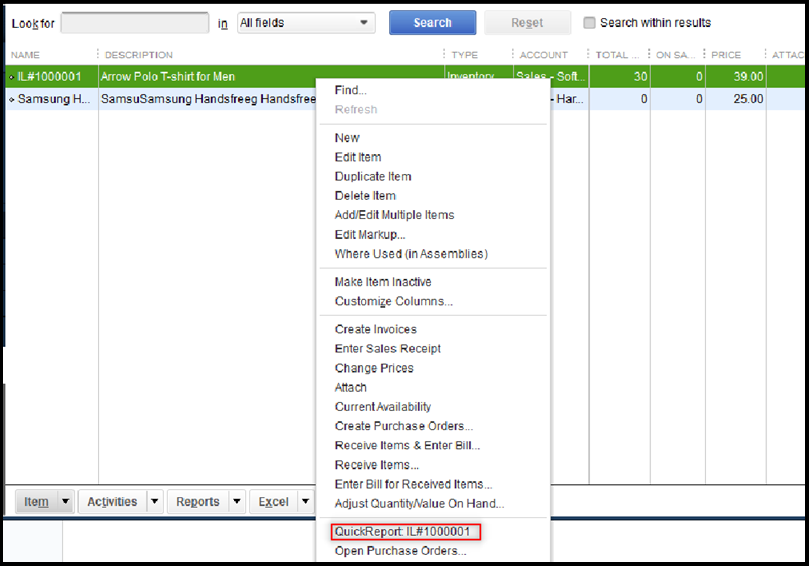
You can open the QuickBooks Item list and select the synced item. Right-click and access the Quick Report option of the item and run it.
It will redirect to the Inventory Item Quick Report.
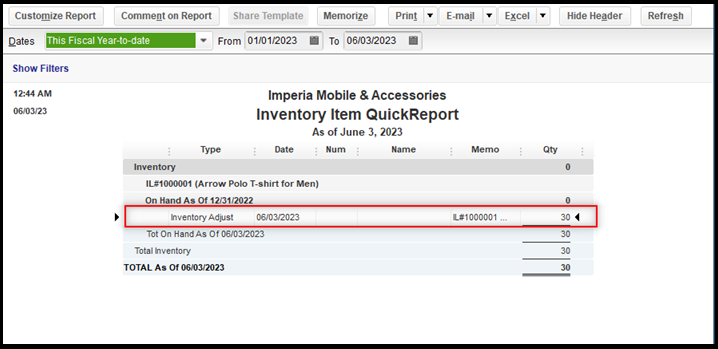
Select the Inventory Adjust option and you will see the latest adjustment.
Optional:
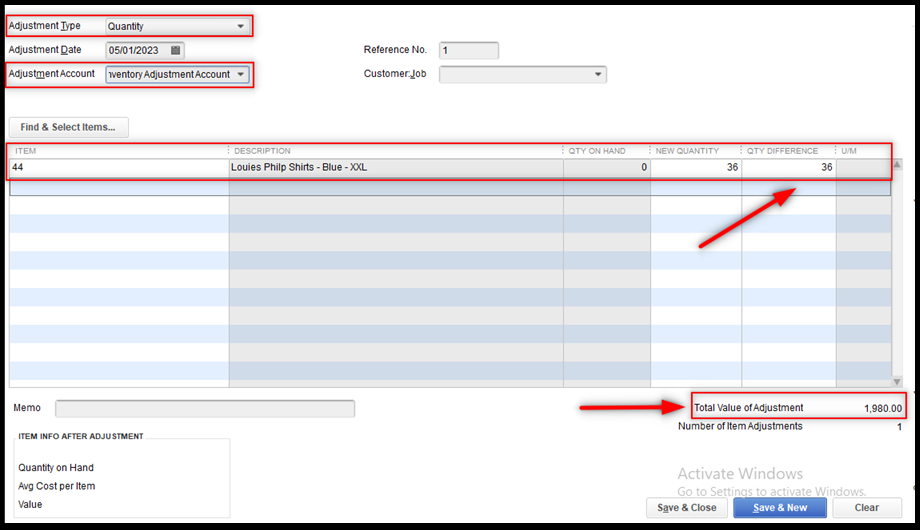
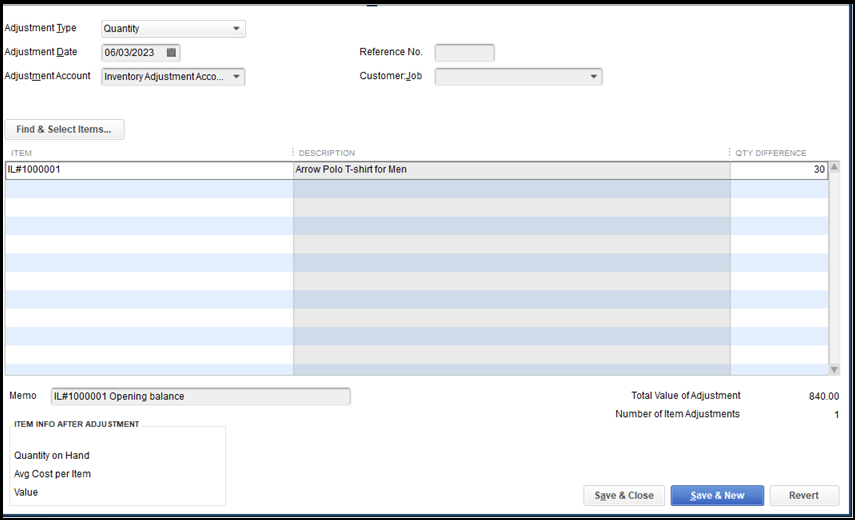
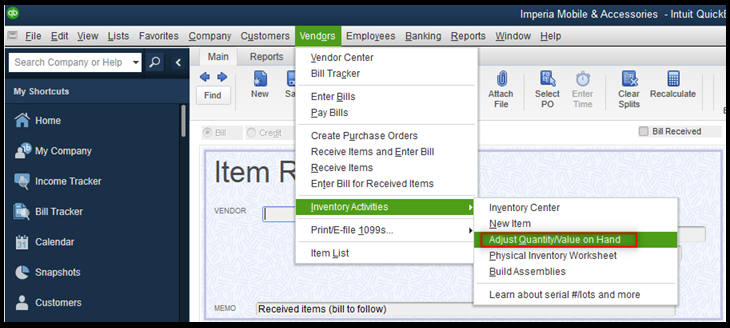
Below we show how to perform a manual adjustment of quantities inside QuickBooks Desktop:
Click on Vendors> Inventory Activities> Adjust Quantity/Value on Hand
Set the Adjustment Type, Adjustment Date & Adjustment Account.

Click on the Find & Select Items Option to add the item from the list.
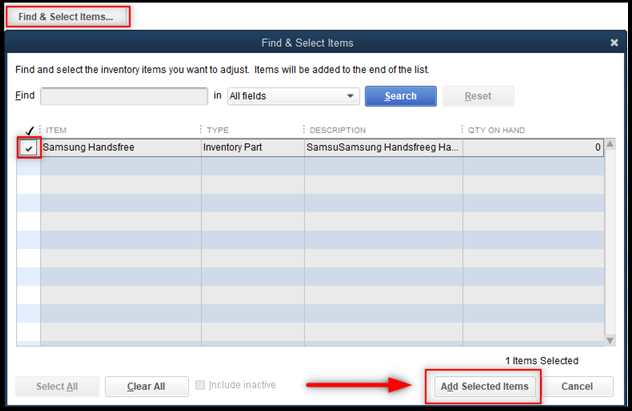
Add the New Quantities and verify the Quantity Difference. You will see the Total Value of Adjustment and the Number of Item Adjustments based on the cost price assigned to the item inside QBE.