
This article explains how to configure Webgility Desktop to automatically create a Customer Job inside a Standard Customer in QuickBooks when an order is posted from your sales channel. This is useful when you want all orders grouped under a single parent customer while still tracking individual customer details via jobs.
How to Set Up Customer Jobs in Webgility Desktop
1). In Webgility Desktop navigate to the Customer settings: Connections > Accounting/POS/ERP > Sync Settings
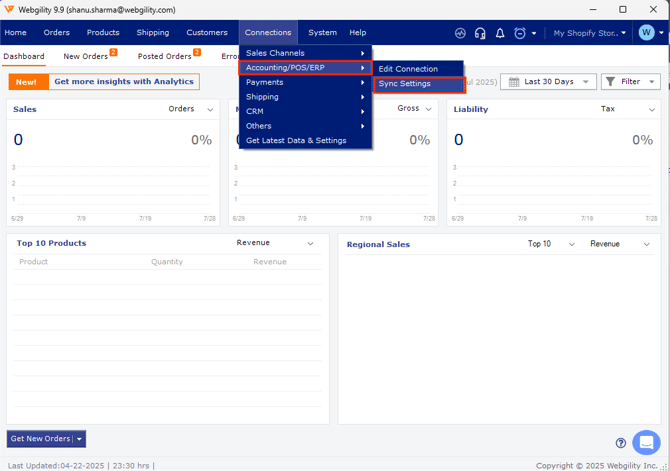
2. Under ‘If no matching customer is found’, select 'Use this customer for all orders'.
- In the Select Customer drop-down menu, find the Standard Customer you created.
- Click the drop-down arrow to the right of the setting, then select Enable Create a Customer Job and click Setup to configure the Customer Job.
3. (Optional) Enable the ‘Override matching, always use this customer’ option if you do not want Webgility to apply the Primary Customer Matching criteria when locating the Customer Job under the Standard Customer while posting orders.
Note: The Customer Job cannot be created if the Override matching option is enabled.
4. Click Setup (from step 2) to configure the default settings for Customer Job Creation, as shown in the screenshot below.
5). You need to enable one more option from the Advanced Settings. Go to Connections > Sales Channels > Advanced Settings.
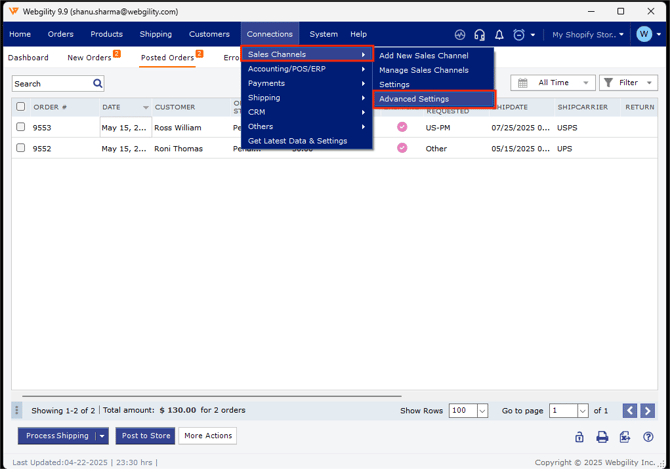
6. In Additional Settings, enable ‘Check job while posting customer to QB’.
6). The following image is a sample of customer details downloaded by the Webgility Desktop application from the sales channel. Using these same details Webgility Desktop will create a Customer Job inside the Standard Customer.
7). Once the order is successfully posted to QuickBooks the customer job will be automatically created inside the selected Standard Customer or an existing customer job will be used per the matching criteria.