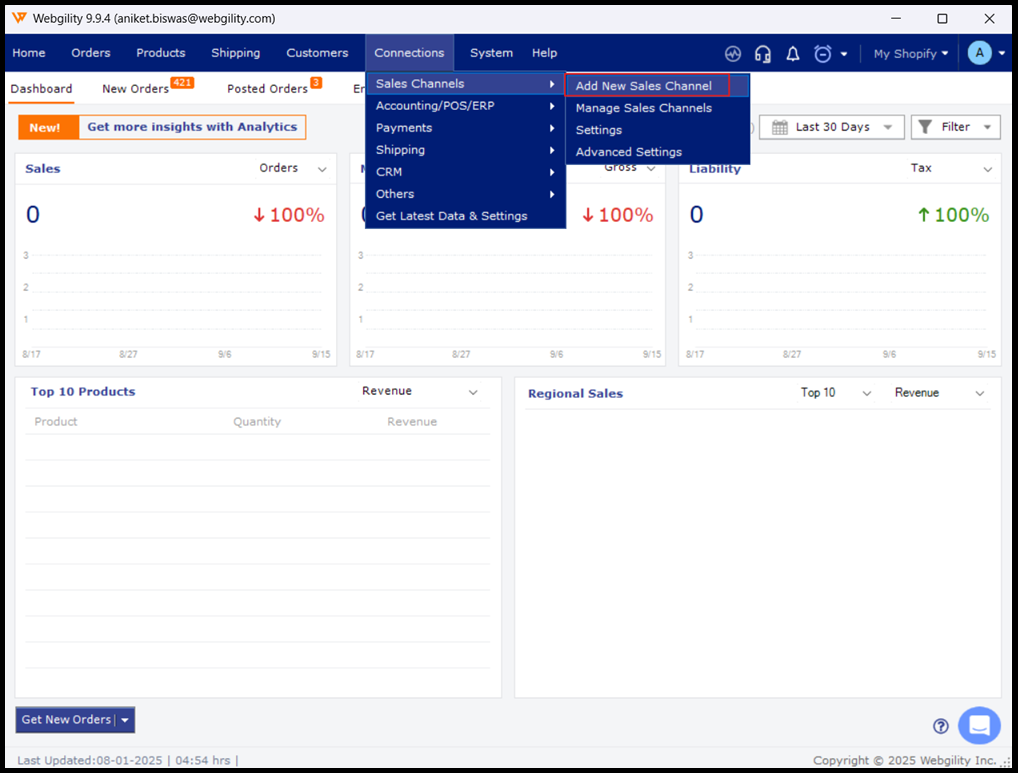
Steps to follow:
1. Open the Webgility Desktop app.
2. Select Connections > Sales Channels > Add New Sales Channel.
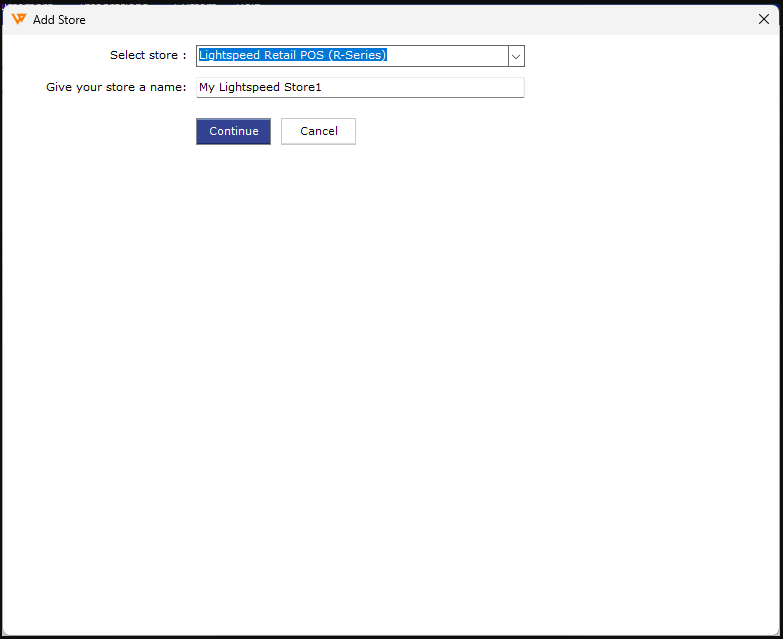
3. Select the sales channel you want to connect, name it, and click Continue.
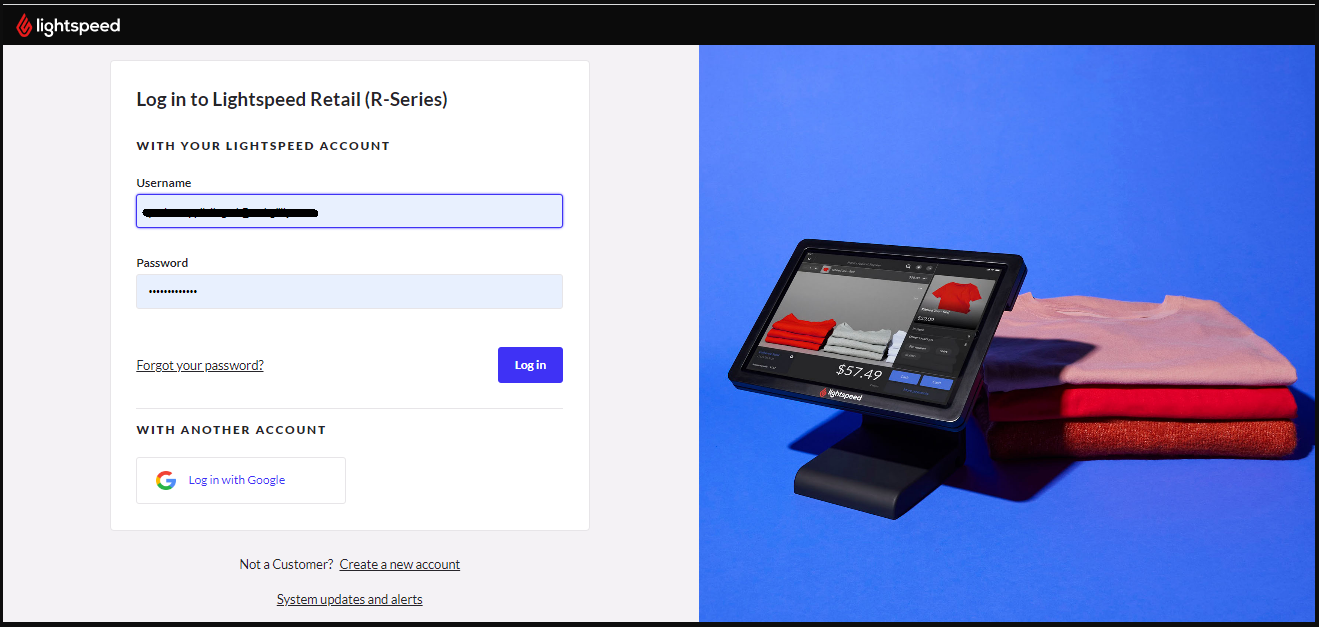
4. Webgility will redirect you to sign in to Lightspeed in your default browser. Enter your credentials and click Log in.
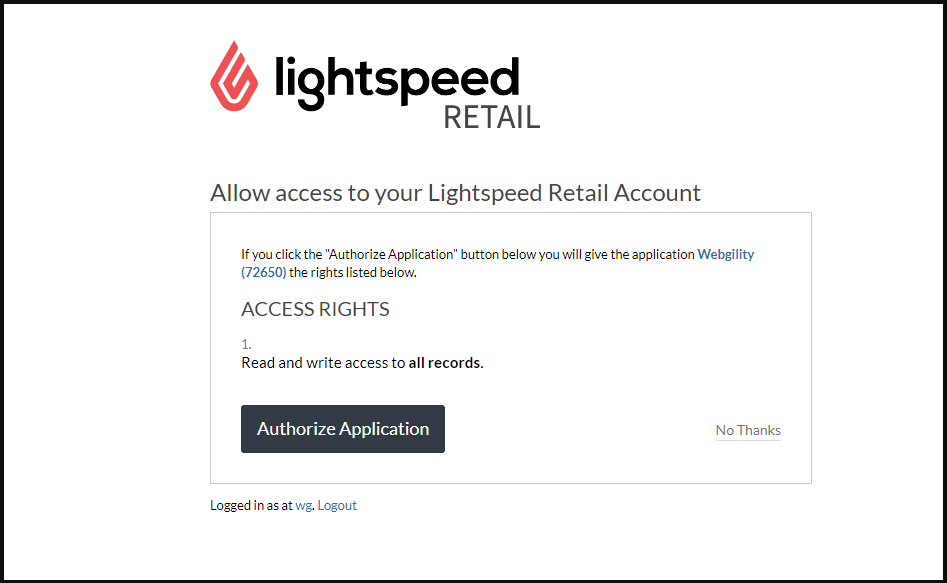
5. Click Authorize Application to allow Lightspeed to connect to Webgility.
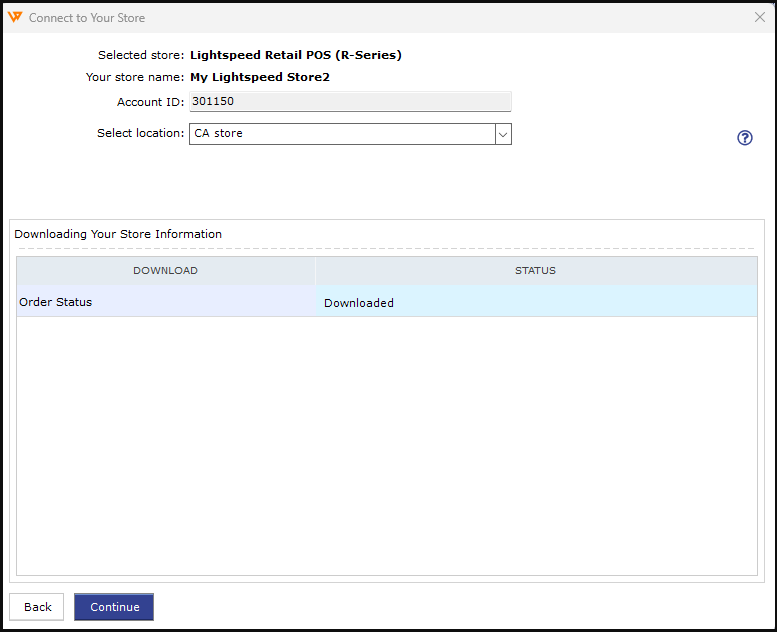
6. You'll be redirected back to the Webgility Desktop app. Select your sales channel location and click Continue.
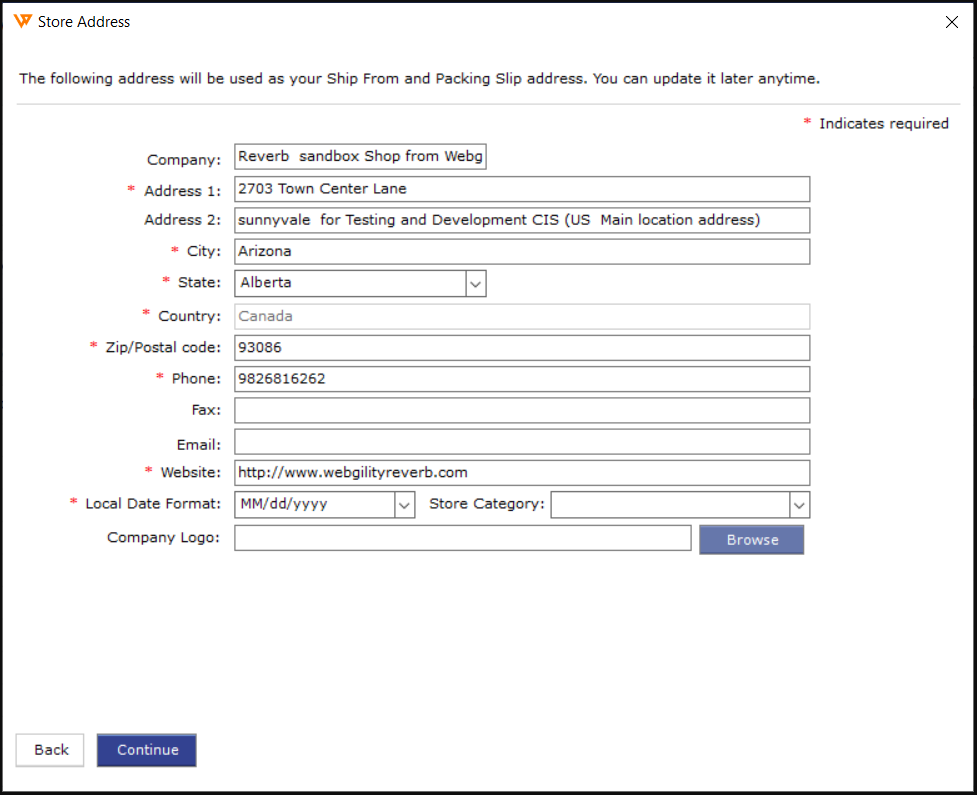
7. Enter your business information in each required field and select Continue.
8. That's it! Now you can connect your QuickBooks, ERP, or POS system by Following these instructions.