How to Create a Picklist Using Webgility Desktop
This article explains Webgility Desktop users how to create and print a Picklist in Webgility Desktop by configuring the Picklist and printer settings. After setting up the details to display, users can select an order on the order screen and use the printer icon to print the Picklist.
To print a Picklist using Webgility desktop, we need to configure the Printer and Picklist settings.
Step to follow:
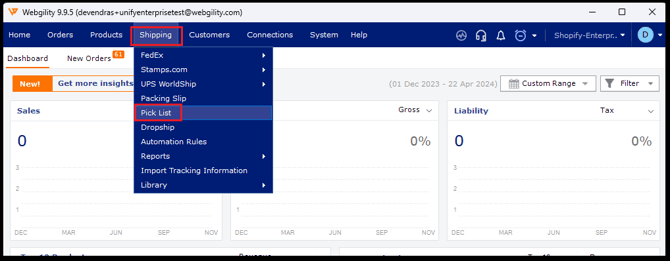
1. In Webgility Desktopm navigate to Shipping> Pick List. This will redirect you to the Configuration screen of the Pick List.

-
Configure the Settings based on the details you would like to show on the Pick List.

- Adjust the Printer Settings.

- On the order screen, select an order (1) and use the printer icon on the lower right (2) of the screen to select the Print Picklist option in Webgility Desktop.

-
Below is a sample of a basic Picklist.
