Steps to follow:
1. Navigate to Connections then goto Sales Channel and click on Settings and enable the Get discount as a line item option.


2. With Get discounts as a line item selected, orders will download with the online discount as a separate line item in the transaction.

3. You can create a variety of discount-type items in QuickBooks. Once mapped, you can record the online discount amount while posting the order to QuickBooks.
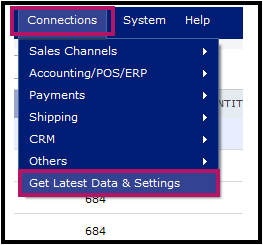
4. After making the discount items, you will need to download the most recent QuickBooks items to see them in Webgility: Navigate to Connections and goto Get the latest data and settings.

In the pop-up window, click Download Data under the Download QuickBooks data and settings area. Note: This may take several minutes. Once it is completed, close the window.
5. Post an order with a discount to your QuickBooks. You will receive an Item mismatch Pop-up. You will need to map the order’s discount item to the specific discount item you created earlier in QuickBooks.


Once you have mapped the item, then post the order to QuickBooks again.

In QuickBooks, as shown below, this is how the online discount will look as a separate line item on the sales receipts, invoices, or sales orders.

Now, to record online discounts as a line item with the standard discount type item in QuickBooks.
1. Navigate to Connections then goto Accounting/POS/ERP and click on Sync Settings.

2. Go to the Discounts tab and select the discount items you wish to use to record online discounts and coupon amounts.

3. When the order is posted to QuickBooks, you will find the discount amount recorded as a line item.

Download the online discount with the discounted item price
Note: This option is only applicable to Shopify & Bigcommerce.
1. Navigate to Connections then go to Sales Channel and click on Settings.

2. Enable Get Discounted Item Price option.

3. Once you enable the option, the Webgility Desktop App directly downloads the discount amount at a discounted item price rather than downloading the discount amount separately as a line item or at the subtotal level.

4. Now you can post the order to QuickBooks using the discounted item price.
