Once you have integrated your Shipping provider to Webgility Desktop, go to Shipping → Automation Rules

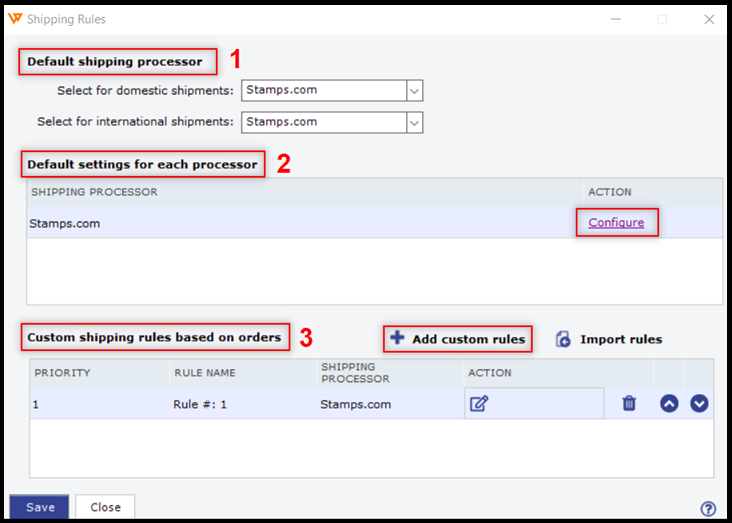
You will get shipping Rule windows. Here, you will find different options, you can follow the below-mentioned steps to configure shipping presets.
1- Default Shiping processor: If you have connected multiple shipping providers (Stamps, Fed Ex, UPS, Etc), here you can select the preferred carrier for domestic and international shipments.
2- Default settings for each processor: Here you can configure the settings for each shipping processor you have connected with Webgility Desktop.
Under the Action tab, click on Configure, and it will open another window with options such as a signature or delivery confirmation, declared value, additional package weight, default phone no, etc.
Once you have configured these settings, click on save.

3- Custom shipping rules:
Here you can create and add multiple rules for shipping based on certain order details.
Click on “Add custom rules” , and it will open a new window for Supping Rules.
Here on the left section, you can click on the dropdown and select the options to apply the conditions for the order total, order weight, country, state, order total quantity, shipping method, item name, sku, and item count. You can also add multiple conditions using the “Add condition” at the bottom of the left panel.
On the right section, you can select the preferred carrier, services, package type, dimensions, confirmation, and declared value, for the options selected on the left pane.
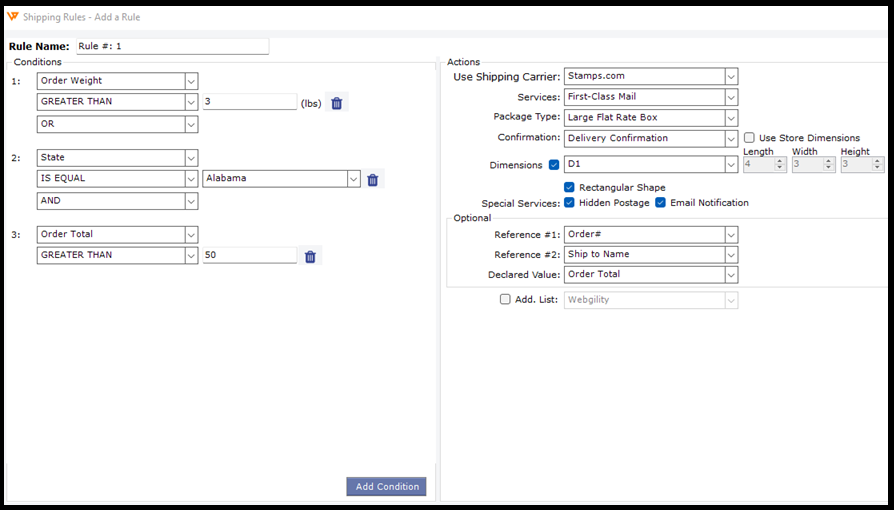
Once the rules are created click on save and the rule will be added to the shipping rules windows, you can later edit or delete these rules.
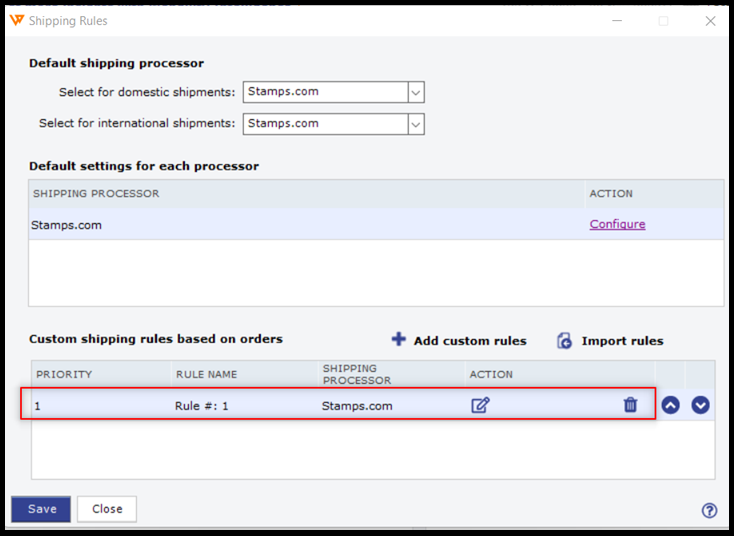
Once you have configured the settings for all the 3 options
click on save,
Whenever you will process shipping for the orders, your shipping preset rules and conditions will be applied and predefined options will show on the Generate Shipping Lable windows.
If required, you can still change the shipping options on this page if needed.
