Overview:
This tutorial shows you the steps on how you can integrate Webgility Desktop with ShipStation in order to download the shipping tracking details and shipping cost and post them to the accounting software.
Step 1. Connect ShipStation as a shipping channel.
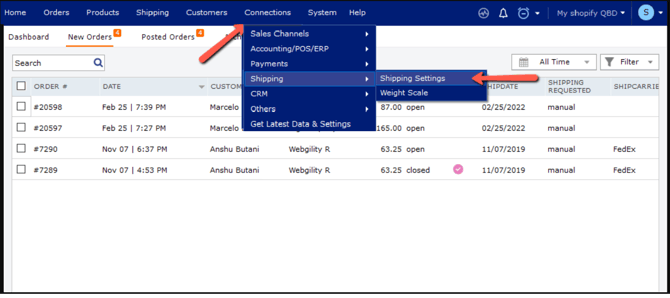
In Webgility Desktop navigate to Connections >> Shipping >> Shipping Settings
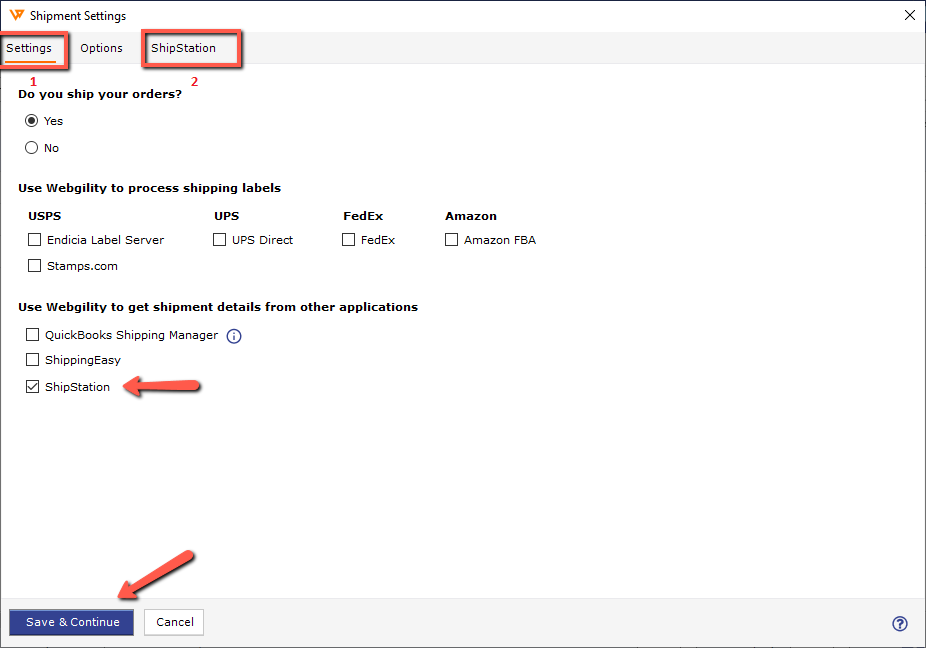
Select ShipStation, and click Save and continue.
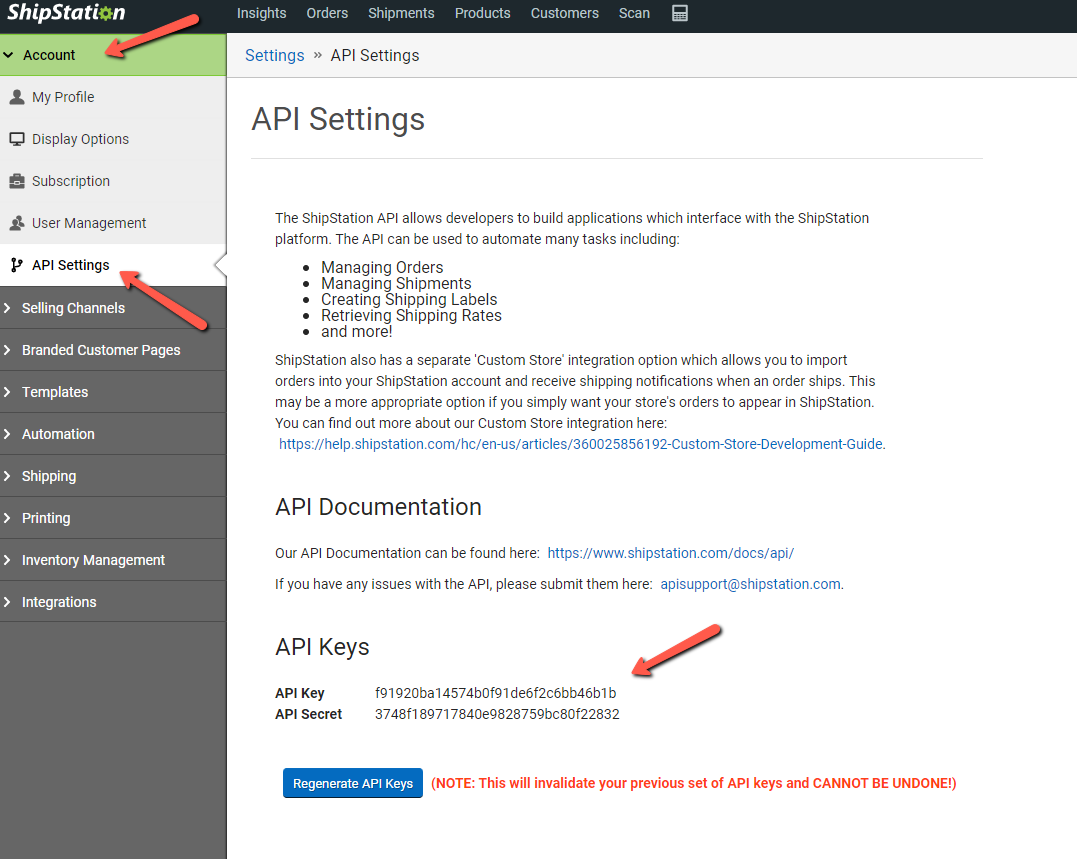
Enter the API key and API secret key for the connection; you can find those details under the Account section of your ShipStation Admin login.

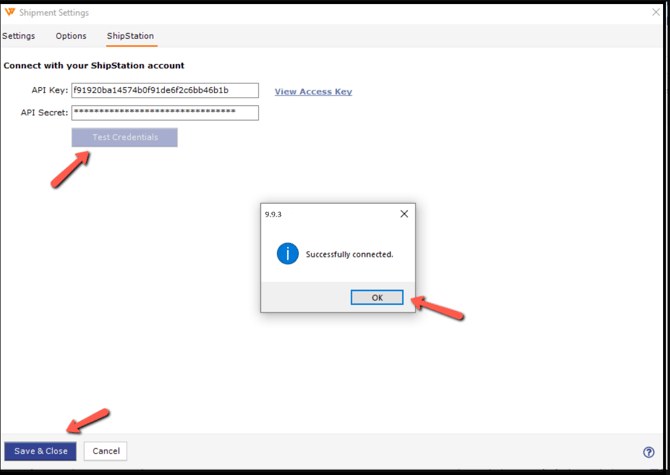
Test the connection, and upon successful connection, save and close.
Step 2. Configure shipping fee settings if you want to record the shipping fees (cost) in the accounting software. You can skip this setting if you do not want to record the shipping fees per order in the accounting system.
Go to Connections >> Accounting/POS/ERP >> Posting Settings.
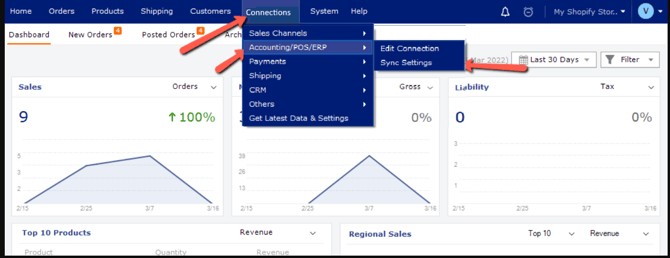
Go to the Expenses & Fees Section and enable the Record shipping cost option.
Click on the Setup button and configure the fee details.

Step 3: Download shipping tracking details from ShipStation.
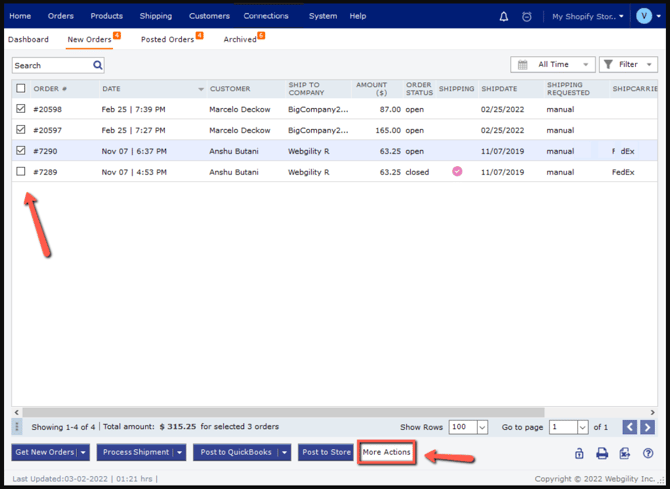
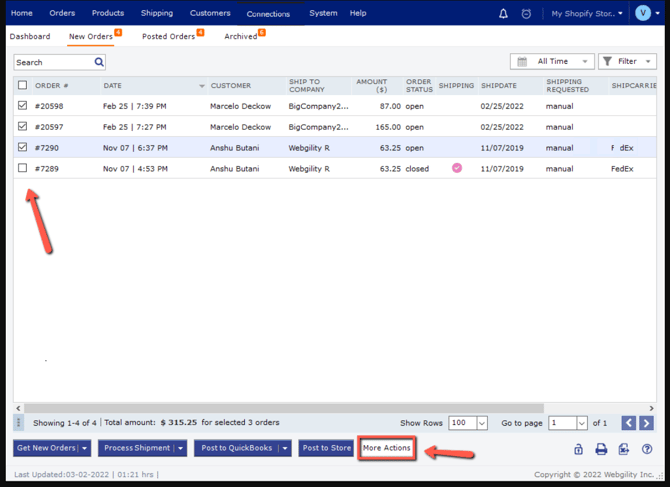
Go to the New Orders Section, select the orders for which you want to download the shipping details, and click on More Actions. Hit the Download Shipments button, and Webgility will bring the tracking details and cost information from ShipStation.
Step 4: Post Orders to Accounting Software.
Select the orders that have shipped status after downloading shipping details from ShipStation successfully and click Post to QuickBooks.
Note: If you choose to download “Shipped” status orders only from the online sales channel, then the shipping details should be downloaded with the order download and do not require an additional step of downloading shipments separately.