Steps to follow:
1. To integrate Stamps, in Webgility Desktop navigate to Connection > Shipping > Shipping Settings.

2. Select Yes for Do you ship your orders?, then select Stamps.com.
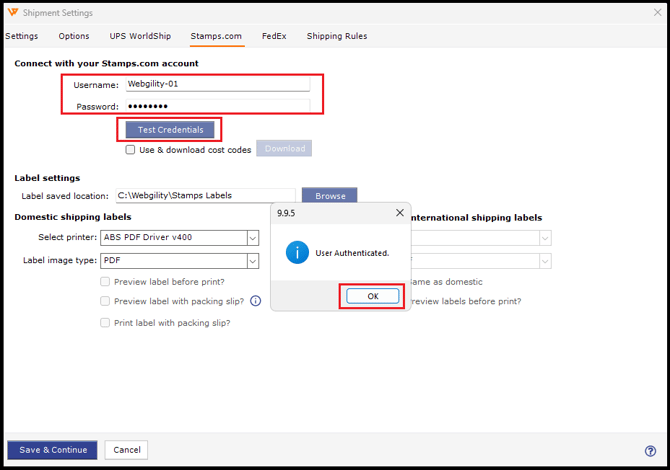
3. Enter your Stamps.com username and password, then click Test Credentials.
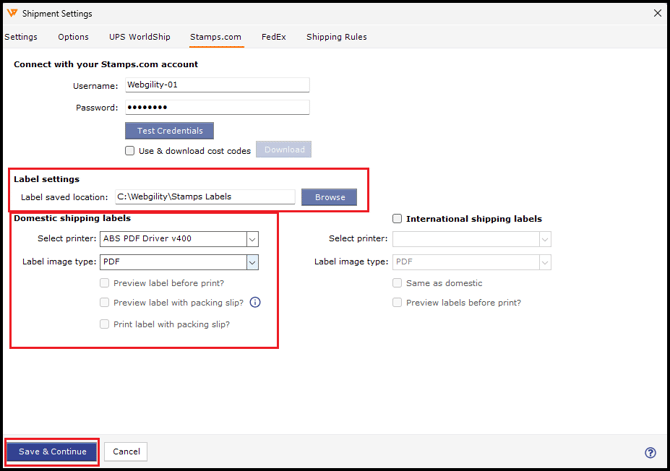
Label Settings:
4. Once the connection is successful, you need to select the folder where your labels will be saved. Click Browse
5. It is recommended that you create a new folder named Stamps Labels on any of drive that is easily accessible.
6. Select the Stamps Labels folder and click on OK.
7. Next, you need to select the printer and label the image type.
Please note that the Preview label before the print option is only available with GIF, PNG or JPG image types, not with ZPL or EPL.
8. Click on Save & Continue.
Default Settings:
9. In order to set some default rules for this shipping processor, go to the Shipping Rules tab. Click Configure for that particular shipping processor.
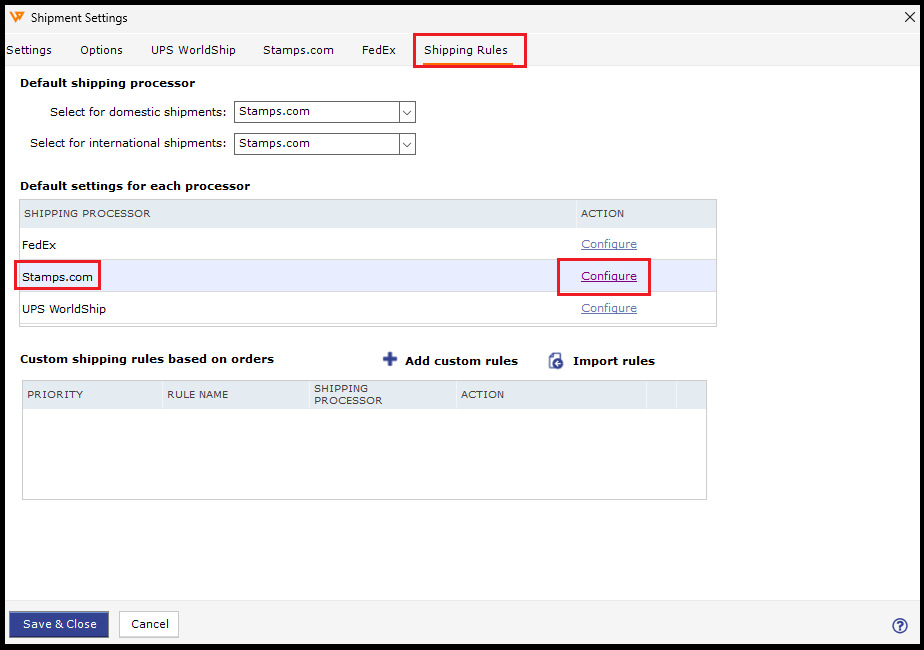
10. Configure the presets that you want to appear by default upon selection of that shipping processor for the shipping order and save.
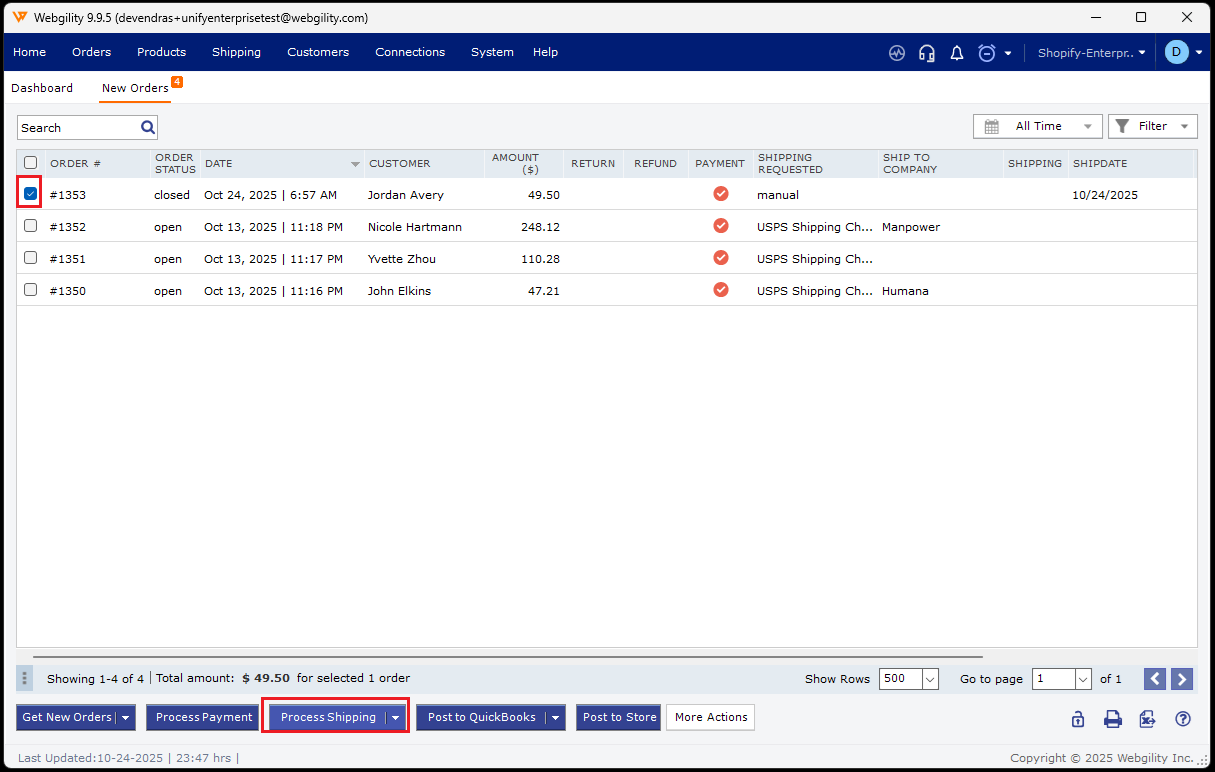
How to process Shipment:
11. Once all settings are configured, go to New Orders and click Process Shipping to generate the labels.