Overview:
If you are a QuickBooks Enterprise customer who uses the Pick, Pack, and Ship workflow, you can view the sales order status in Webgility Desktop. Webgility Desktop also downloads the shipment information and sales order status from QuickBooks, so you can view and filter the option in Webgility Desktop order screens.
Who Can Use This Feature
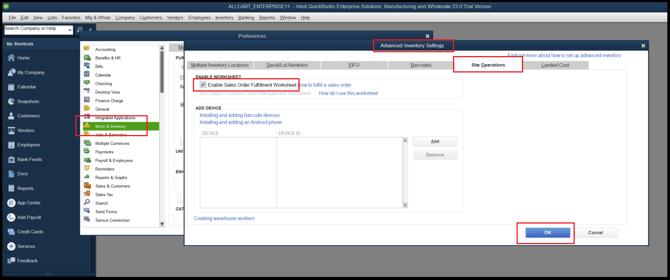
Customers who are using the Sales Order Fulfillment Worksheet feature in QuickBooks Enterprise. Typically this feature is used by high-volume sellers who are using QuickBooks warehouse and fulfillment services. You will need to enable this feature by navigating to the "Edit", "Preferences" settings in QuickBooks.
To learn more about Sales Order Fulfillment Worksheet please refer to the following article by Intuit.
Configure Webgility Desktop Transaction and Fulfillment Settings
If you’re using the Sales Order Fulfillment worksheet in QuickBooks and want to update the sales order status and fulfillment details in Webgility, you will need to set the following configuration.
1. Set Up Transaction Posting
-
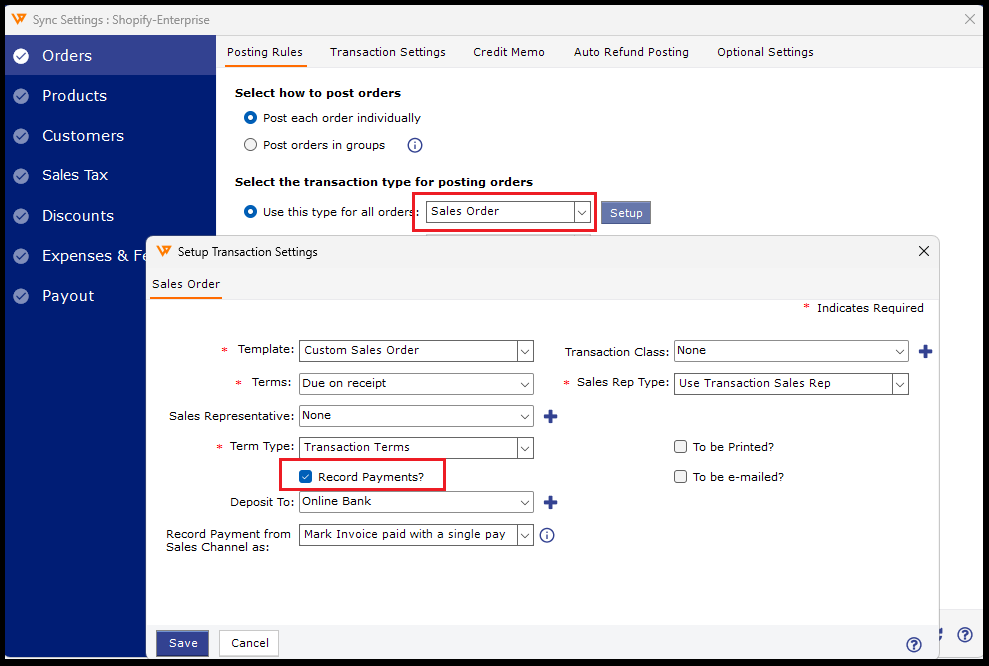
You can configure sales orders as a transaction posting option. Navigate to "Connections", "Accounting/POS/ERP", "Sync Settings".

-
Select the transaction type as sales order and select whether you want to create the payment for the sales order while creating the transaction. Usually, payment is done by e-commerce customers during the checkout process.
2. Set Up Shipping Fulfillment Settings
-
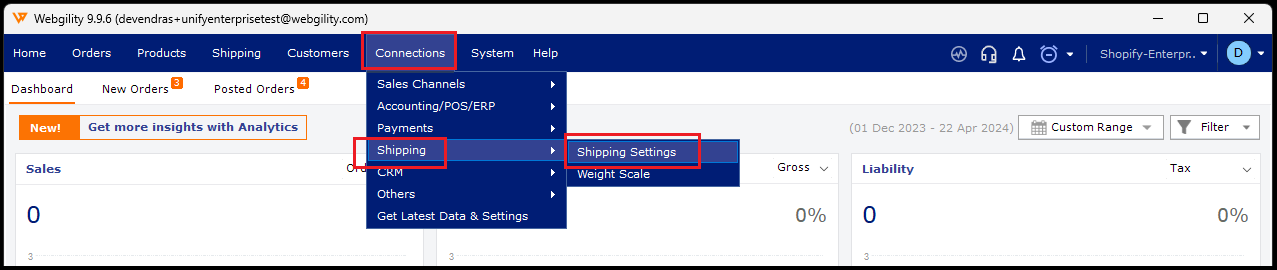
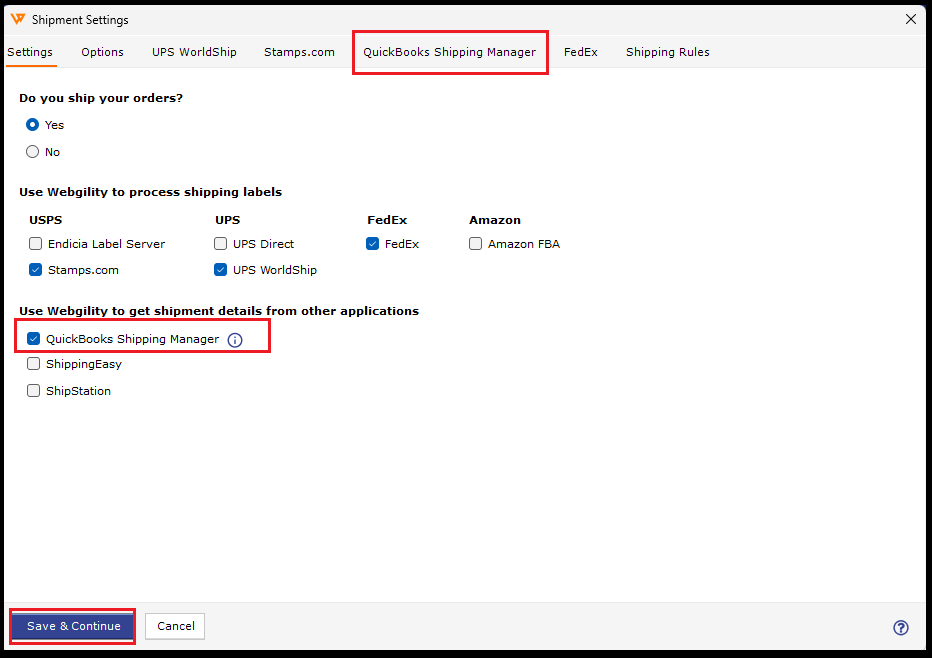
You can retrieve the sales order and shipment information from QuickBooks. Navigate to "Connections" then goto "Shipping" and click on "Shipping Settings".
-
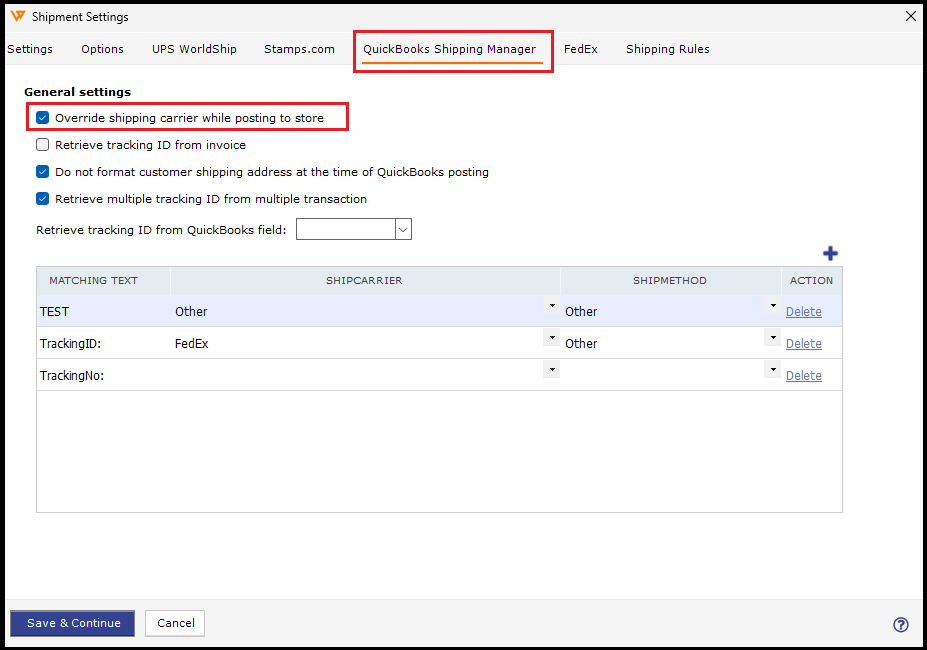
To read the sales order status and shipment details, you will need to select the QuickBooks Shipping Manager option.
-
Then select Override shipping carrier while posting to the store.
-
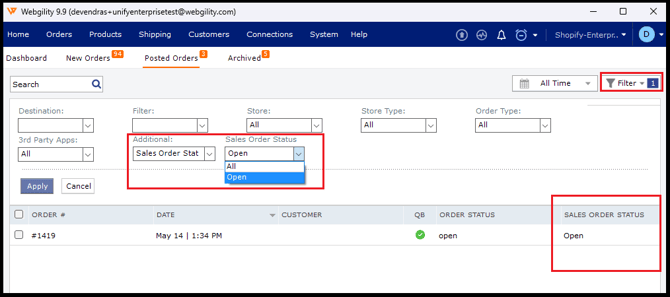
To view the Sales Order status, set the display settings on the Posted Order tab.

- Once you set the display setting, you will see the Sales Order Status column.

Note: This only works for sales order transactions.
3. Post Transactions as Sales Orders
-
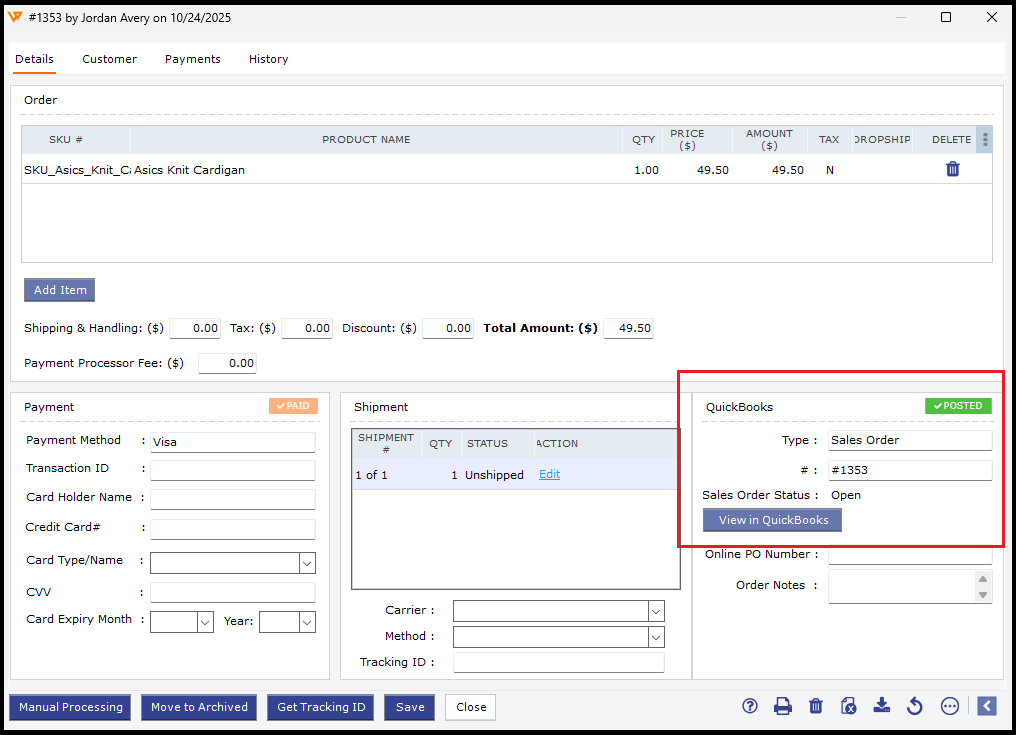
You will need to post the order as a sales order. The sales order fulfillment status will be shown as Open.
4. Fulfillment is Done by QuickBooks
-
You will need to open the Sales Order Fulfillment worksheet.
-Dec-06-2024-07-09-20-6705-PM.jpg)
-
Perform the Pick, Pack, and Ship Workflows in QuickBooks. Based on your actions the sales order status will be updated, and this updated status will be retrieved by Webgility.
-Dec-06-2024-07-09-25-6528-PM.jpg?width=611&height=265&name=rtaImage+(40)-Dec-06-2024-07-09-25-6528-PM.jpg)
-
You can use the Fulfillment Workflow in QuickBooks to generate the shipping labels.

5. Read Sales Order Status & Shipping Details
-
Use the Posted Order tab or the Order Details screen to retrieve the shipping and tracking details from QuickBooks. This process can also be automated by using the Webgility Scheduler. Webgility will retrieve the sales order status along with the shipping details. The sales order status will have various stages like Sent for Pick, Sent for Pack, Partially Shipped, and more. Webgility will retrieve the order until the sales order status is Closed or Shipped.
-4.jpg?width=572&height=413&name=rtaImage+(42)-4.jpg)
6. Search & Filter Orders Based on the Sales Order Status
-
Filter orders based on the Sales Order Status.