Steps To Connect:
1. Go to Connections go to Sales Channels then Add New Store. (If this is your first channel, you can skip this step.)
2. In the Add Store window, select WIX as the sales channel type, enter your store name, and click Continue.
3. In the next window, choose your sales channel type (sales channel or restaurant), then click Connect to WIX.
4. You’ll be redirected to the Wix login page in your browser. Select the Login option, then enter your Wix credentials (login ID/email and password) to access your account.
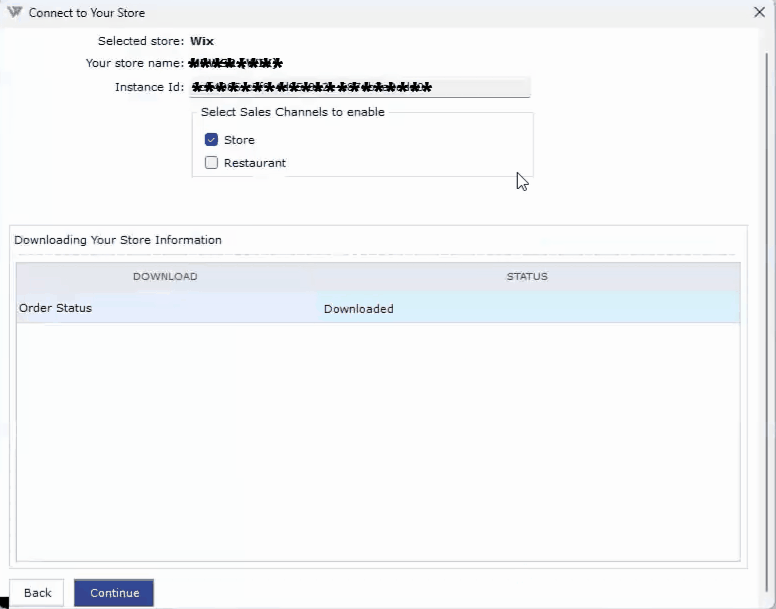
5. On the next page, authorize the connection by clicking on Agree & Add. This will automatically generate the Instance ID.
6. Return to the Webgility Desktop connection page and click Continue.
7. On the Store Address screen, enter your sales channel details, including company name, address, and contact information, then click Continue.
8. On the next screen, choose your preferred settings for when to download orders from Wix, then click Save. Once saved, Webgility Desktop will download recent orders and complete the sales channel connection process.