Overview:
In Webgility Online we call it a Transactional Accounting Method. To post every order individually as a sales receipt to QuickBooks Online, follow these recommended steps below.
Important Note: Make sure the preferred accounting method is selected as transactional.

-
Go to Sync Settings > Orders
In the Orders tab, you will set up how the individual transactions will manifest in your accounting solution. The recommended settings below are ideal for most customers.
-
Use the same settings to post all orders: Single Transaction Types
-
Post all orders as this type of transaction: Sales Receipt
-
Use this Deposit Account: Undeposited Funds or a Checking Account
-
Set the Payment Method: As on the sales channel
-
Which system should assign the Sales Receipt Number?: QuickBooks
-
Set the Sales Receipt date as: Order Date
-
Set the Ship Date as: Order Date
-
The memo should be Online Order number
-
No Default Message appears
-
Set Product Description as Item Name
-
Set the Reference Number as Transaction id
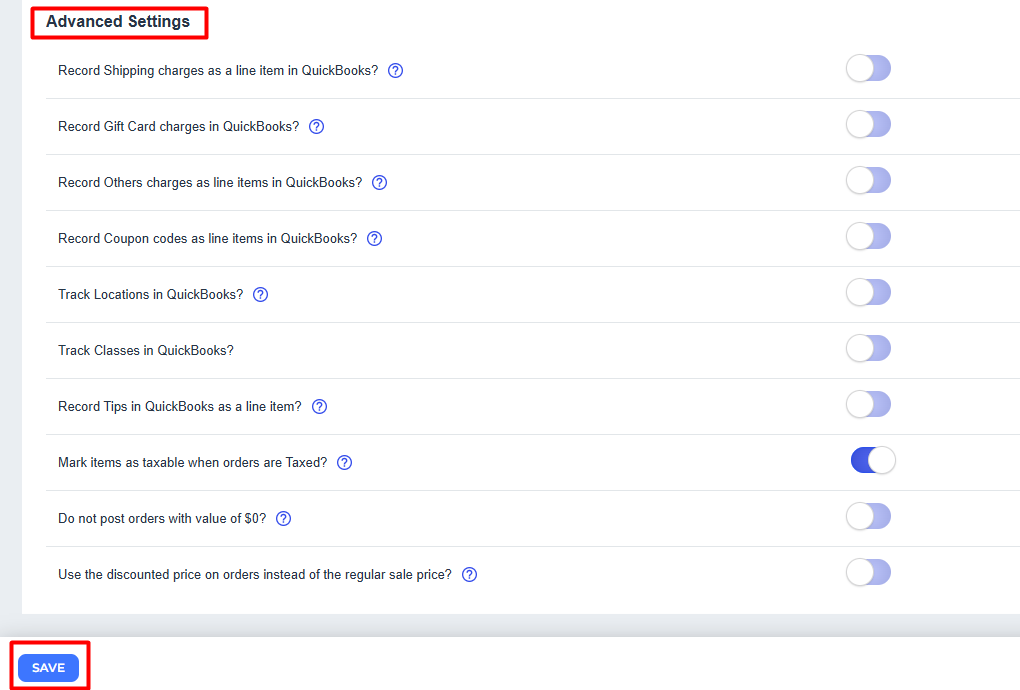
Advanced Settings:
Advanced Settings expands into several optional settings. These can be left unselected for now. Make sure you Save the settings before moving on with the configuration.
Products
Product Settings are where you determine your product matching criteria between your sales channel and QuickBooks Online. Most commonly this is done by linking the Product SKU from the sales channel to the QuickBooks Online Product Name.
There will be two outcomes of the product matching. So the further settings are mainly for the second outcome which is "If a Matching Product is not found then". This will dictate how Webgility Online will behave when a product does not match automatically with an item in QuickBooks Online while posting orders. The recommended selection is to Map the product to what it should be in QBO. This will prompt you to map it when the order is posted.

Customers:
Similar to Product Settings, Customer Settings also allows you to choose how to match the customers coming in the orders with the ones available inside QuickBooks Online. The default settings are, FirstName LastName to Customer Name, and Email to Email these settings work best for most situations.
The other settings on this page are how Webgility Online will create a new customer when there is no match to an existing one in QuickBooks Online.
After finishing the setup, Save the settings.
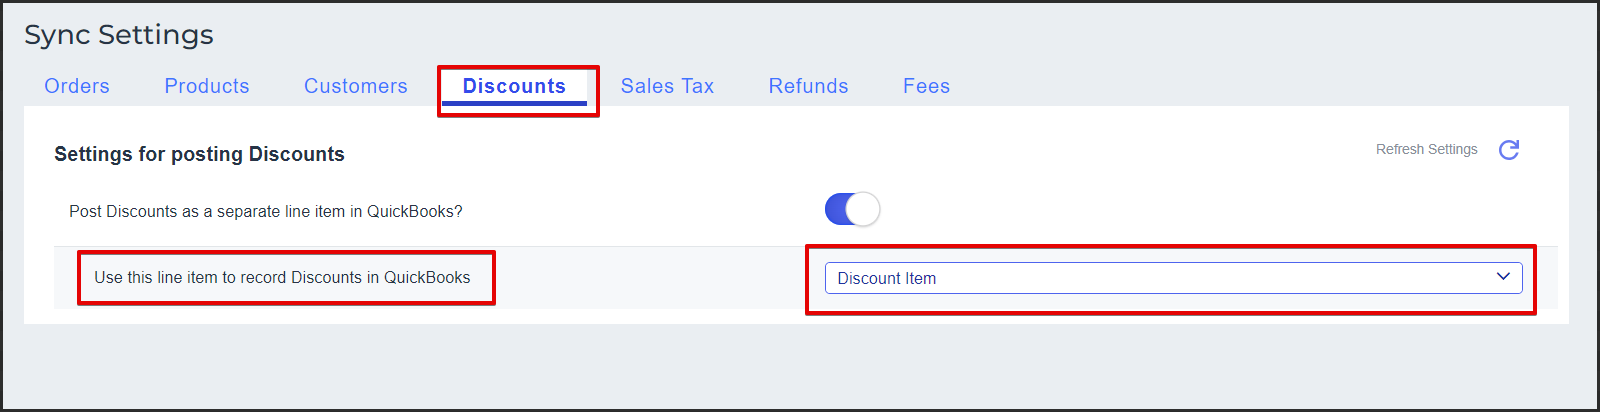
Discount:
Discount Settings allows you to select a discount line item to use when posting a discount to QuickBooks Online. Select Save to save the settings.
Sales Tax:
In the Sales Tax Settings, you will need to select the Sales Tax Item used to record your sales tax, then click Save.
Select how to record sales taxes:
-
Here you can choose whether to post the sales tax Based On Location using the option Standard Sales Tax Rate Field
-
Alternatively, you can choose the option to Record The Exact Amount Collected As A Line Item. Select the line item you want to record the sales tax in the transaction.
Refunds:
Refund settings allow you to specify how your refund transactions will manifest in QuickBooks Online. The recommended settings shown below will create a refund receipt and pay it out of the clearing account. The other selections on this screen are optional and are not usually adjusted in most cases. Save the settings when you are done.
Note: This area will not appear if your sales channel is not supported for refunds with Webgility Online.