Overview:
Selling things or partial amounts by weight, volume, or dimensions is possible with the use of the unit of measure, or UoM. According to your demands, QuickBooks Desktop Financials has built-in functionality that can be configured to work with particular unit types.
Become familiar with the features of QuickBooks Desktop UoM. here
Webgility Desktop integrates with UoM in two ways:
Depending on the UoM settings in QuickBooks Desktop, Webgility Desktop can map the UoM for items when using one of these versions of the accounting software:
-
QuickBooks Desktop Pro/Premier
-
QuickBooks Desktop Enterprise Solutions
-
QuickBooks POS
If you're using a different version of QuickBooks Desktop, you must use Webgility Desktop's settings to map the quantities for UoM using the steps below:
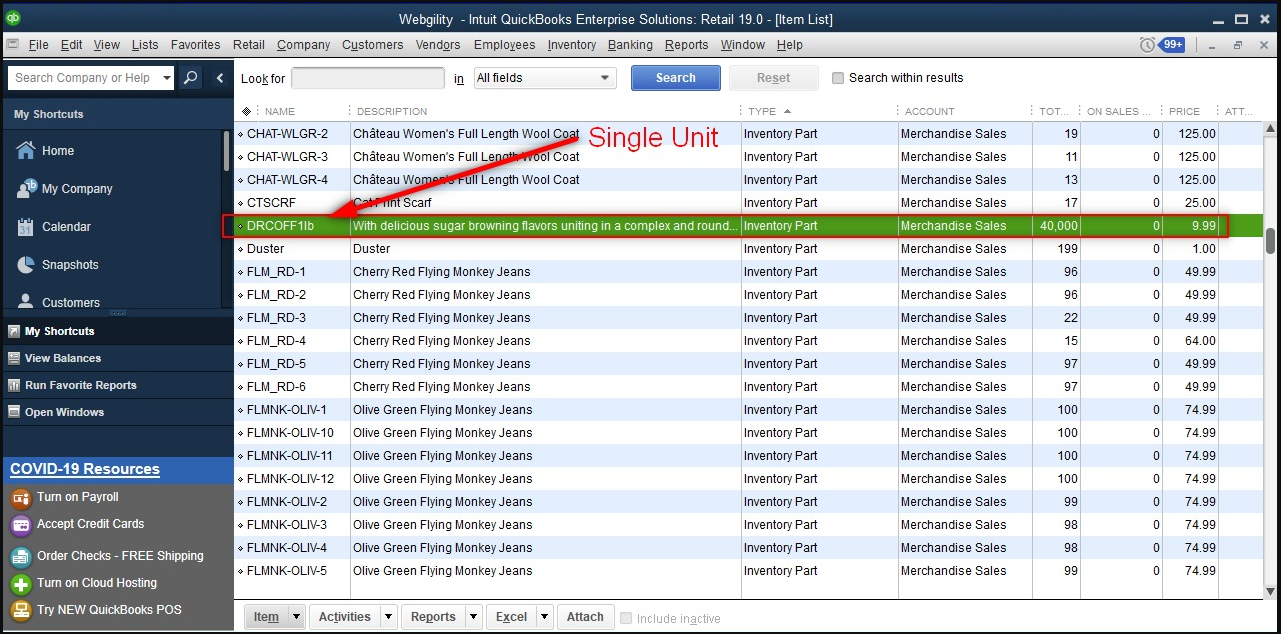
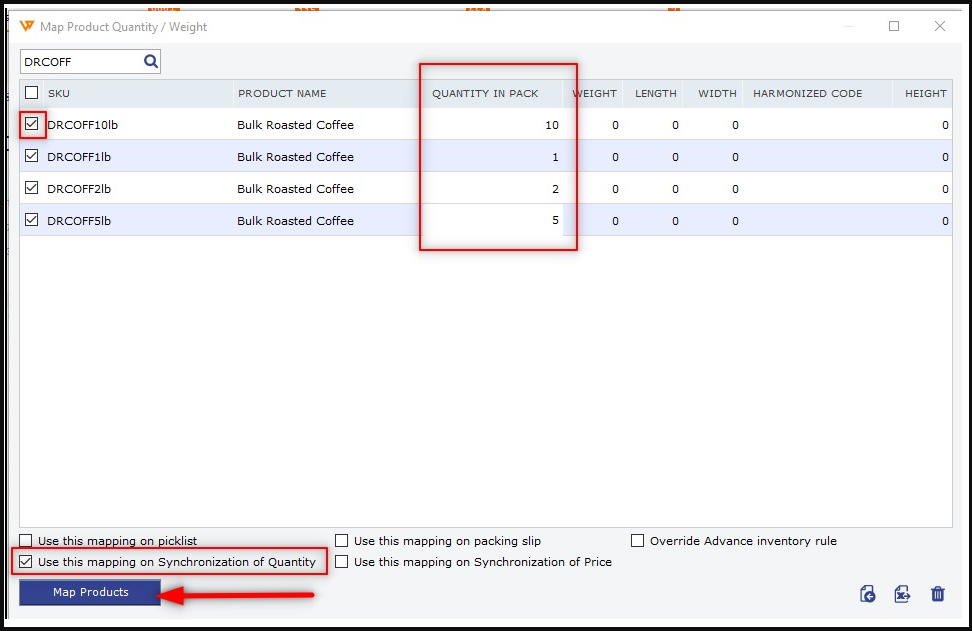
1. To set this up in Webgility Desktop you need to have your Single unit item in QuickBooks Desktop.

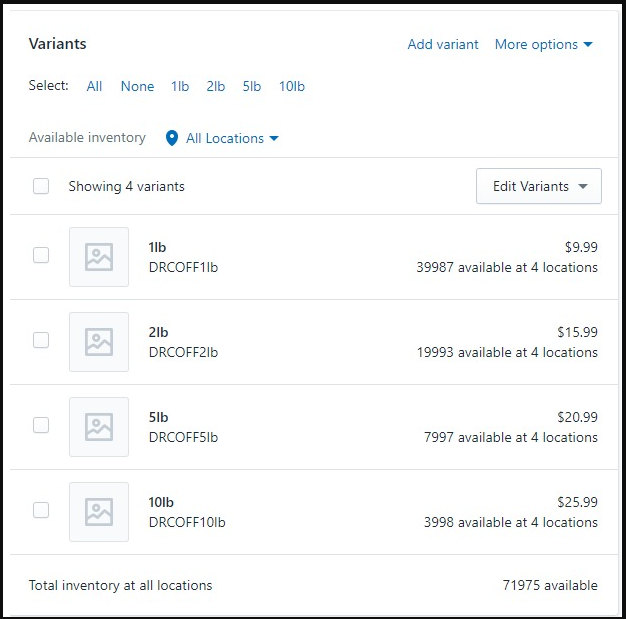
2. Make sure you have your variants set up as the quantity in packs on the online store.
In this case, there are 1lb, 2lb, 5lb, and 10lb bags.
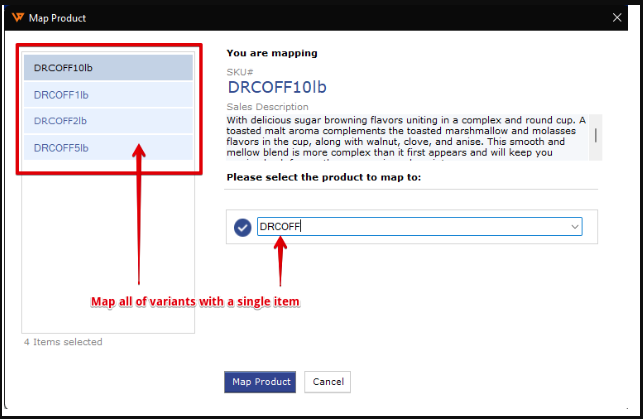
3. In Webgility Desktop each of the variants should be mapped to a single item in QuickBooks Desktop.
Learn more about mapping, here.
4. Once the product is mapped go to Products and hover the mouse over the small triangle to see the popup menu and select Quantity/Weight.
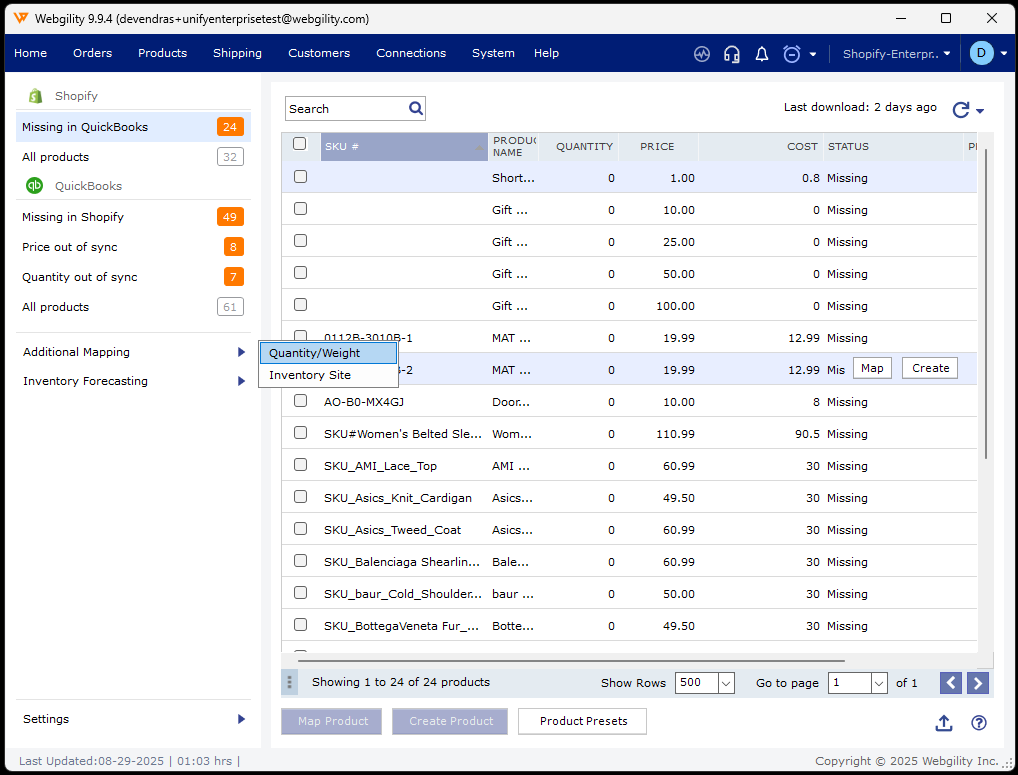
5. In the pop-up, use the search feature to look for the online Store SKU.
6. Select the boxes in the left column next to the appropriate SKU numbers.
7. Then fill in the pack quantity for each.
8. Lastly, once you are done click Map Products in the lower left to save the mapping.
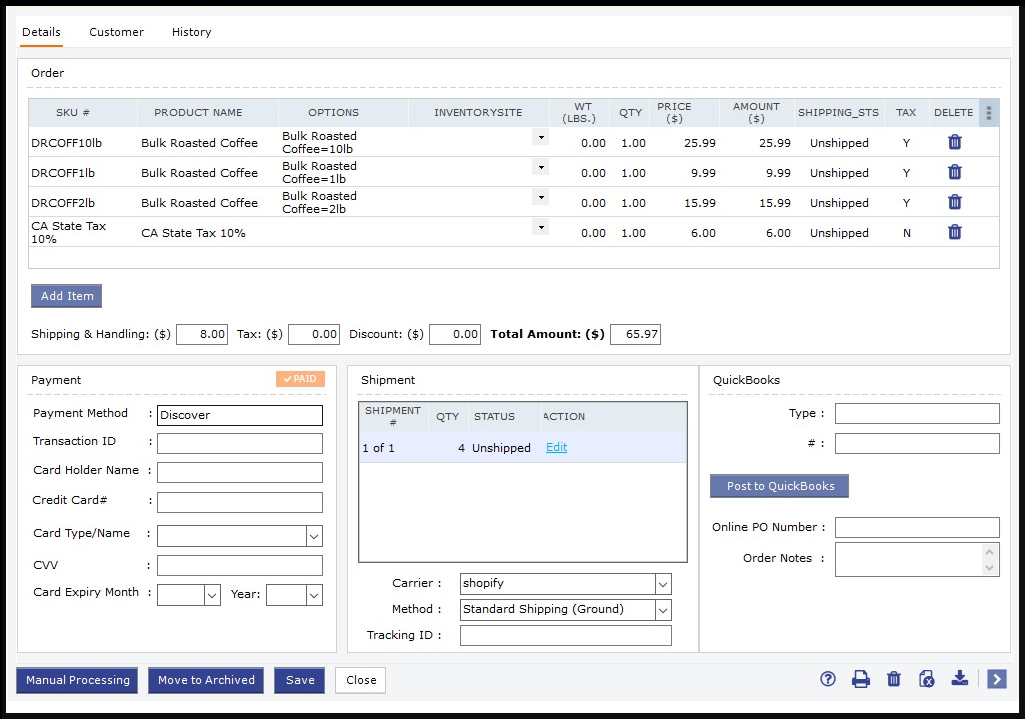
Below is an example of how the above order will look after posting to QuickBooks Desktop:
