Recommended Journal Entry Settings for Webgility Online
This help article provides a comprehensive guide to Webgility Online user for configuring and managing recommended journal entry settings in Webgility Online. It explains how to map income, expenses, taxes, and payment gateways to QuickBooks, automate deposits, and streamline the tracking of orders, refunds, and fees. Following this setup ensures accurate, detailed, and efficient accounting and reporting for e-commerce businesses.
Note 1: This article uses Shopify channel as example
What is in a Journal Entry?
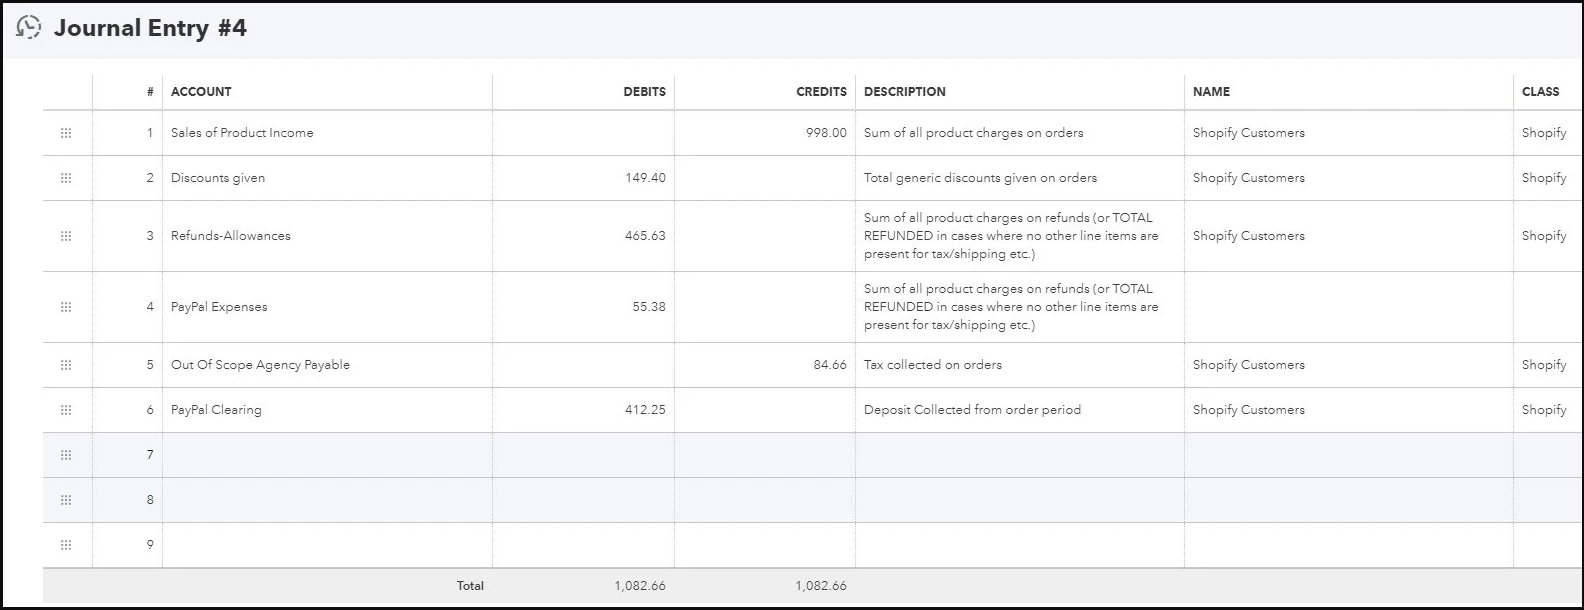
First, let’s look at what typically is included in a journal entry by a bookkeeper or accountant for an e-commerce business. Manually collecting this information usually requires aggregating all parts of a sales channel's transactions over a defined period of time. Transactions that happen online between a customer and a merchant may include:
-
Orders: Sale which includes the sales price of the product sold, shipping charges, tax, discounts given, gift card redemptions, and more.
-
Refunds: Reversal of a sale that may include one or all of the above charges made during an order.
-
Expenses: Transactions from online sales channels come in subsets, depending on the time in which an expense is incurred or processed by the service.
-
Payment Gateway Fees - Any online transaction that passes a credit card through a secure service will typically incur a payment gateway fee. These are processed at the same time that an order is placed, or a refund is processed. These do not stand alone as transactions.
-
Shipment Fees - Outside of the sale of digital goods or service-based businesses, physical products need to ship. Shipment incurs a cost separate from the original order transaction. Shipment fees for the label and service are often collected from an invoice from the shipping provider and batched into a journal as an expense for the same time period as the shipments were processed.
-
Settlement Fees - Marketplaces like Amazon, eBay, or Etsy provide a report-based settlement. These marketplaces operate differently than a standard payment gateway , and their fees are incurred and processed differently. Although a customer's payment is processed and fees are preliminarily determined early on in the transaction's lifecycle, both the customer's payment and your fee as a seller are not remitted or settled until the marketplace’s clearing period. For Amazon, this is typically every two weeks. Therefore, these marketplaces make the final report available at the time of transfer to your seller bank account. At this time, all finalized fees for the period are available and can be journaled as expenses to their appropriate categories.
-
Webgility Online uses the same information from orders, refunds, and expense transactions to allow you to assign these income, expense, cost of goods sold, tax liability, and deposit accounts for an automated daily or weekly sync.
By providing Webgility Online with the mappings to your chart of accounts, we allow for the highest degree of detail you can achieve while removing the manual math involved in summarizing the same data.
Account Settings

Your account settings reflect the general accounts used to record a journal entry.
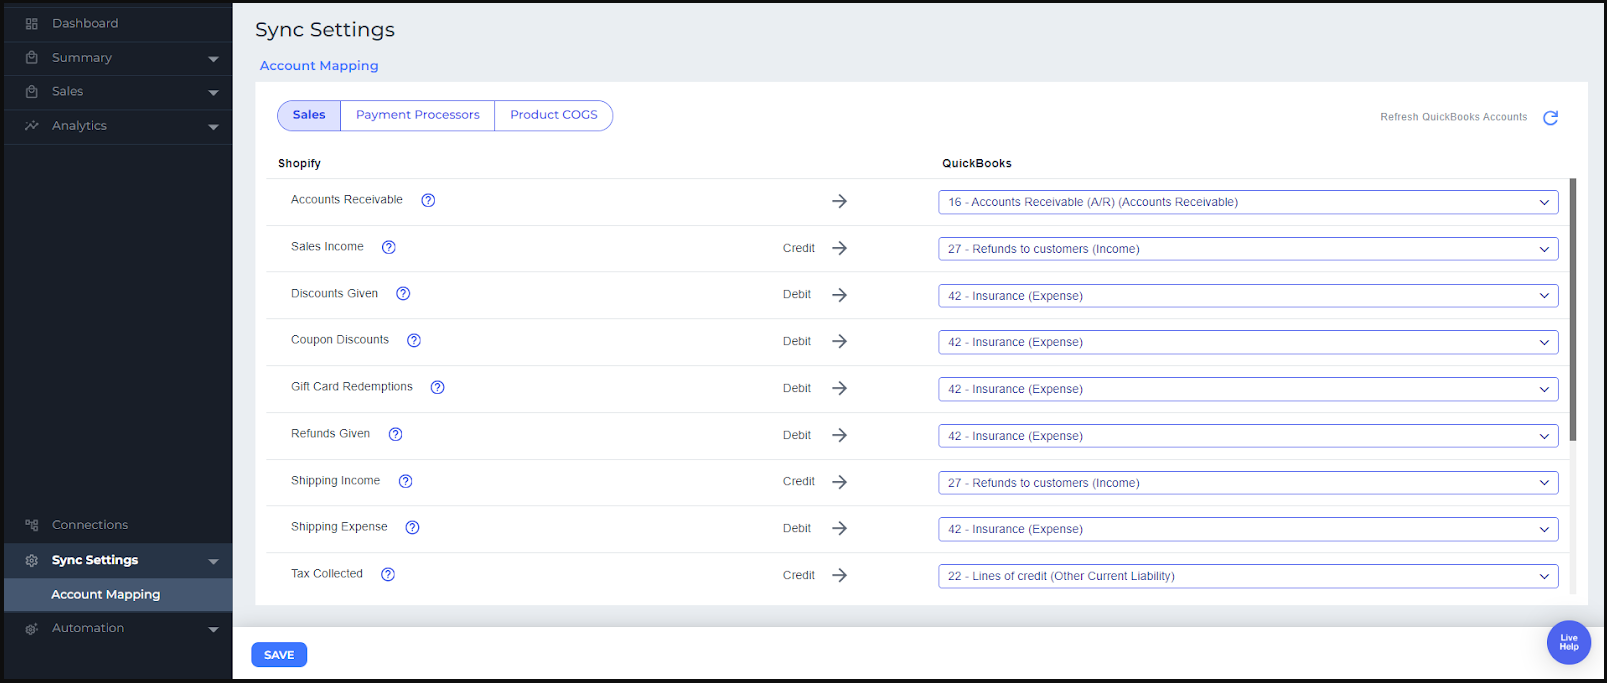
1. Select income, expense, and the cost of goods sold accounts that are already in your connected QuickBooks file, or click + to create an account. You can also always manually create an account in QuickBooks and click Refresh Settings.
2. The designation of Credit and Debit gives you a picture of how these charges typically appear in a journal entry in the event of a positive deposit.
See corresponding definitions for each set of mappable accounts.
Product or Sales Income: Webgility Online will combine all product charges detected on your orders during the sales period you set as daily, weekly, or monthly batches.
Discounts Given: The total of all order-level discounts detected that were given on orders during the period. These typically include direct discounts applied to the order, not sale item prices or other sales channel-level discounts.
Coupon Discounts: The sum total of all coupon applied discounts. This is only available for some sales channels, but in the event that a customer applies a coupon-based discount to their order, these discounts can be collected separately from generic order-level discounts.
Customer Redemptions: Sum of gift cards, gift certificates, or other sales channel credit redeemed in customer purchases.
Refunds Given: Total refunded product charges and miscellaneous refund charges detected and processed during a set period. Refunded tax, shipping, and fees will be applied to appropriate accounts where available. But, in the event that a refund is processed without detailed information regarding the distribution, Webgility Online will record the total refund given to this account.
Shipping Income: The sum total of shipping charges that customers paid on orders during the period.
Shipping Expense: The sum total of shipping charges the seller paid to process shipments related to these orders. This information is not available directly from most sales channels like other order details which happen pre-shipment. Connect a ShipStation or ShippingEasy account to Webgility Online, and the related shipment fees will be synced along with orders to this expense account.
Tax Collected: Webgility Online will sum the total tax collected for orders in the batch to this account. Choose your tax liability account or create a new account from the menu.
Note 2: We recommend setting all accounts, even if your sales channel doesn’t handle or process one of these types of charges. In the event that something is updated, or changed at the seller's end or sales channel's end, these selections can be set to be used as needed and won’t be used until there is a charge available for that account.
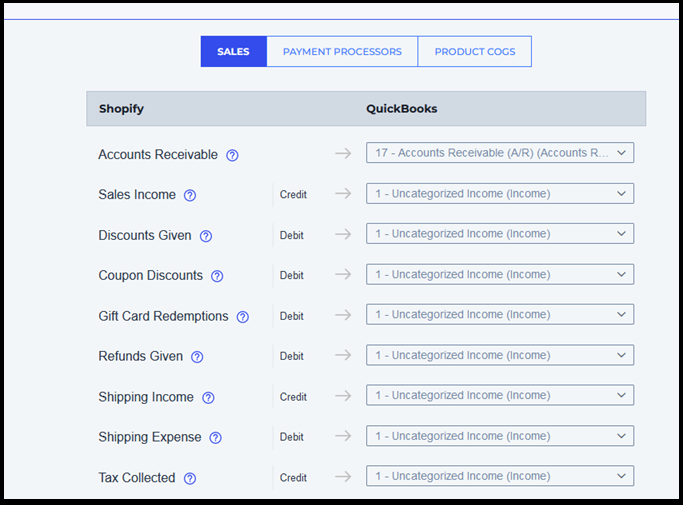
When complete, it will look similar to this:

3. Click Save, then move to Payment Settings. Here is where you will manage the most important part of the journal entry’s creation - deposit by the gateway.
Payment Settings
To understand how deposits will be created, you need to reference what is in the journal entry. Online sales channels can process orders in a multitude of ways through countless payment gateways. However, when the sale is completed through a sales channel or marketplace, the sale always has an order, and the order always has a payment method.
The payment method for an order can dictate the processing method of an order even when its payment gateway information is not attached to the order.
For example, a Shopify sale channel uses both Shopify Payments and PayPal to process different payment events. A customer may check out with a Visa card through Shopify Payments, and then hours later process a second order with the same Visa card through PayPal. The two different orders will possess different payment methods when downloaded to Webgility Online to identify themselves.
Order #1: Payment Method - Shopify_Payments
Order #2: Payment Method - paypal_express
Even though the same Visa card was used in two separate transactions, the payments will be recorded, processed, and deposited by different institutions. Now that you understand how payment methods can be correlated to payment gateways, learn how to set up split deposits.

Settlement Frequency: Webgility Online will group all transactions available for the day or week depending on your preference for deposit and reconciliation.
Note: For Amazon Sales Channels, deposit and expense accounts will be replaced by Amazon Expense and Fees settings for related settlement report accounts. All payments are settled by a single gateway with Amazon.
Payment Deposit and Payment Expense Accounts: A Payment Deposit account dictates the bank or other current asset account that will be used for a deposit for the given payment gateway when batching transactions.
The Payment Expense account for the payment gateway gateway will only be used in the event that the gateway is connected to and feeding Webgility Online transaction fees. You can check payment gatewaysconnected under Connections. If orders, refunds, and fees are available for the payment gateway for a given period, the expense account for the gateway will contain these aggregated gateway fees. Currently, PayPal, Stripe, Square, and Shopify are supported.
The bottom half of the page represents your Payment gateways in this sales channel and the deposits that will be created for transactions available that have been processed by those gateways. All available payment methods will be downloaded from your sales channel and displayed here.
A default payment gateway will always be added first. If your sales channel only uses a single payment gateway and does not connect to Webgility Online, leave all of your payment methods in this category and a single deposit will be created.
If you have connected a supported payment gateway application, those payment gateways will be automatically displayed and are ready to have payment methods grouped for deposit.

1. Drag and drop payment methods to the appropriate gateway. All orders with these payment methods will be grouped by their gateway into deposits in the above accounts which are available at the frequency of your choosing.
2. Finally, if your sales channel supports a payment gateway that cannot connect to Webgility Online, we can still help separate your deposits so that the gateway fees can be more easily removed from the deposit later. To add a custom payment gateway, click + Add New and enter a name for your gateway. This will give you new deposit and expense accounts, and a new category to group payment methods for deposit.

Above, you can see Authorize.net has been added as a payment gateway with credit card methods processed through it. Webgility Online will not capture the fees with those transactions, but the order revenue and refund information will be processed to a separate account where those fees can be easily removed during reconciliation.
Once you’ve grouped your payment methods, click Save. Next, we will continue to Optional settings.
Note: Some investigation may be required to understand your sales channel’s payment methods if you are unsure of them. One of the easiest ways to do this is directly within Webgility Online. Navigate to Sales > Orders and select various entries to reveal the details so you can see the payment methods being used.
Advanced Settings
These settings for your journal provide a few final pieces of information and reporting.

Class Tracking: Apply a class to the entire journal in QuickBooks. This is a great way to identify journals from different sales channels that are going through the same payment gateway .
Customer: Assign a customer to the journal entry. Sometimes used in place of class tracking. For example, Shopify Customer.
Tax Agency Vendor: If you assigned a tax liability account, you can also assign a specific vendor to that line here.
Send report summary to An end-of-day or end-of-week summary will be sent to you based on your accounting posting preferences that include activity for the period processed by Webgility Online and notifications of any error that occurs in processing.
Once you save your settings, you can see your settlements and start syncing them to accounting.
Review & Sync Settlements
On the left navigation, click Settlements to see a list of grouped transactions that are based on the preferences configured.

Settlements are your groups of transactions - orders, refunds, and any available fees, for the period.
Pending Settlements: Days or weeks that have been closed and are not yet synced, but are ready to be created as a journal entry.
Period Not Closed Settlements: Currently active periods. See the progress of these periods as orders are processed, but you can only sync once the period closes.
Completed Settlements: Journal entries that have been successfully synced. If you tested something and want to reverse a journal entry, you can unsync here. After changing settings, transactions can be synced again from Pending.
Orders, refunds, and shipping expenses will also appear here. View these tabs to see detailed information on all individual transactions that Webgility Online has downloaded to compile the journal. These can all be exported from each individual page for detailed record-keeping.

To sync a settlement as a journal entry, select one or more batches, and click Sync. When you are done, check the completed tab for journal entry # and any other information that can be verified in the corresponding QuickBooks entry.

If you have configured multiple payment gateways, a single date, or a range of orders that can be processed into multiple journal entries - Webgility Online can help you separate and deposit as much income and expense information as is available for the gateway for the period. Any final fees or changes can be made with a manual journal in QuickBooks to complete reconciliation now that the base sale information has been entered.
We are continuing to add more payment sources and fee sources for journal entries in the future so please keep sending your feedback, and happy syncing.