Overview:
Transferring products from QuickBooks Point of Sale to BigCommerce to move product variants into BigCommerce takes a few more steps than normal product transferring.
Let’s look at a Shirt in QuickBooks POS as an example. This product has different sizes - M, L, XL and XXL, and each size has the same item name but a different quantity and item number.

Go into Webgility Desktop to begin transferring these attributes into BigCommerce.
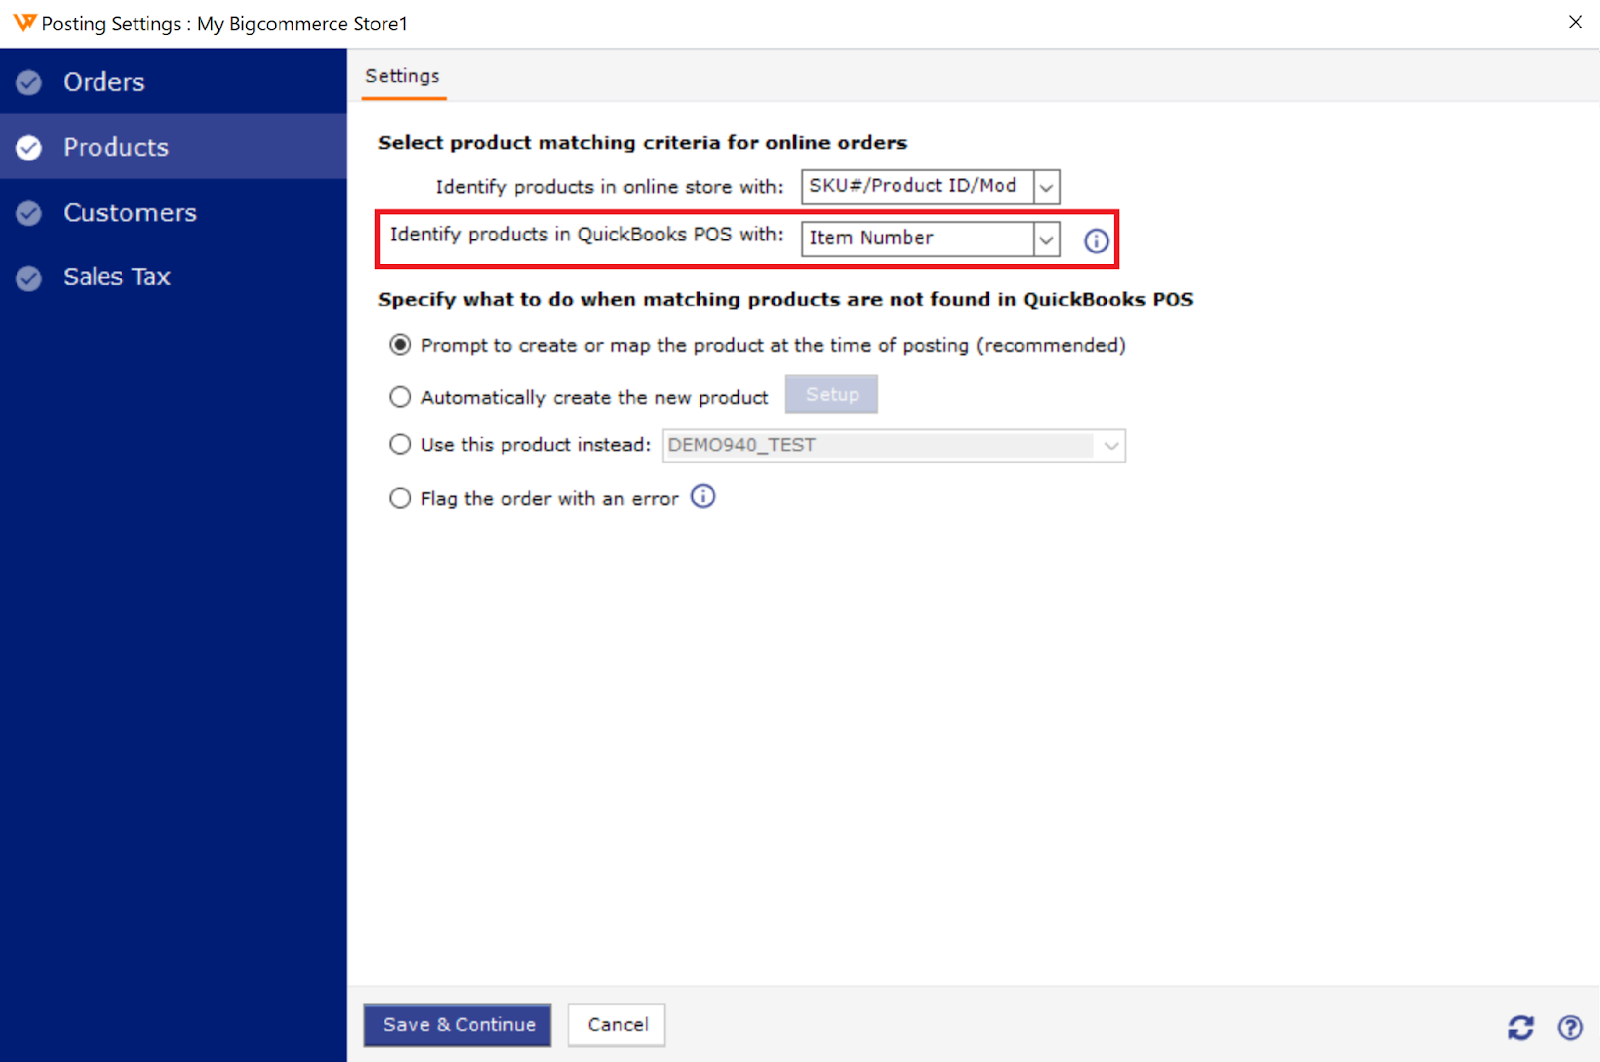
1. Go to the store configuration and select the products screen and a matching data field. This should be either the Item number or ALU in POS. This will become the option SKU in BigCommerce.
2. While in the Webgility Desktop dashboard, navigate to Products > Export BigCommerce Options.
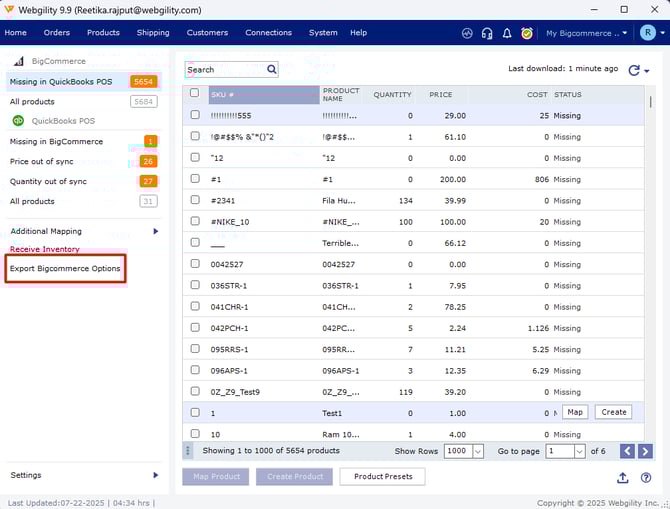
3. Search for the item you want to transfer and define your settings for Free Shipping & Option. Set the option name as to Size, because these sizes define this product in POS.
Note: don't forget to track inventory at the option level.

4. Click Ready to Export and the items will be marked Ready to transfer in the status area.

5. If you have additional attributes to transfer, you can search and then select and configure the settings. Click Ready to Export, and it will be added as data within the export file. When all of your attributes are marked Ready to transfer, click Export products and a CSV file will be generated.

Note: You should put this file in a very accessible place for easy retrieval, because you will need it in the next step.
6. Navigate to BigCommerce to import this CSV file.
7. In the BigCommerce interface, select Products > Import Products.

8. Be sure to select the option to Bulk edit and then scroll down to import the file. Browse for the CSV file you created earlier.

9. Click Next > Start importing, then, and wait for BigCommerce to complete the import.

10. As soon as the import is complete, click View Updated Products.

11. Click the product name and select Variations. Then navigate to the SKUs area to view the newly created options.


12. Next, you need a new download of products in Webgility Desktop. Navigate to Products , then re-download your products from Sales channel & QuickBooks POS.
Download Items from Scratch from Both QuickBooks & Sales Channel
13. This allows Webgility Desktop to recognize these attributes as the same in both BigCommerce and QuickBooks POS.
14. You now have your base product, which sets the price, and its options, including the quantity. If you need to sync the price and/or quantity, go to Synchronize products to smoothly sync the option price or quantity if they are out of sync.