Overview:
With inventory automation, you can keep multiple sales channels in sync without overselling by providing buffer zones for higher volume channels. You can also adjust the buffer on an item-by-item basis.
Just so you know, to use this feature, you must have at least two stores connected to Webgility Desktop.
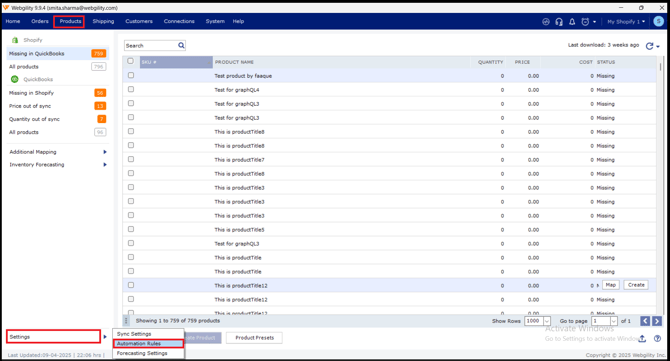
1. To get started, in Webgility Desktop navigate to Products > Settings > Automation Rules.
2. Within the window for the automation rules, there are two areas: Store Settings and Item Settings.
Store Settings
Here, you will be able to set criteria for how Quantity and Price will be calculated when synchronizing QuickBooks to each Sales Channel that you have connected and would like sync rules applied to.
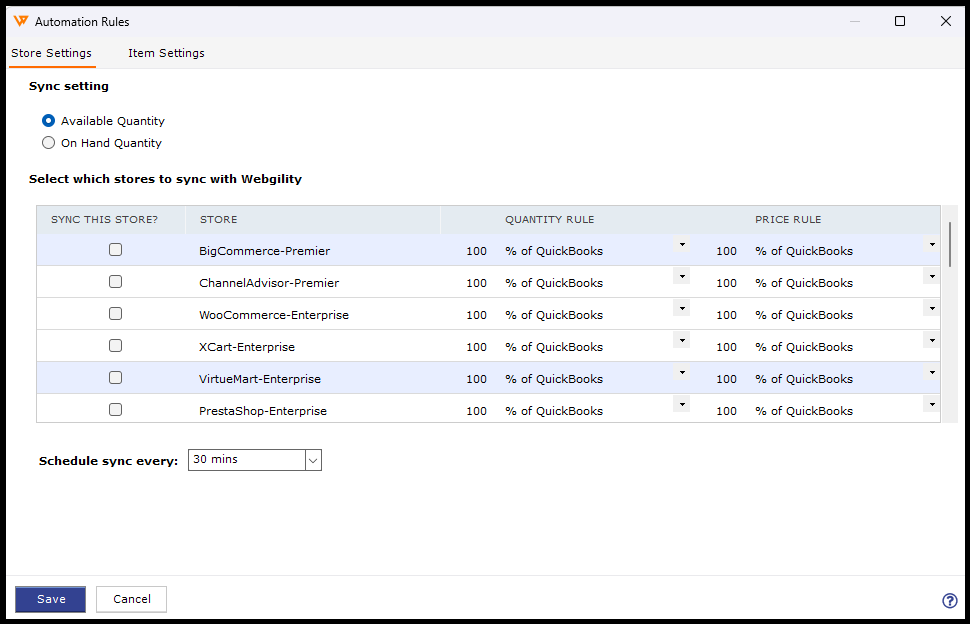
To enable certain channels for automation sync, you must select the box for each channel in the left-most column. Then, you can implement your settings for each channel and decide how you would like Webgility Desktop to calculate each data type.
Store Settings Example
So, what can be done for the Quantity Rule? Below, stores have been set up to synchronize quantity.
1. For each of these channels, a value of 1 has been entered in the quantity field and then less than QuickBooks has been selected from the drop-down menu.
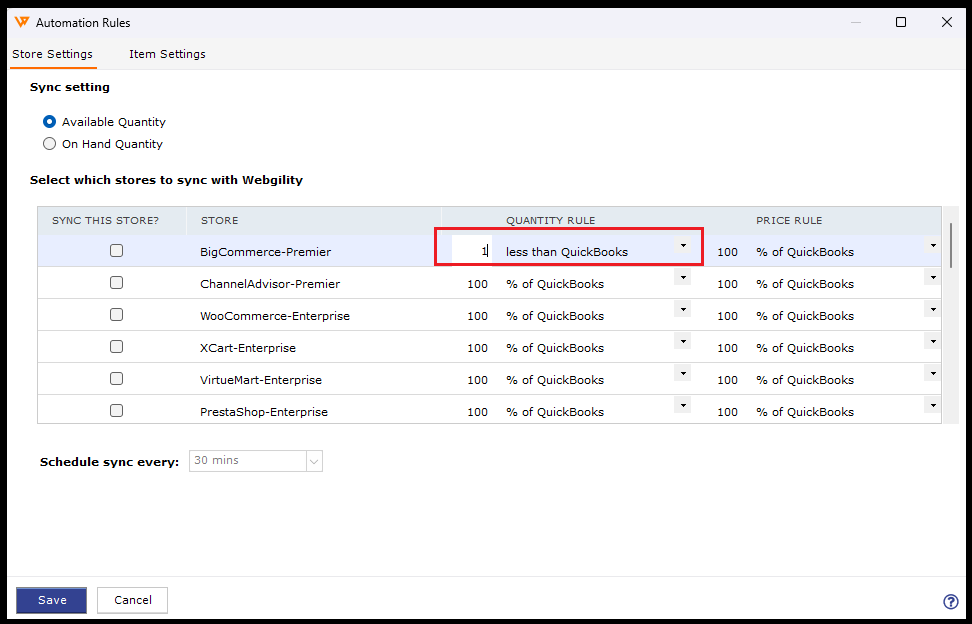
2. When you use this rule, the Multi-Channel sync tool is instructed to sync 1 less than the quantity in QuickBooks as the quantity to the sales channel.
3. For example, if SKU123 within QuickBooks has a total quantity of 100, then Webgility Desktop will synchronize 99 to the store. The purpose of this is to be notified when a product’s inventory is almost completely depleted.
4. Looking at that same product, almost all of the inventory has been sold, and QuickBooks is left with only 1. Because the sync rule is set to calculate 1 less than QuickBooks, Webgility Desktop will synchronize a quantity of 0 to the channel. This would effectively make that product in the sales channel unavailable for purchase, thus ensuring that the item is not oversold and providing more time to replenish inventory.
5. This small buffer zone not only grants extra time to replenish but also covers the potential delay between sales channels synchronizing inventory. Being able to set this rule on a sales channel level can allow for limiting overselling on your channels that are most important.
6. For example, most marketplaces like Amazon carry penalties for delayed fulfillment. With this multichannel inventory sync, you can specifically give Amazon a lower inventory than you show in QuickBooks compared to your other sales channels, where overselling may not be as big a concern because you have more flexibility for fulfillment requirements.
Item Settings
The item settings are specific to the channel you are currently working in. All of the above options from the store settings will also apply to the item setting, but here it is on an item-by-item basis instead of channel-wide.
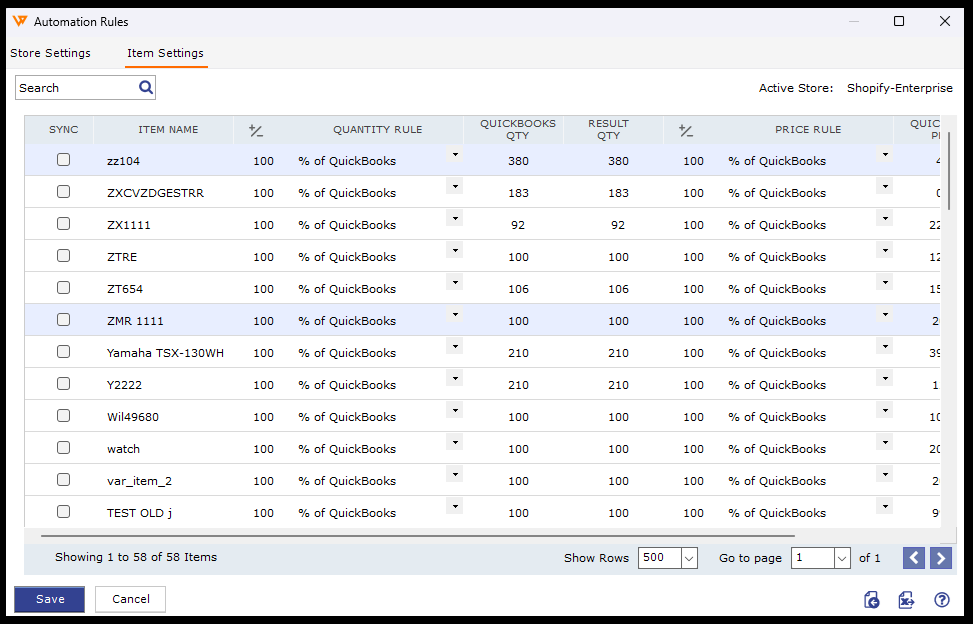
Item Level Quantity Adjustments
The advantage of the item-level view is the direct manipulation of the price and/or quantity of each item. You have several options for modifying the value, and each has a specific use case. Keep in mind that when you adjust the numbers here, it does not affect your other sales channels.

-
% of QuickBooks: Use this option to set the number available to a set percentage of what QuickBooks has, rounded down. This is recommended to be less than 100% to have items removed from the listing when they approach zero quantity.
-
Less than QuickBooks: This option sets the number as a static amount less than what QuickBooks currently shows as available. This is recommended to have set to a value that is about half your reorder point on all but one of your channels. This will allow fast-moving items to delist when they are close to selling out, while remaining available in one store. This reduces the possibility of double-selling your last item to almost zero.
-
More than QuickBooks: This option allows you to have a higher quantity than what QuickBooks has available. This is only recommended for manufacturers or for items that can be quickly restocked, as it may lead to overselling if used incorrectly.
-
Equal to: This option will set the quantity of an item back to a specific number every time it syncs. This is great for non-inventory items when a marketplace requires a quantity, or when reaching your selling limits as a new seller in a marketplace.
-
Less than or Equal to QuickBooks: This setting is a combination of the equal to and less than in QuickBooks. When you set a number here, Webgility Desktop will set the item count to this number unless there are currently less than that in QuickBooks. For example, if you set it to 10 for a widget, as long as you have more than 10 in QuickBooks, the item will keep being reset to 10 every time it syncs. However, as soon as it drops to 9 or less, it will sync the actual value.
Item-level Price Adjustments
Prices can be adjusted at an item level, like the quantities.
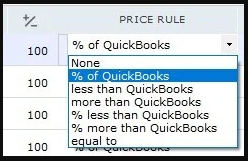
The pricing rules work similarly, but are mostly used in one of two ways:
-
Add to the price to reflect added costs from marketplaces and payment processors.
-
Reduce the price temporarily for sales or clearance.
Keep in mind that the price and quantity changes do not affect the actual information in QuickBooks. If you adjust the number in QuickBooks, Webgility Desktop will recalculate the quantity or price of the item based on the rules you have set.