Overview
QuickBooks Enterprise offers an Advanced Inventory feature that allows businesses to manage products across multiple inventory sites or locations. Enabling this option helps track stock movement, manage orders, and maintain accurate quantities for each site.
Steps:
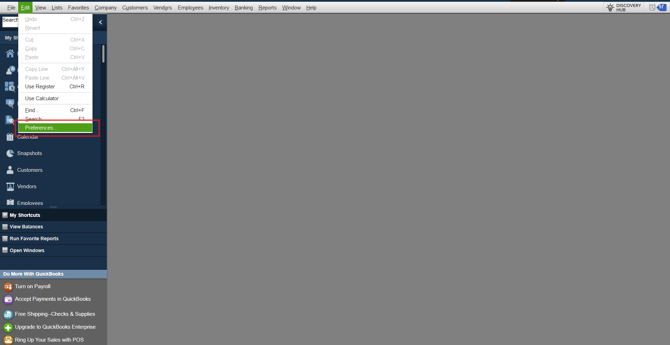
1. Open QuickBooks Enterprise. Go to the Edit menu and select Preferences.
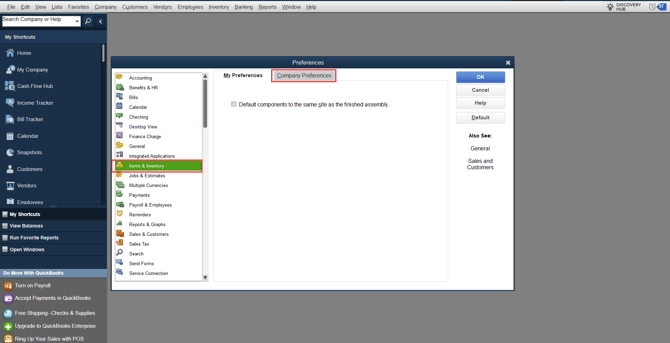
2. Once there, go to Items & Inventory > Company Preferences > Advanced Inventory Settings.

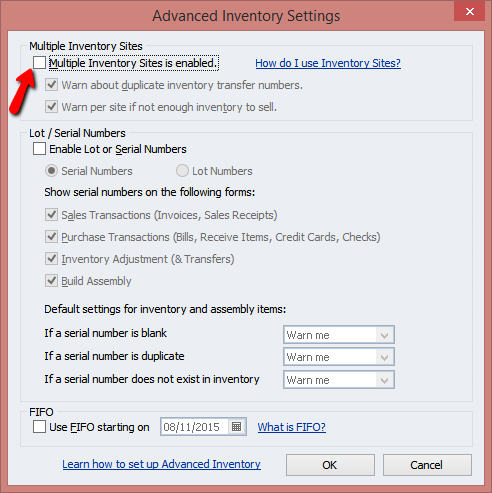
3. Under the Advanced Inventory Settings, select Multiple Inventory Sites is enabled. Click OK.
4. Click OK, again.

5. To download the advance inventory data in Webgility Desktop, login into Quickbooks company file with Admin user, then navigate to Webgility Desktop and refresh latest accounting data. Follow the steps in this helpful article on: How to Download the Latest Accounting Data from Scratch - Webgility Desktop