Overview
In this comprehensive guide, we will walk you through the step-by-step process of connecting your Volusion sales channel with the Webgility Desktop application. By following these instructions, you will be able to seamlessly integrate your sales channel's data and streamline your e-commerce operations.
Steps to add Volusion sales channel:
1). Launch your Webgility Desktop application
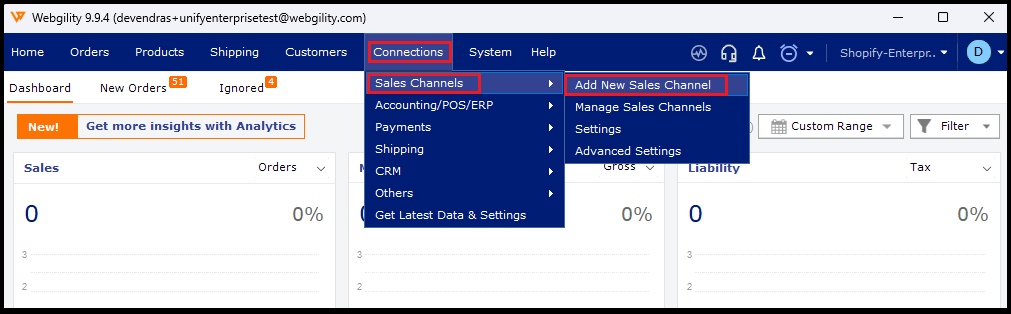
2). Navigate to Connections > Sales Channels > Add New Sales Channel.
Note: If this is the first channel you are adding, you do not need to do this step.
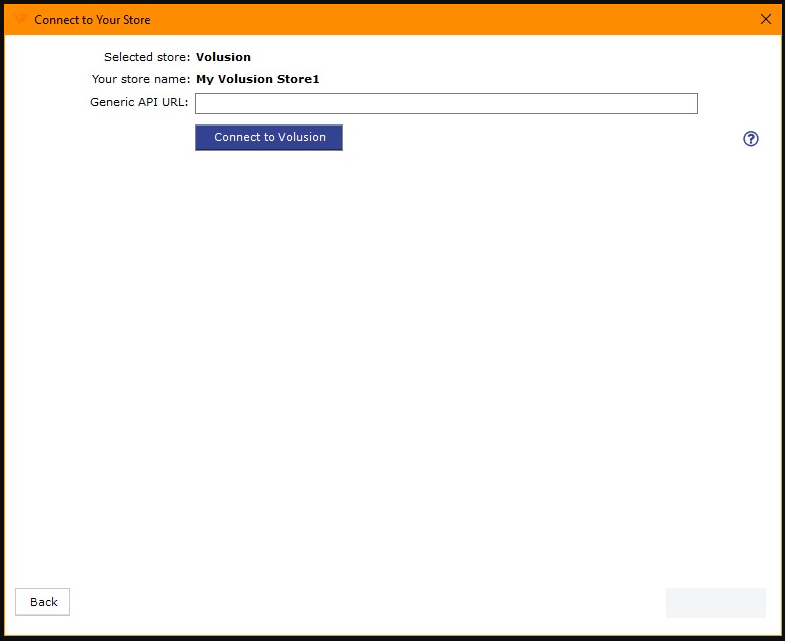
3). Select Volusion as the sales channel type and provide a name for your sales channel. Then click Continue.

4). In the following window, Webgility Desktop will prompt you to enter the Generic API URL for your Volusion sales channel.
5). To get the Generic API URL, log in to your Volusion sales channel using your admin account.
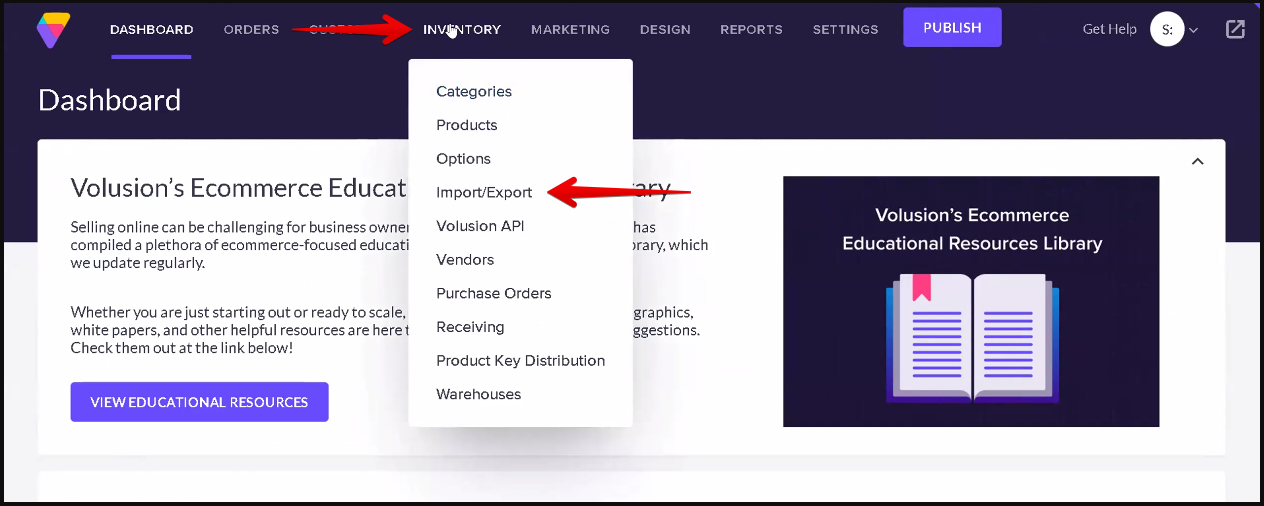
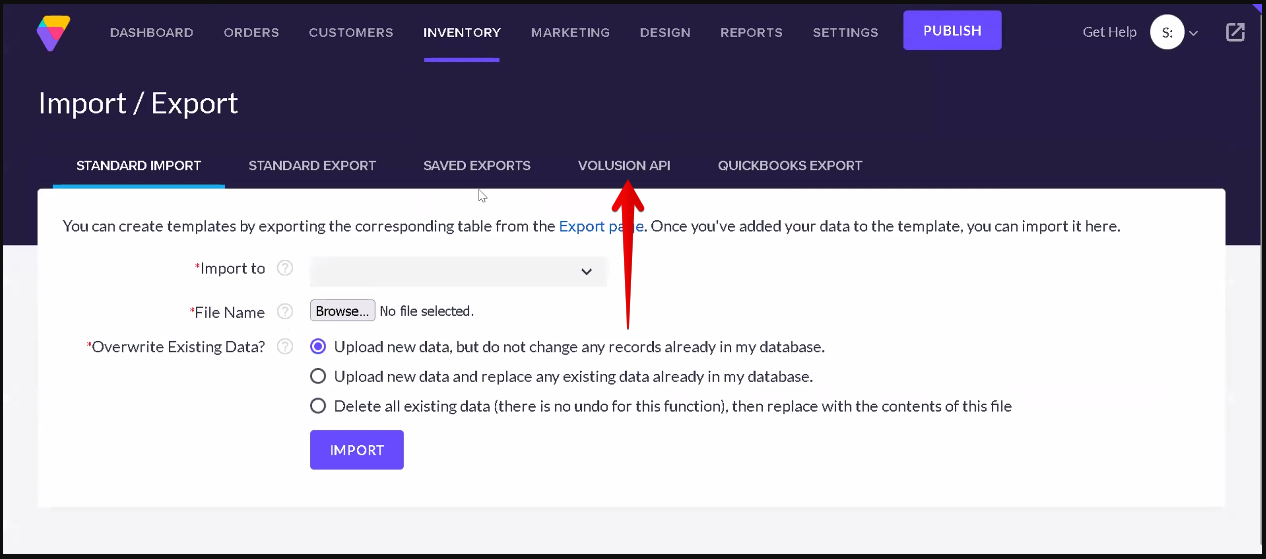
6). Click on Inventory> Import/Export and on the next screen click Volusion API.
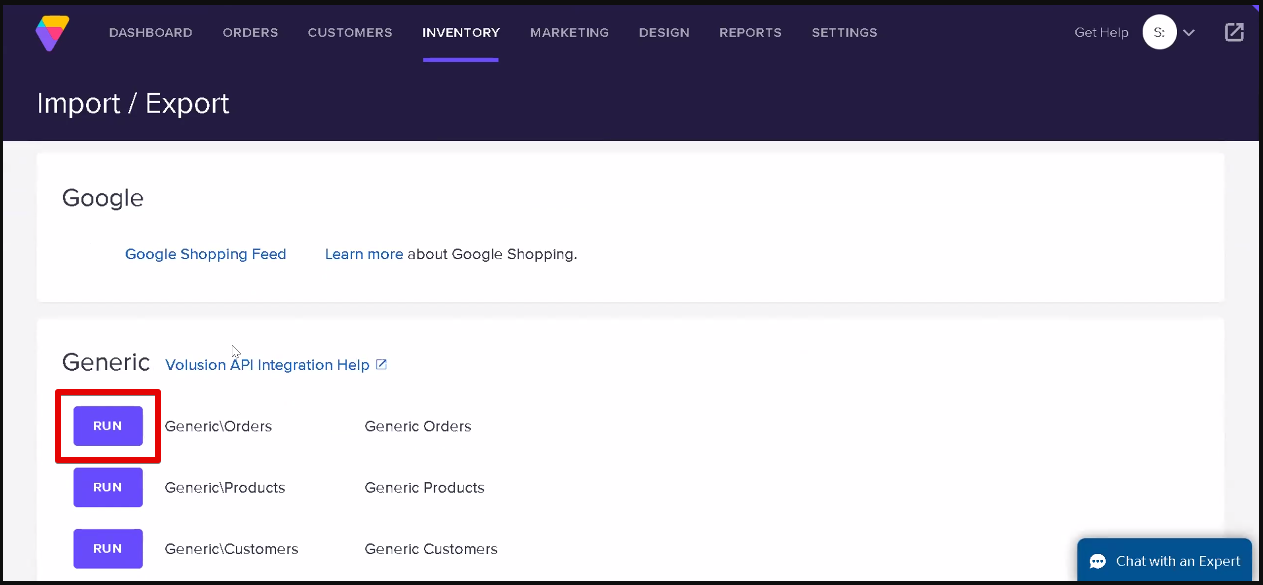
7). Scroll down to the Generic section and click Run button next to Generic\Orders.
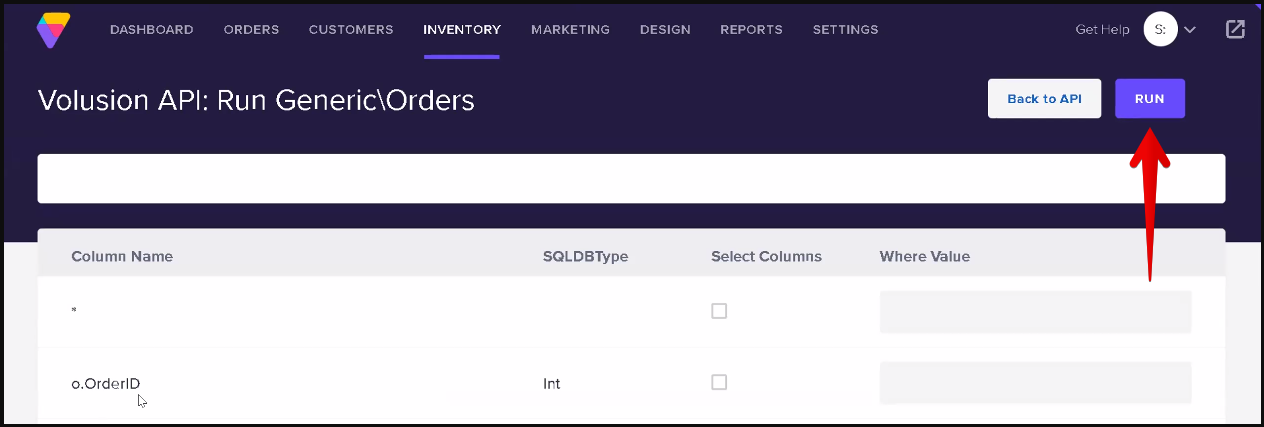
8). In the Volusion API: Run Generic\Orders screen, click Run.
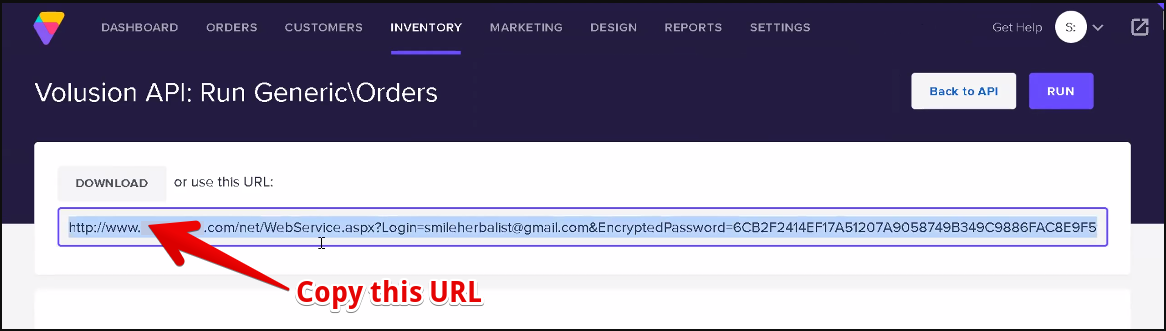
9). The URL is generated. You can now copy this URL in the Connect to Your Store screen in Webgility Desktop.
10). Paste the API URL into the Generic API URL field in Webgility Desktop, then click Connect to Volusion.

11). Once Webgility Desktop has finished downloading the sales channel information, you can proceed by clicking the Continue button.
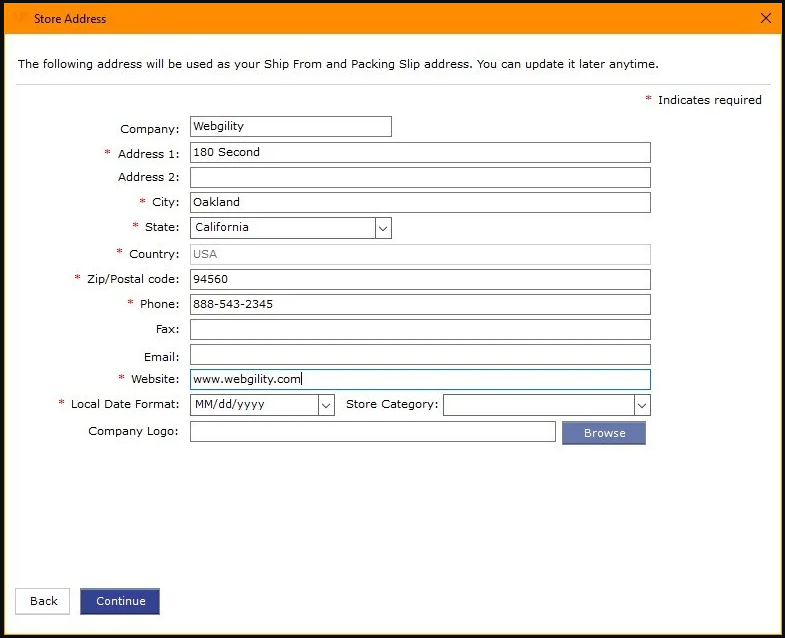
12). Please provide your sales channel contact information and address.
13). The next few screens are for connecting your Accounting, ERP, or POS system to Webgility Desktop. To learn more, check the article link out here.
Congratulations! You have successfully connected your Volusion sales channel with the Webgility Desktop application. After completing the configuration process, you can enjoy the benefits of streamlined e-commerce management, efficient order processing, and accurate inventory tracking.