Description:
This article provides a step-by-step guide on configuring Webgility Desktop to work with QuickBooks Desktop in multiple currencies. While most US-based stores typically accept only US dollars, certain marketplaces or unique business scenarios may require multi-currency functionality.
Pre-Requisites for Multi-Currency:
Before you begin, ensure the following are set up in QuickBooks Desktop:
-
Enable Multi-Currency:
-
Multi-currency functionality must be turned on in your QuickBooks Desktop settings.
-
-
Standard Customer Accounts:
-
Create a Standard customer account for each currency you plan to use.
-
-
Accounts Receivable (AR) Accounts:
-
Set up separate AR accounts for each currency.
-
-
Deposit Accounts:
-
Make sure you have deposit accounts corresponding to each currency.
-
-
Vendor Information:
-
Ensure that vendor information is properly configured to match the currency you’ll be using for transactions.
-
Note1: Enable Multi-Currency in QuickBooks Desktop before using it in Webgility Desktop. Skip if already activated and set up in QuickBooks Desktop.
Warning: Once activated, the Multi-Currency feature in QuickBooks Desktop cannot be deactivated.
How to enable multicurrency in QuickBooks Desktop:
You can achieve this by navigating to QuickBooks Desktop and selecting Edit, Preferences, select Multiple Currencies, and setting up the desired currencies for your chart of accounts.
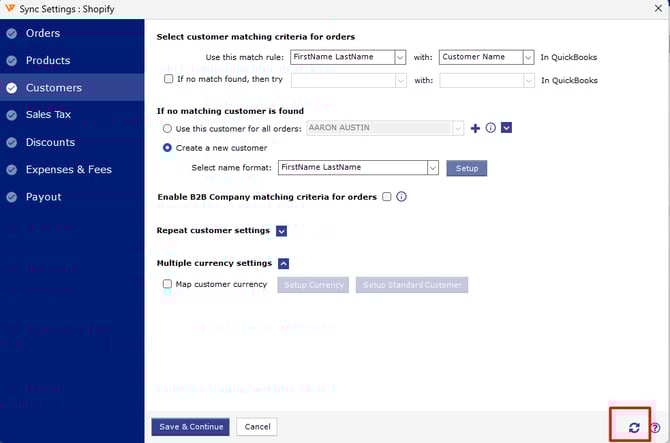
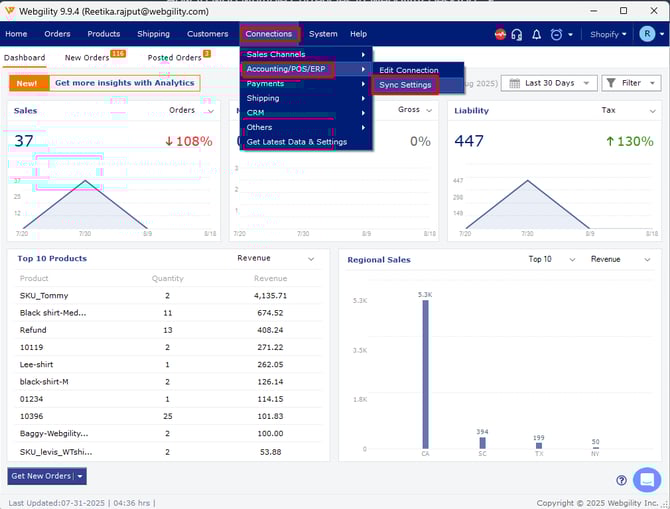
Once enabled in QB, open Webgility Desktop navigate to Connections > Accounting/POS/ERP and under Customers, click on the refresh button at the bottom right corner.
After the settings are refreshed you will see a new option “Map customer currency”
Steps to configure multi currency in Webgility Desktop
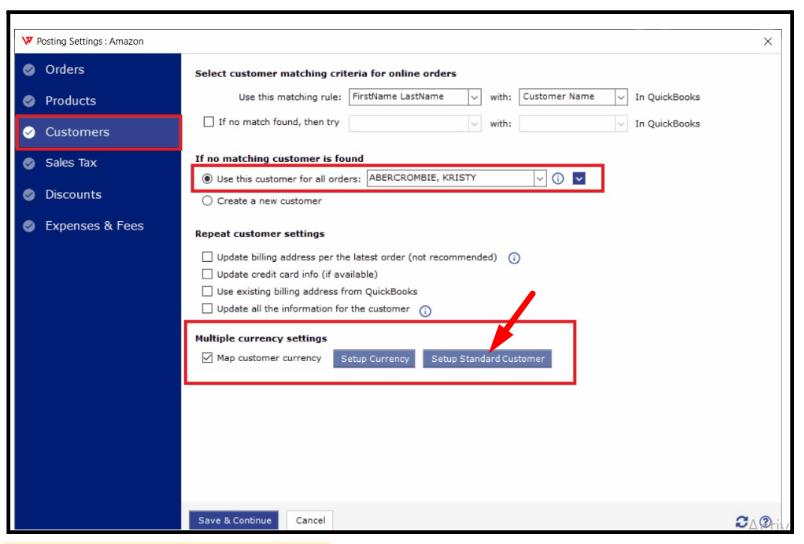
1). When you are ready to start configuring the multi-currency setup in Webgility Desktop, go to Integrations, select Accounting/POS/ERP and then click Posting Settings.
2). Select Customers. Then choose Use this customer for all orders.
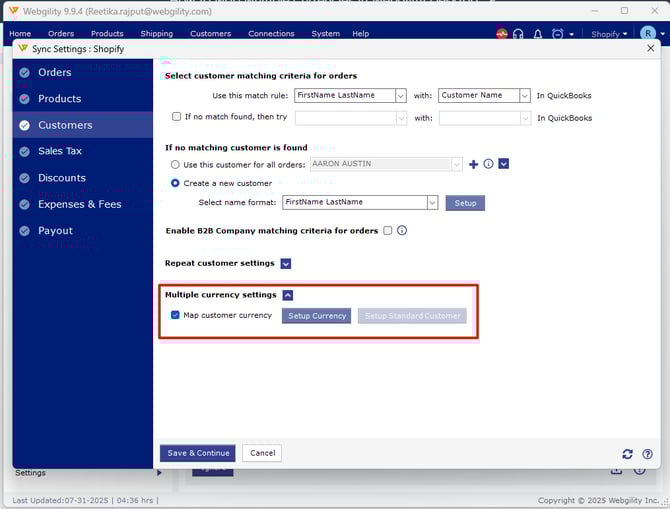
3). Then enable Map customer currency, and select customers under Setup standard customer option
4). Next, choose how you want to map currency. You have three options, including:
-
Map by Store Currency
-
Map by Country
-
Map by Price Level
Note: For the particular currency the Deposit account, Account receivable and the customer that you are using should be in the same currency. Eg: for CAD the Standard customer, deposit account and AR account should be in CAD
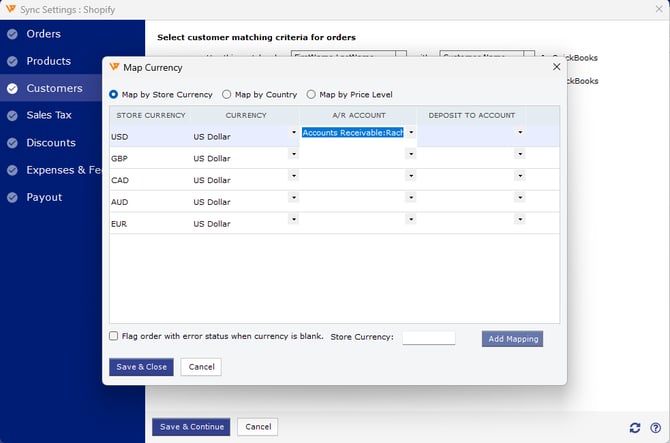
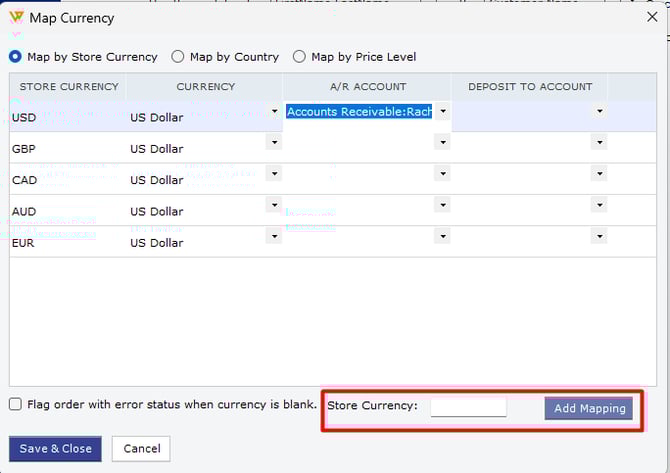
If the currency you need is not available in the drop-down, enter the currency in the Store Currency box and click on Add Mapping button.
Flag order with error status when currency is blank If you want the orders to be marked as errors if they don't have any currency, check the box in the bottom left corner.