Simply follow these steps to connect Webgility Desktop with Salesforce.
After successful configuration of customer settings, the next stage is to configure the CRM settings. You can use the CRM setup screen to integrate your existing Salesforce account with Webgility.
Steps to follow:
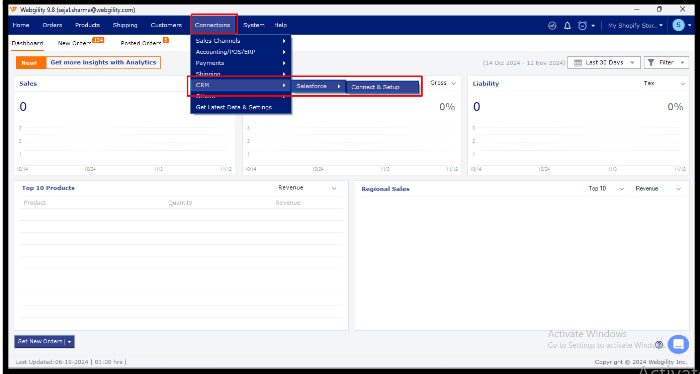
Step 1. To get started, In Webgility Desktop go to “Connections” then click on “CRM” There you will find ”Salesforce” over there click on “Connect & Setup”.
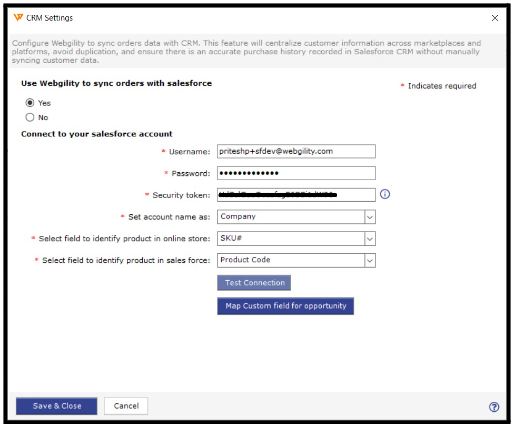
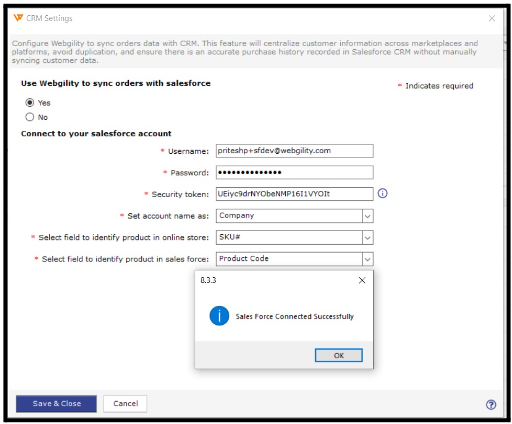
Step 2: If you select "Yes," you will need to connect to your Salesforce account by entering your credentials, including your username, password, and security token. If you select "No," you can simply click "Save & Close," which will take you directly to the Product Settings tab on the Products screen.
Note: Not sure how to find your SalesForce security token? Scroll down for instructions.
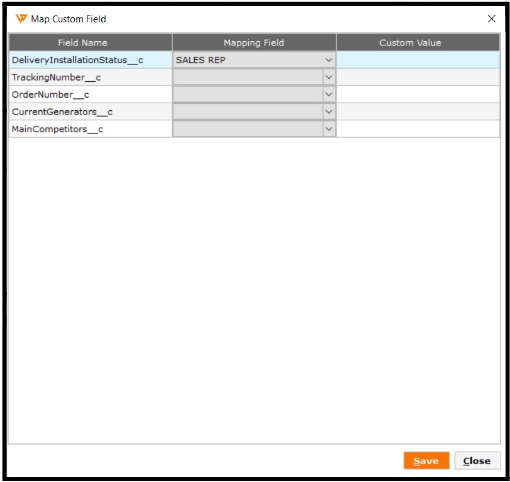
Step 3. Next, map custom fields and click Save.
Step 4. Finally, you will receive a message once Salesforce is successfully connected.
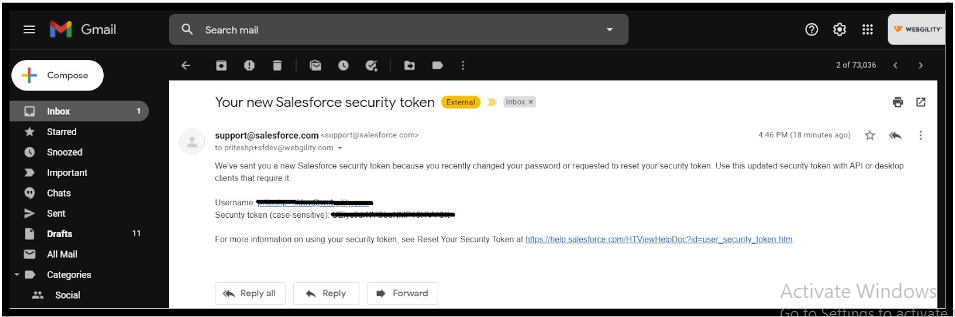
How to Get Your Salesforce Security Token
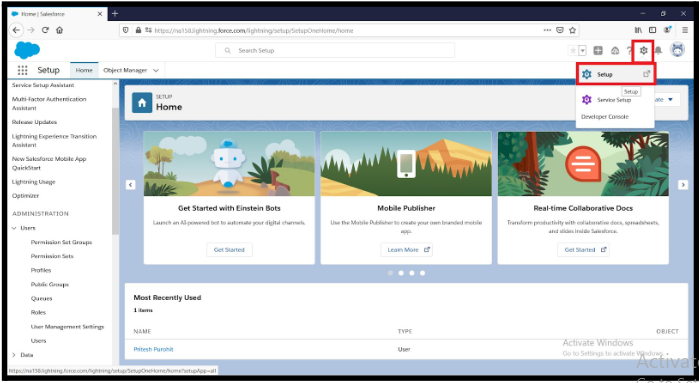
Step 1. Log in to your Salesforce account and click Setup.
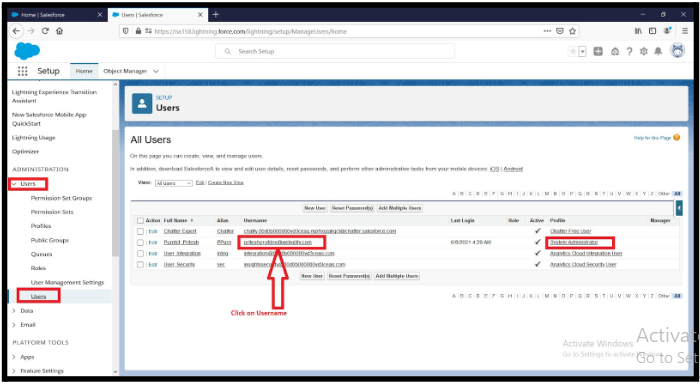
Step 2. Under Administration, select Users' then click on the System Administrator's username.
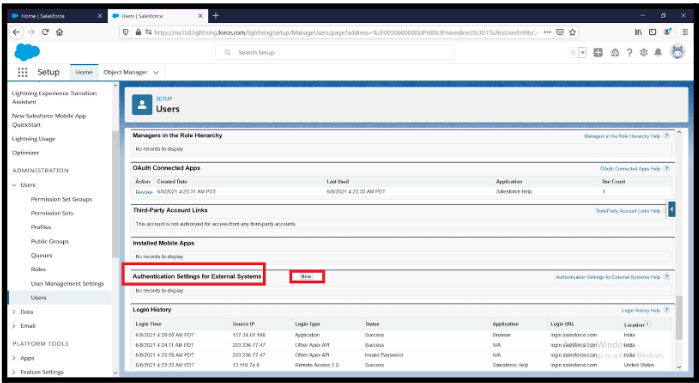
Step 3. Under Authentication for External Settings, click New.
Step 4. Select Reset Security Token.
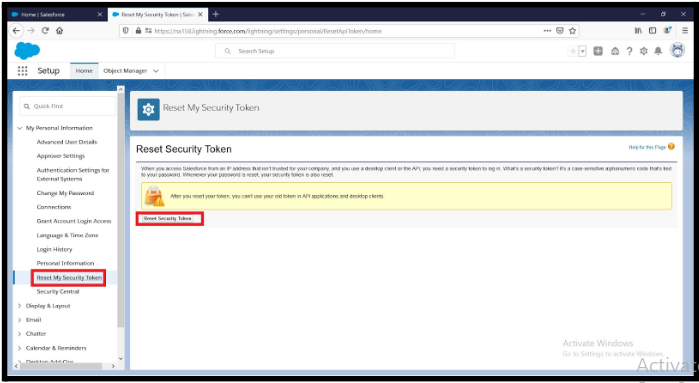
Step 5. You will then receive your security token via email.