Overview:
PII stands for Personally Identifiable Information — any information that can be used to identify a specific individual, either on its own or when combined with other data.
Both Webgility Desktop and Webgility Online can delete Personal Identifiable Information (PII) data from their respective databases based on the user's configuration. The basic identifiers for PII data are : Customer's First Name, Last Name, Address1, Address2, Phone, and Email.
Note: It is important to note that if this information has been posted to the accounting system, the information will not be removed from there.
Amazon FBA
Amazon has limited access to PII as it handles the purchasing and shipping of items. Since customer data is required for posting orders into QuickBooks, a standard customer will need to be created and used for accounting purposes. Refer: How to Use a Standard Customer for Orders
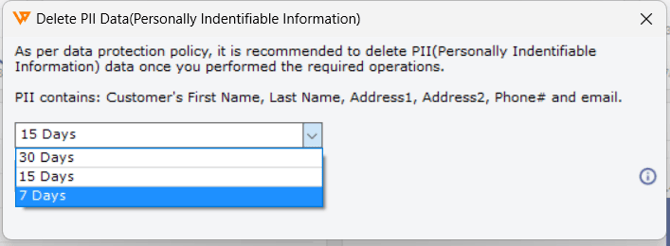
You will also be prompted to remove this information from existing orders when you log in to Webgility.
-Dec-06-2024-07-09-49-6730-PM.jpg)
Follow these Steps to Delete PII Data in Webgility Desktop
1. You can automatically set PII data to be deleted by navigating to System, clicking on Manage Data, and clicking on Delete PII Data.

2. Select the checkbox to Delete PII Data. Then, select the time frame of when the data will be deleted.
3. After you make your selections, click Save.
Follow these Steps to Delete PII Data in Webgility Online
1. You can automatically set PII data to be deleted by going to Automation, then Data Protection
2. Click on Data Protection, and enable the option to Delete PII Data. Then, select the time frame of when the data will be deleted. The option to skip deleting if orders are not posted to accounting can be checked as well.
3. When selecting Delete PII Data, the option for Do not delete any PII data if orders are would also be there, and you can determine if PII data should not be deleted based on not being posted to accounting.

3. After you make your selections, click Save.
Note: For Amazon, there is no option for data retention post 30 days; the PII data will automatically be deleted.