Overview:
Learn how to create and use a standard customer for each order
If you do not want to create a new customer for each order that comes from your sales channels, you can use a standard customer. This will eliminate having to create or match existing customers. Instead, it will combine all orders under a single selected customer.
It is recommended to use a standard customer if you have a large QuickBooks company file or if you are using a marketplace that doesn't provide full customer data, such as when selling on Amazon.
Configuring a Standard Customer
2. Log in to Webgility Desktop and navigate to Connections > Get Latest Data And Settings
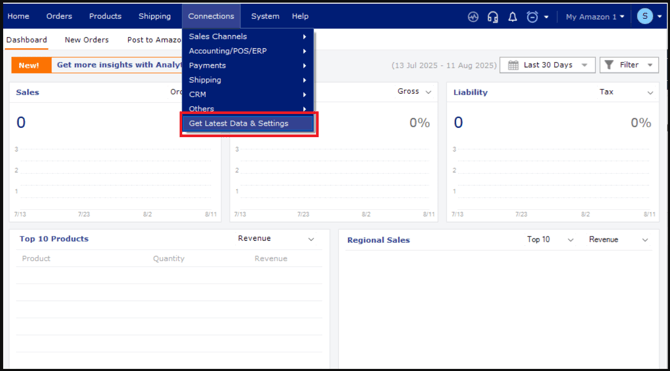
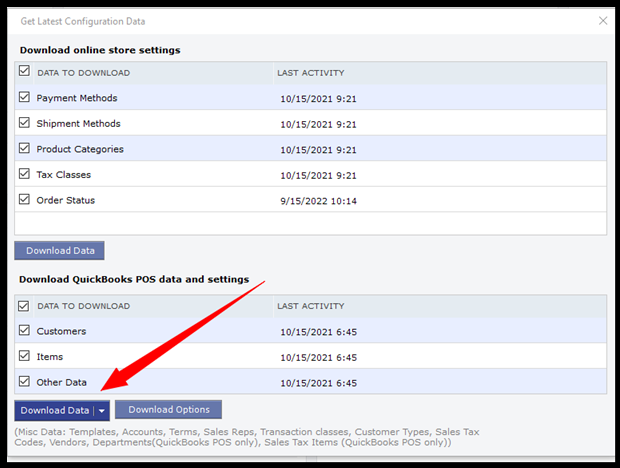
3. In the screen that pops up, you will need to click Download Data under Download QuickBooks Data and Settings. Depending on the size of the company file, this download can take several minutes. After it completes, close the pop-up.
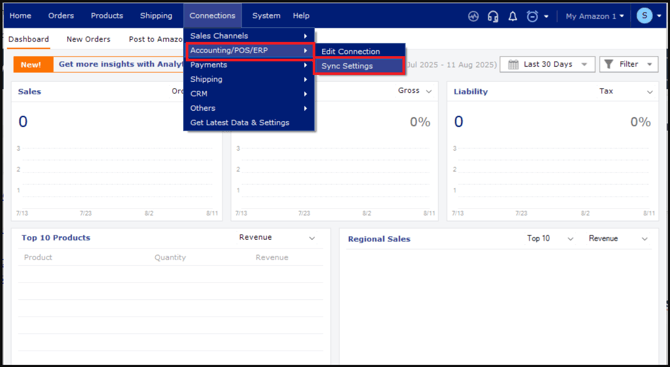
4. From the Connections menu, select Accounting/POS/ ERP and then click Sync Settings.
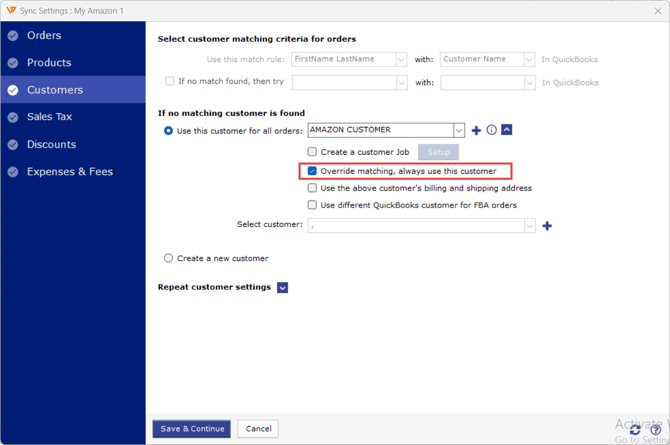
5. In the left panel, click Customers.
6. Under ‘If no matching customer is found’ select ‘Use this customer for all orders.’
- In the Select Customer drop-down menu, find the Standard Customer you created.
- Click the tiny drop-down arrow to the right of it and select Override matching; always use this customer.

Using different standard customers for Amazon FBA and FBM
1. For the Amazon Store, from the Connections menu, select Accounting/POS/ERP and then click Sync Settings. In the left panel, click Customers.
2. Under ‘If no matching customer is found’ select ‘Use this customer for all orders.’
- In the Select Customer drop-down menu, find the Standard Customer you created.
- Select Override matching; always use this customer.
3. If you process FBA orders and want to use a different standard customer for Amazon FBA, then select Use different QuickBooks customer for FBA orders, and from the drop-down, select the customer.

4. Click Save & Continue to save your settings.
