Webgility Was Unable to Install/Create an SQL Database
This article helps Webgility Desktop users troubleshoot issues related to SQL Server installation or database creation. These problems may arise due to incorrect SQL configurations, insufficient permissions, or network connectivity issues. The article provides detailed step-by-step guidance to identify and resolve the root cause, ensuring successful installation of SQL Server and creation of the required database.
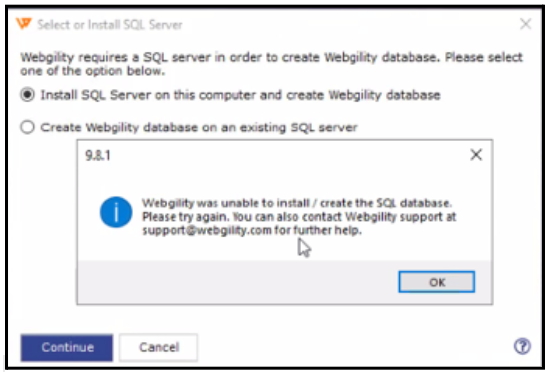
Error:
Overview
If Webgility Desktop is unable to install or create an SQL database, the issue could be related to several factors like SQL configuration, permissions, or network connectivity. Here's how to troubleshoot and resolve the problem:
1. Check SQL Server Installation
-
Ensure SQL Server is Installed: Verify that SQL Server is properly installed on your system or server. Webgility Desktop requires SQL Server (Express) to create a database.
SQL Server Version Compatibility: Ensure that the version of SQL Server you're using is compatible with Webgility Desktop. To install SQL Express successfully, it's crucial to download a compatible installer. You can find the appropriate installer for SQL Express. Make sure you're using the correct version for your system. Learn more
2. Check SQL Server Configuration
-
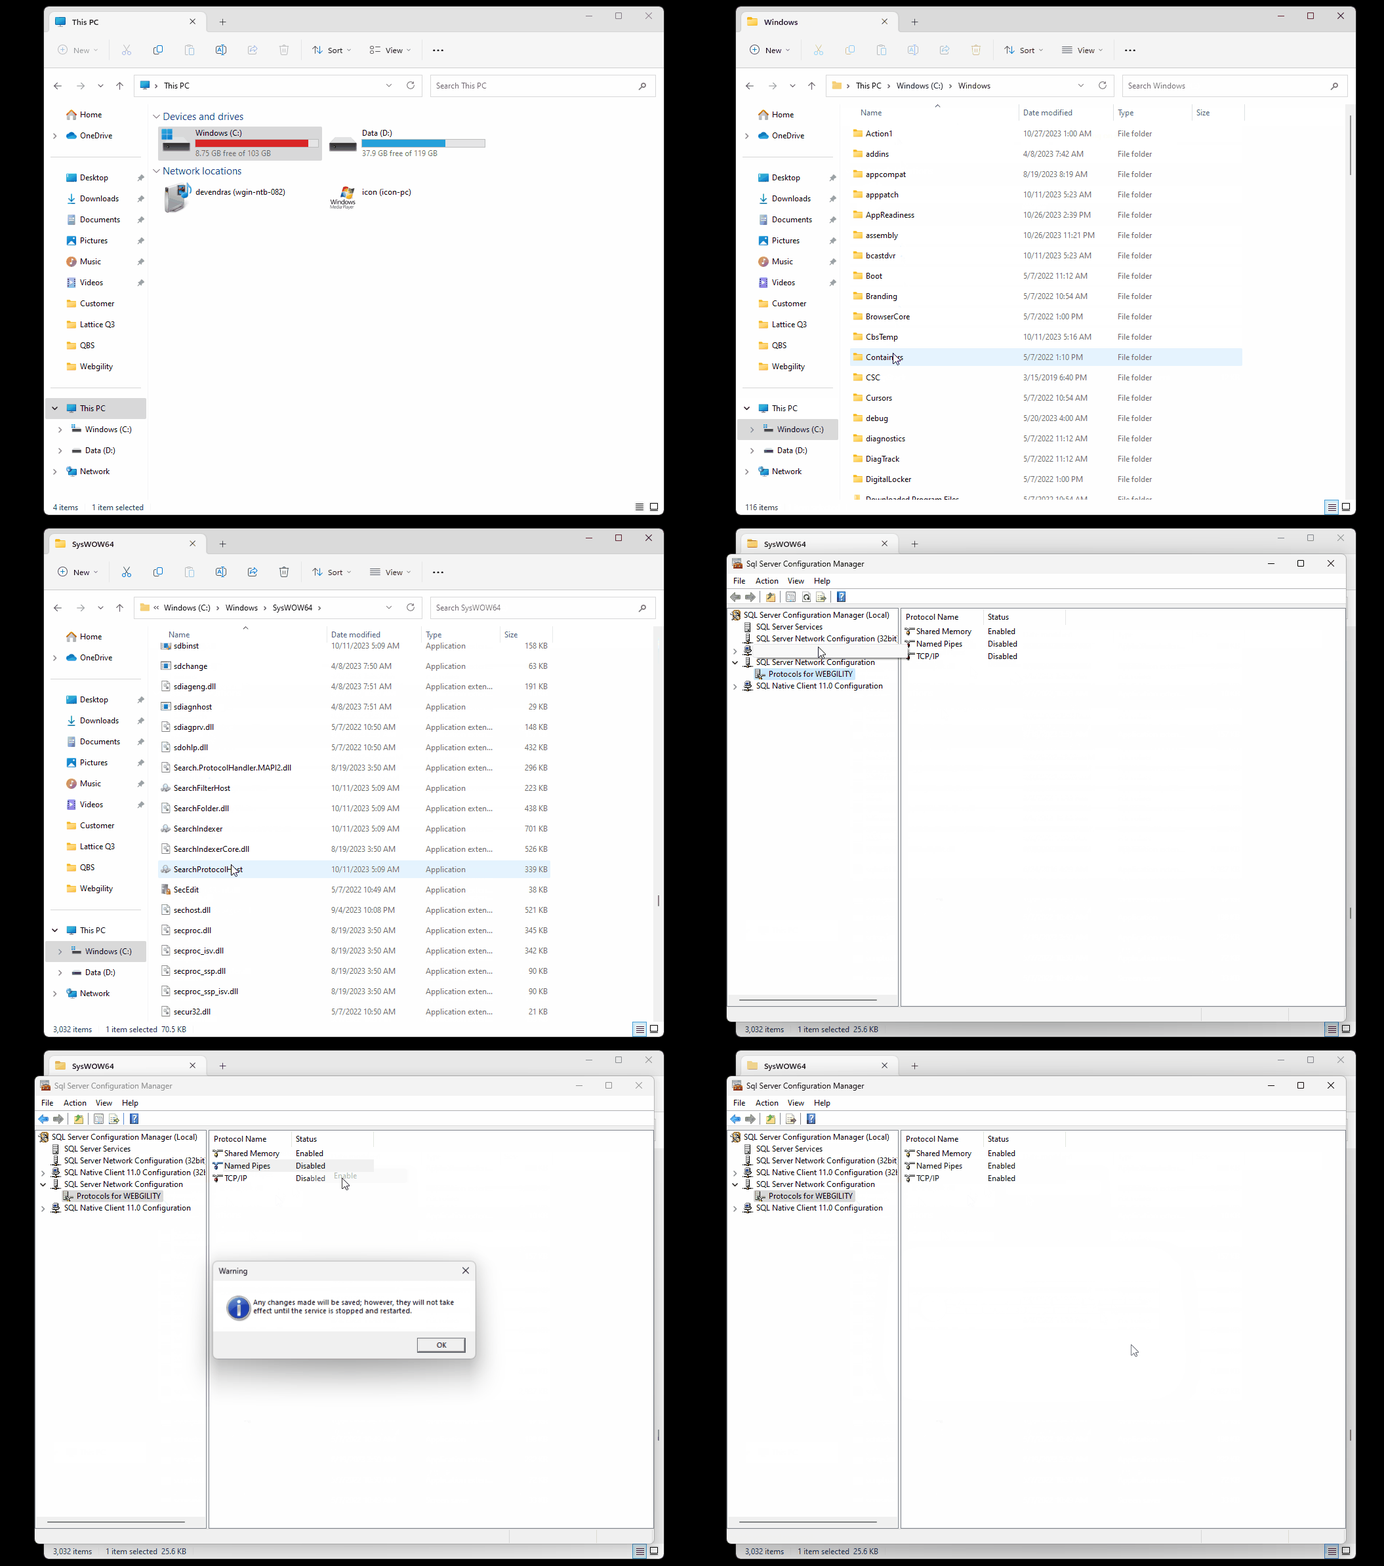
Enable TCP/IP: Go to the SQL Server Configuration Manager and ensure that the TCP/IP protocol is enabled under "SQL Server Network Configuration."
-
Check Named Pipes: Named Pipes may need to be enabled, depending on the environment. This can also be configured from SQL Server Configuration Manager.

-
SQL Server Browser Service: Ensure that the SQL Server Browser service is running. This helps Webgility Desktop discover the SQL instance, especially if it's not the default one.

3. Check Permissions
-
Database Permissions: Ensure the SQL Server user account you are using has the proper permissions to create a database. The user should have either dbcreator or sysadmin roles.
-
Windows Firewall or Antivirus Blocking: Ensure that Windows Firewall or any installed antivirus software is not blocking SQL Server ports (default port is 1433 for TCP/IP).
4. Connection String
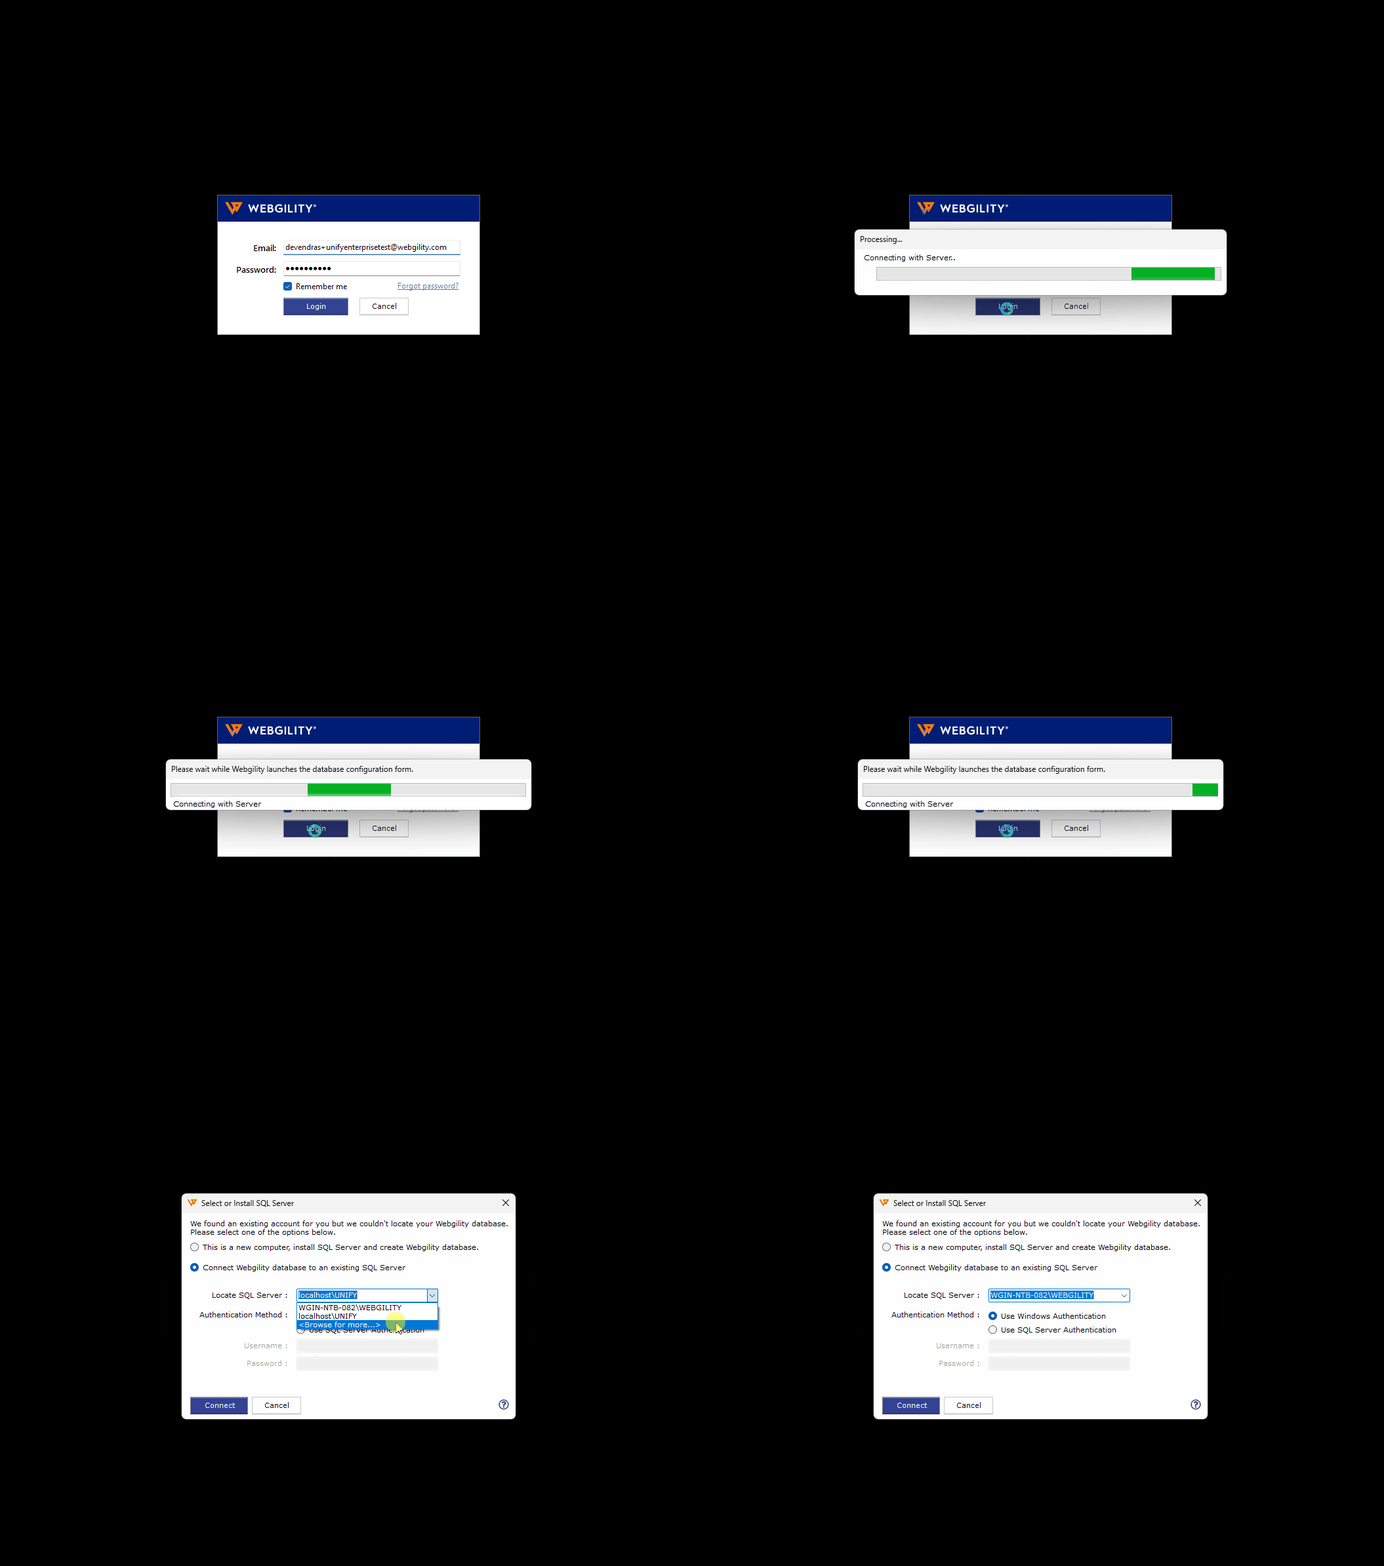
- Ensure that Webgility Desktop is connecting to the correct SQL instance. For example, if you’re using a named instance, the connection string should include SERVERNAME\INSTANCENAME. Double-check that you're entering the correct server and instance names when setting up Webgility Desktop.
- If it does not appear under "Locate SQL Server," click on the drop-down and select "Browse for more." Note that this step may take a few minutes.

5. Check SQL Server Authentication Mode
-
SQL Server Authentication: Webgility Desktop may not work well with Windows Authentication. Ensure that SQL Server is configured to allow SQL Server Authentication (mixed mode). You can change this in SQL Server Management Studio (SSMS) under the server's properties.
6. User Account Control (UAC)
-
Run Webgility Desktop as Administrator: UAC might block the creation of an SQL database. Ensure that Webgility Desktop is run as an administrator, and check that you have sufficient privileges.
7. Database Naming or Collation Issues
-
Ensure that the database name you are trying to create is valid (no spaces or special characters)
8. SQL Server Logs
-
Check SQL Server Logs: The SQL Server log may give you more details about why the database creation failed. Look for error messages in SQL Server's log files (located in C:\Program Files\Microsoft SQL Server\MSSQL\<INSTANCE>\MSSQL\LOG).
9. Network Issues
-
Remote Connections: If you are trying to connect to a remote SQL Server, ensure that remote connections are enabled in SQL Server. Go to SQL Server Management Studio, right-click on the server, and choose "Properties." In the "Connections" tab, check the "Allow remote connections to this server" option.
10. Reinstall SQL Server or Webgility Desktop
-
If none of the above solutions work, you may want to attempt reinstalling either SQL Server or Webgility Desktop to reset any incorrect configurations.
