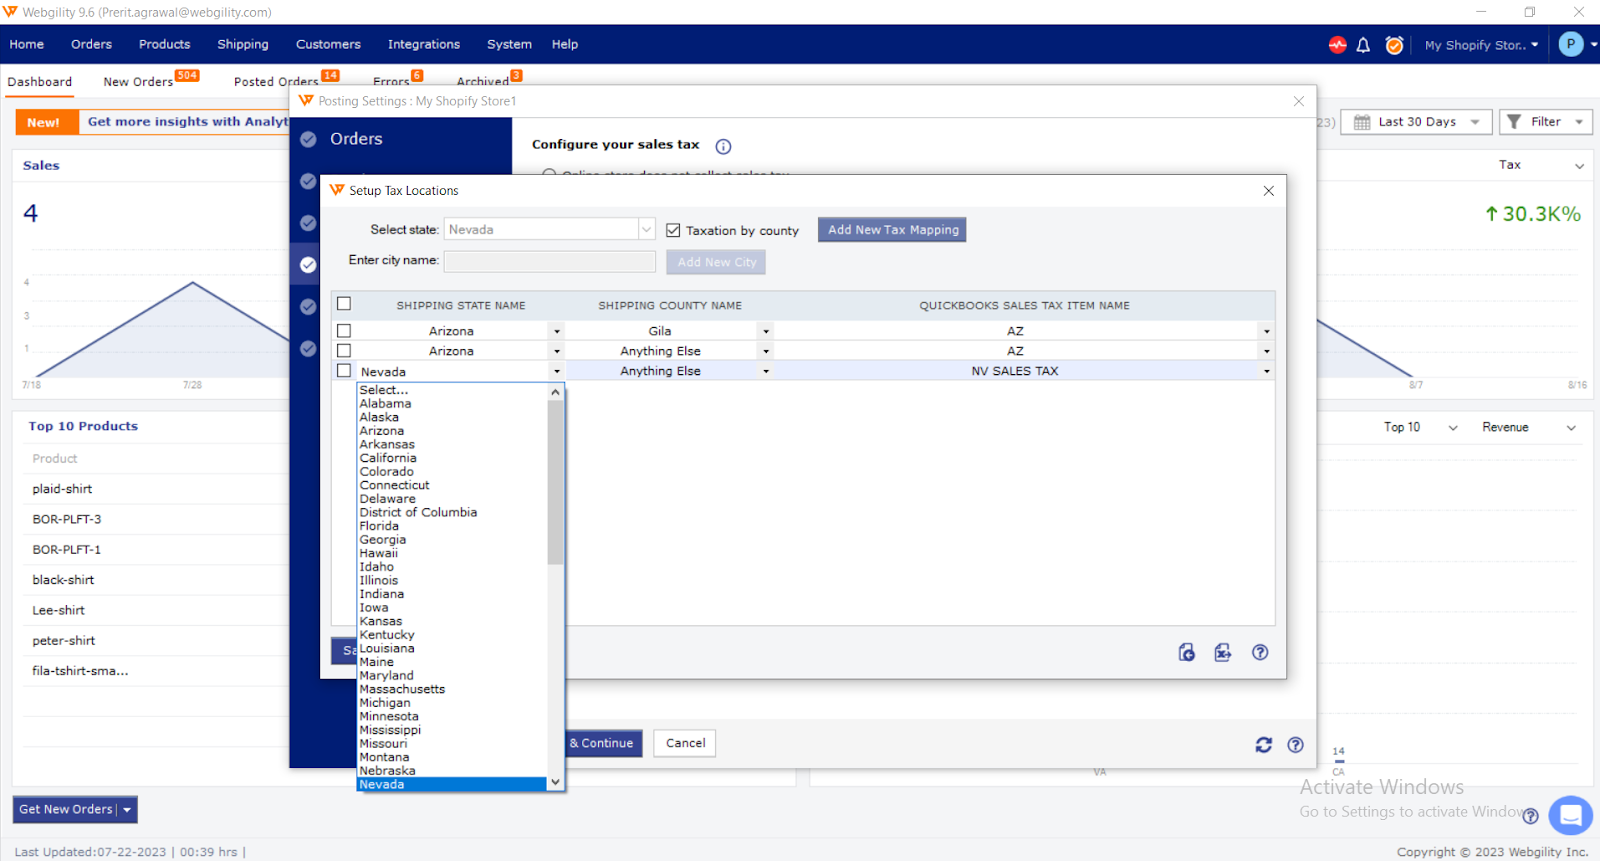
To set up the sales tax configuration in the Webgility application on the basis of Canadian states, we need to enable additional settings. By default, you would only be able to see all the state names of the United States of America as shown in the screenshot below:

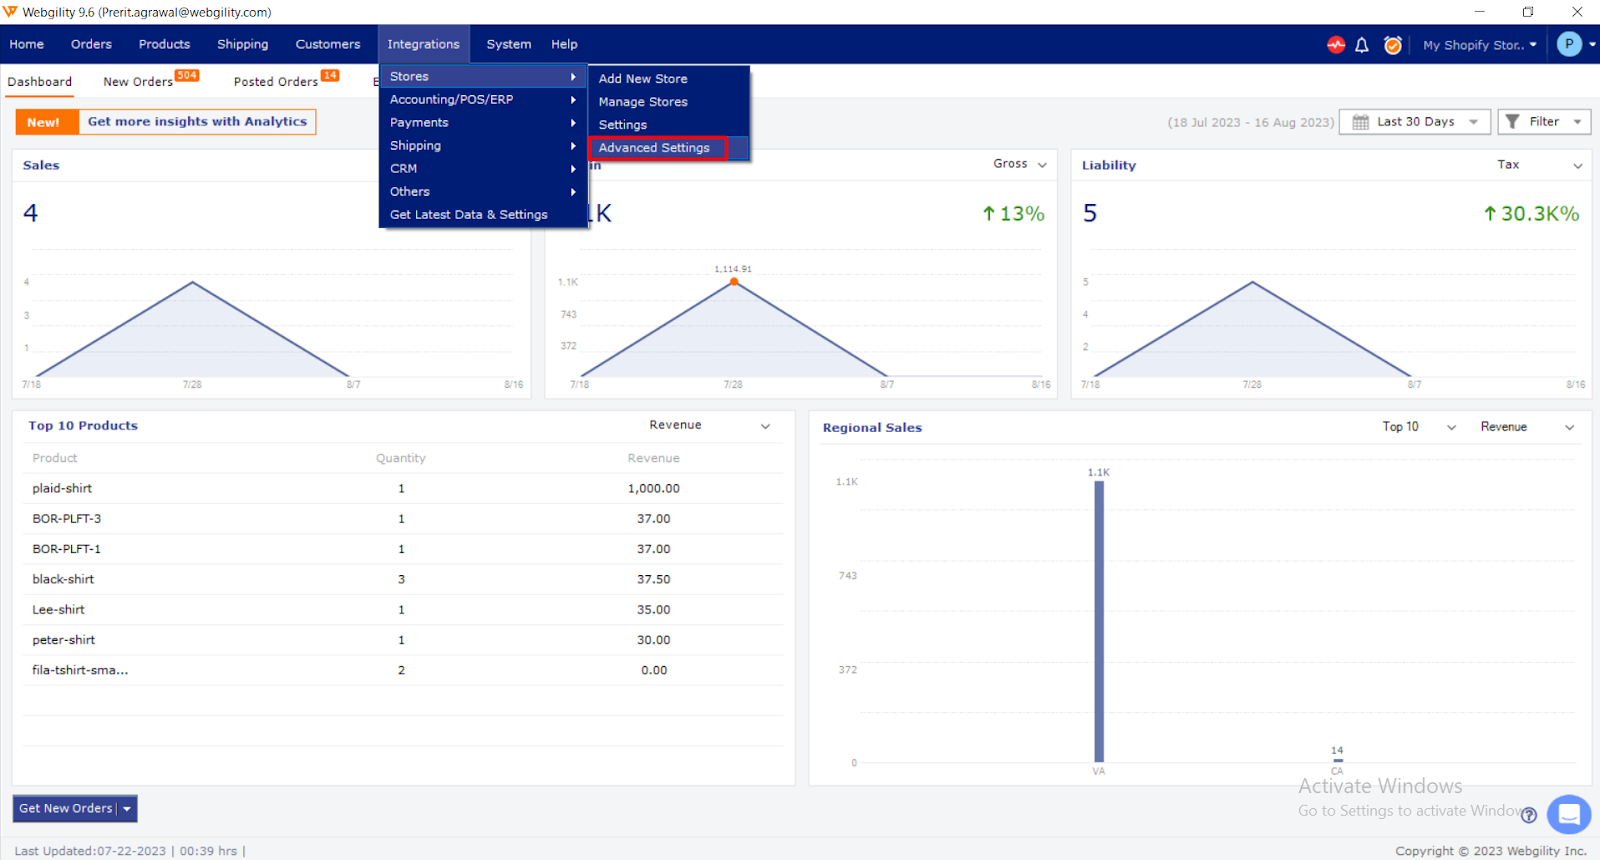
To enable the Webgility application to show Canadian states in the sales tax configuration, please navigate to Integrations> Stores> Advanced settings> Additional Settings
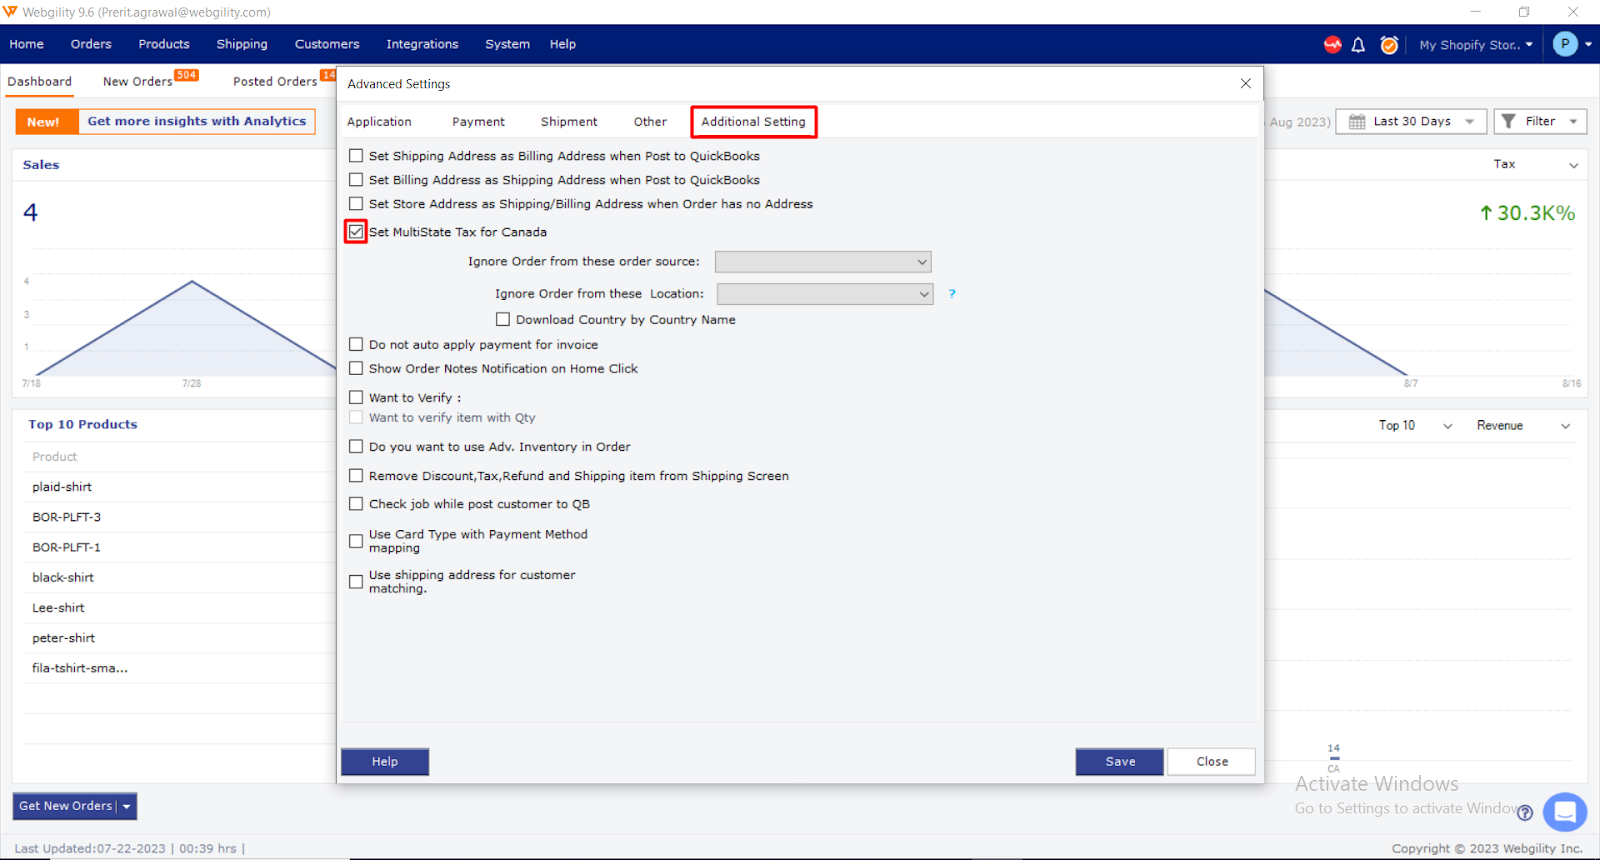
Go to Additional Settings, click on the checkbox Set Multistate Tax for Canada and Save the settings.
Now that the option is enabled, please navigate to the sales tax setup in Webgility under Integrations> Accounting/POS/ERP> Posting Settings> Sales Tax.
Click on the Checkbox Setup different taxes by state and click on Setup Tax location.
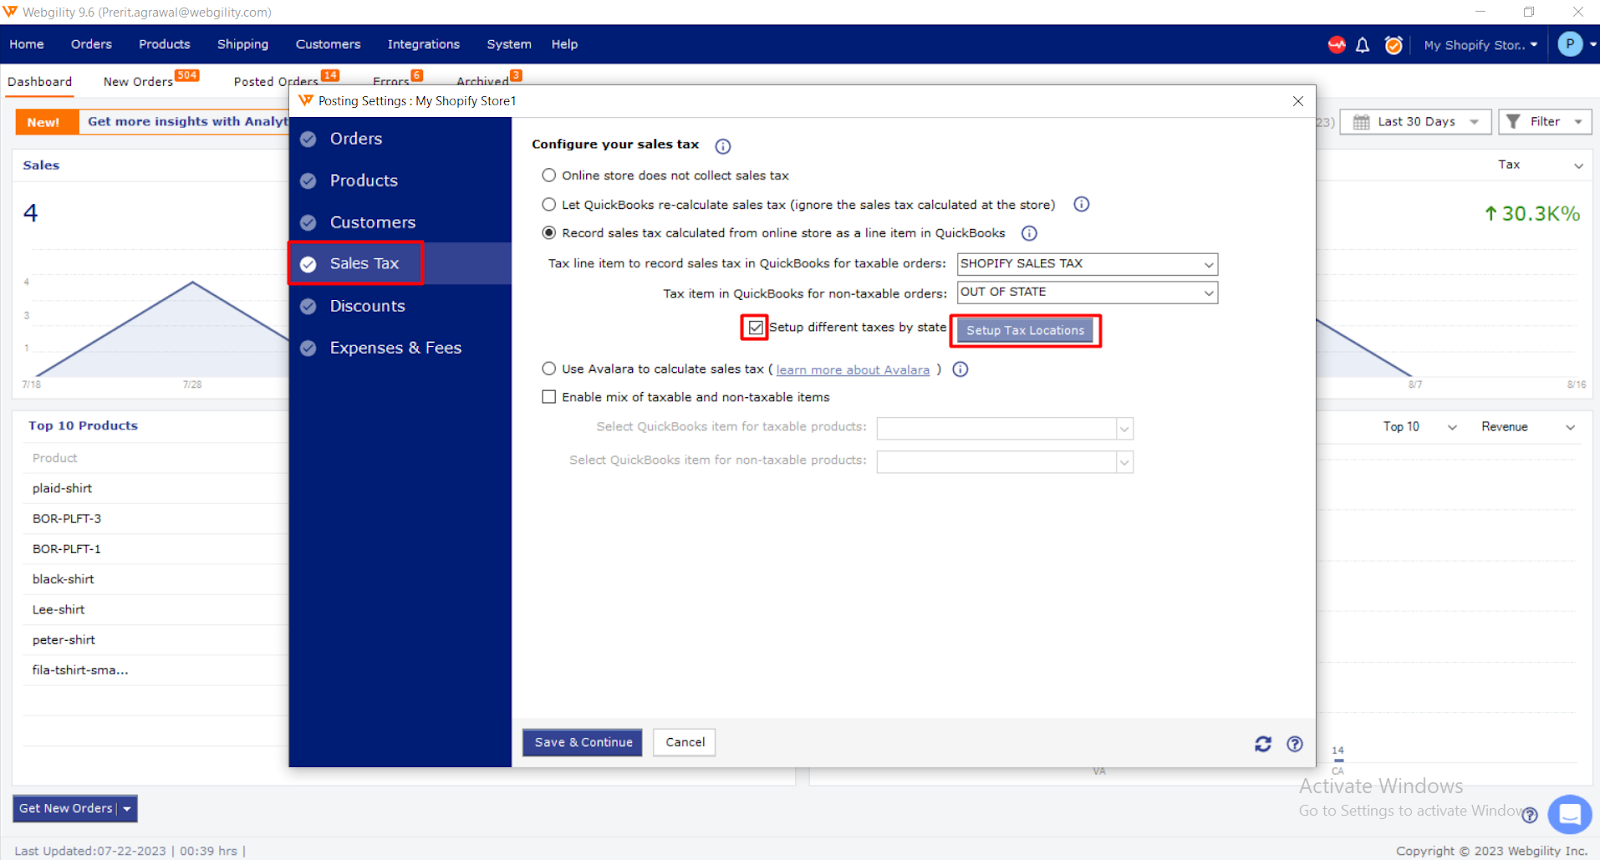
Now you will see the Canadian state names to map with Quickbooks sales tax items under the dropdown.
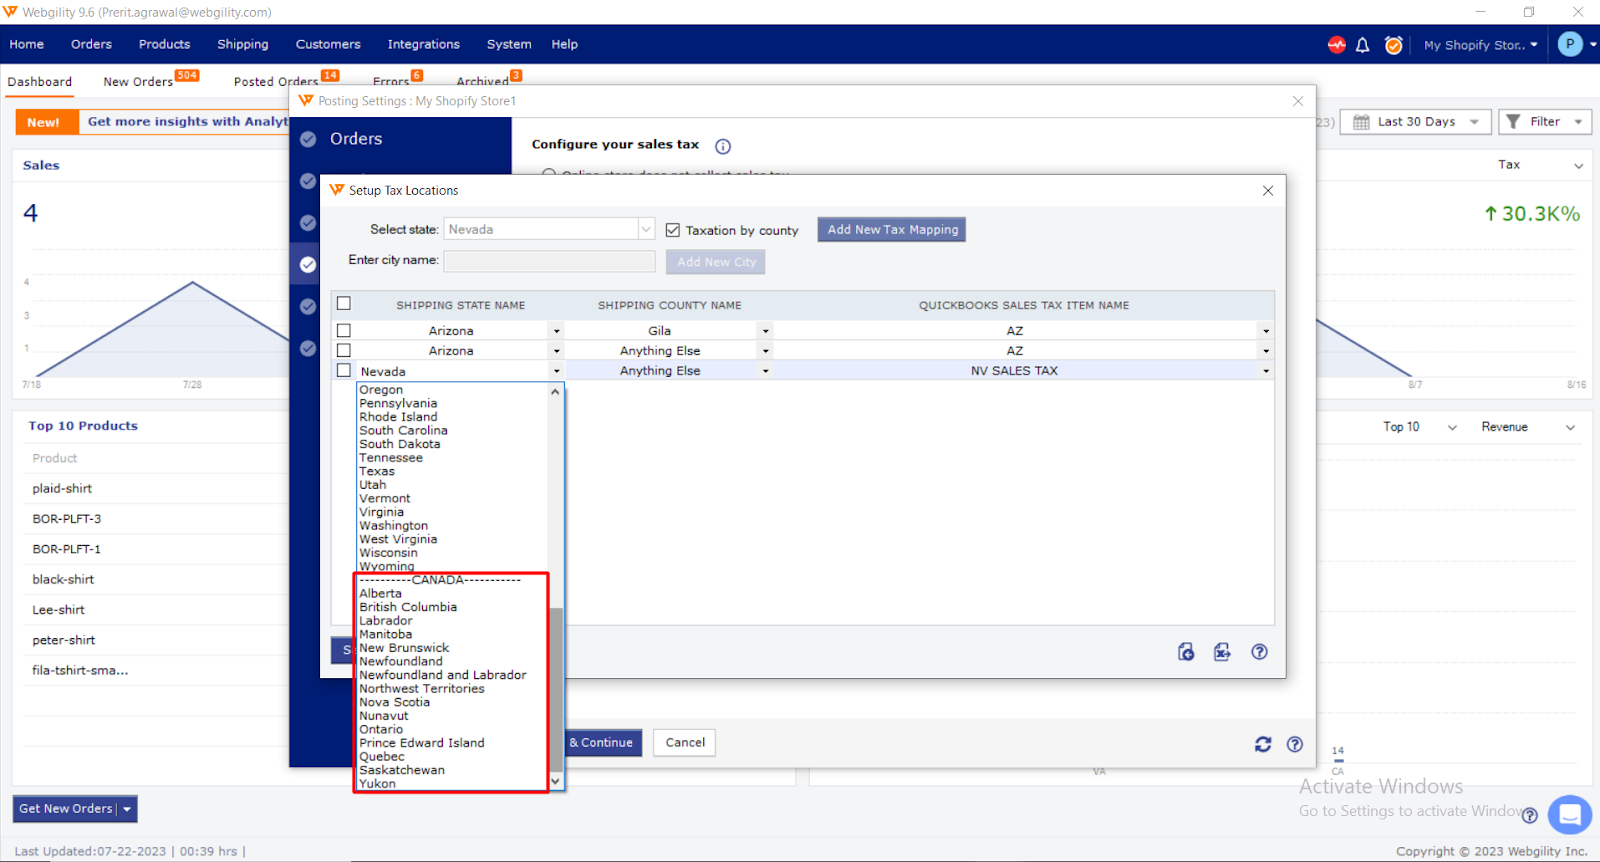

Generally, we do not find Canada under shipping state names.