Overview:
This article covers the basic recommended Sync Settings for Webgility Desktop and NetSuite. If you require more advanced features or workflows, please work with a Webgility Onboarding Specialist to help configure Webgility to best fit your needs.
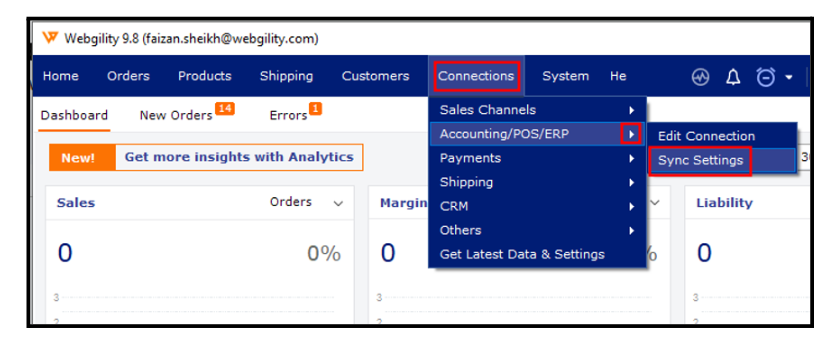
If you have just added a new sales channel you will be taken to the Sync Settings by default. You can also get there by navigating to Connection > Accounting > Sync Settings

Sync Settings
The Sync Settings screen lets you set how orders will be posted, including transaction details, products, customers, sales tax, discounts, and expenses/fees. You can customize each setting in detail to ensure all order information from the store is accurately recorded in NetSuite.
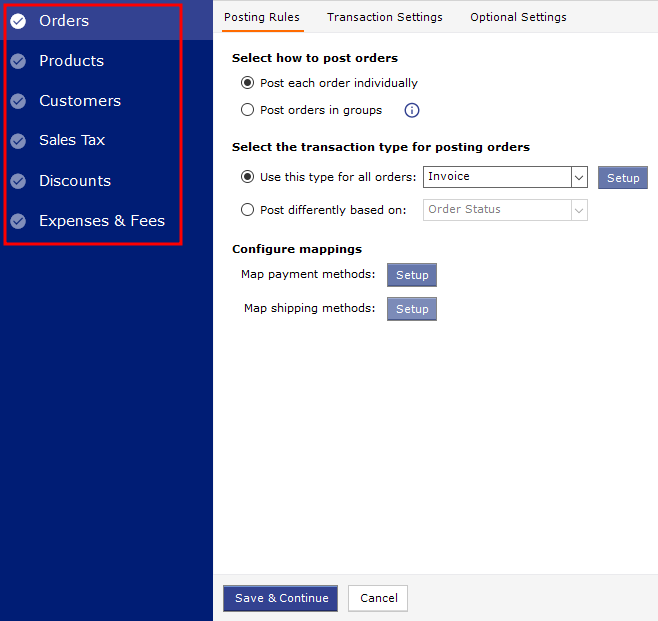
Orders
The Orders tab sets the transaction type as well as how the orders will be posted to NetSuite.
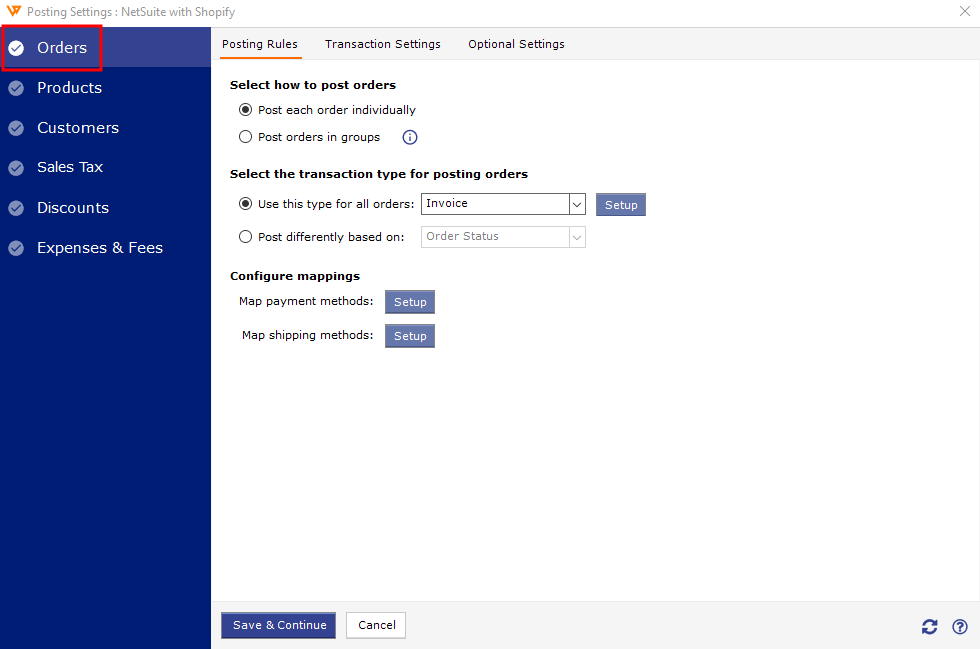
1. Select how to post orders: This area allows you to either post individual transactions or post orders in groups (daily/weekly/monthly). The group transaction is one of the more advanced features so you should leave it off and post individual orders for now.
2. Select the transaction type for posting orders: Here you can choose Cash Sales, Invoice, or Sales Order. We recommend selecting Invoice.
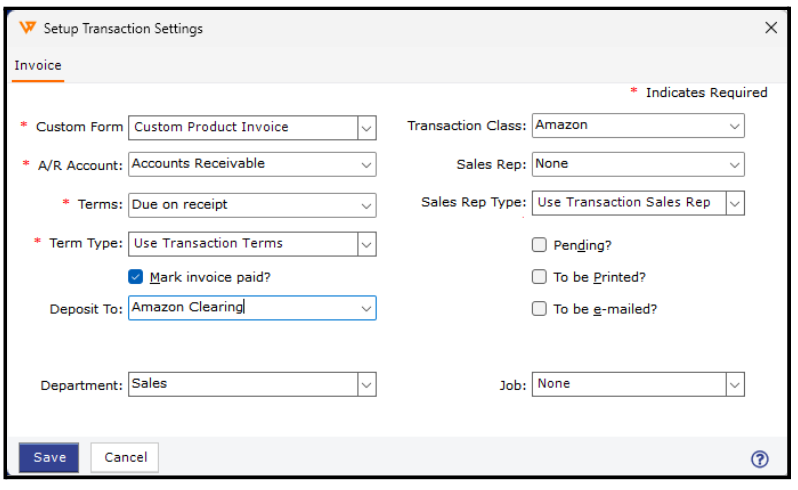
Click Setup next to the transaction drop-down to configure the settings for the transaction type you have selected.
-
Select a Custom Form from those available in NetSuite.
-
Select A/R Account and Terms as Due on Receipt.
-
Select Term Type as Transaction Term.
-
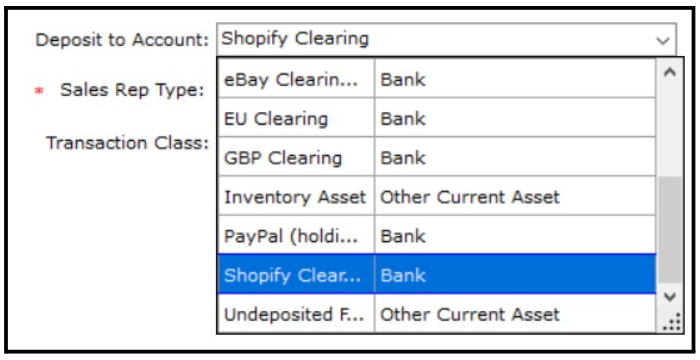
Deposit to Account is where the income from the order will be deposited in NetSuite. We recommend using a clearing account as outlined here.
-
Sales Rep is optional, so you can leave it blank if you do not use sales reps in NetSuite.
-
The Sales Rep Type option works with the sales rep selection above. If the customer on an order is already in NetSuite and assigned to a specific sales rep and you want to use that customer’s existing rep - select Use Customer Sales Rep, or Use Transaction Sales Rep if you want the rep to default to the one selected above.
Select a Custom Form from those available in NetSuite.
Select A/R Account and Terms as Due on Receipt.
Select Term Type as Transaction Term.
Deposit to Account is where the income from the order will be deposited in NetSuite. We recommend using a clearing account as outlined here.
Sales Rep is optional, so you can leave it blank if you do not use sales reps in NetSuite.
The Sales Rep Type option works with the sales rep selection above. If the customer on an order is already in NetSuite and assigned to a specific sales rep and you want to use that customer’s existing rep - select Use Customer Sales Rep, or Use Transaction Sales Rep if you want the rep to default to the one selected above.
Note: When selecting an account, the account type is displayed in the drop-down list for clarity.

If you receive an Error with the following NetSuite message:
You do not have permission to set a value for an element class due to one of the following reasons:
1. The field is read-only;
2. An associated feature is disabled;
3. The field is available either when a record is created or updated, but not in both cases.
Reason: In NetSuite, the class field has a lack of permissions for the transaction form.
Solution: In NetSuite: go to Customization > Forms > Transaction Forms. Click on and edit the corresponding transaction form provide the display permissions to the field and save it.
Configure mappings
This section allows you to map the payment types within the options you have in NetSuite. This area is more advanced so for now you should skip this configuration.
Transaction Settings
This screen further defines your preferences for the transaction settings in NetSuite. Even though there are a lot of settings here, most are optional. Therefore, this section will focus on the required and recommended settings. Ask your Implementation Specialist to help set up a more specialized workflow if required.
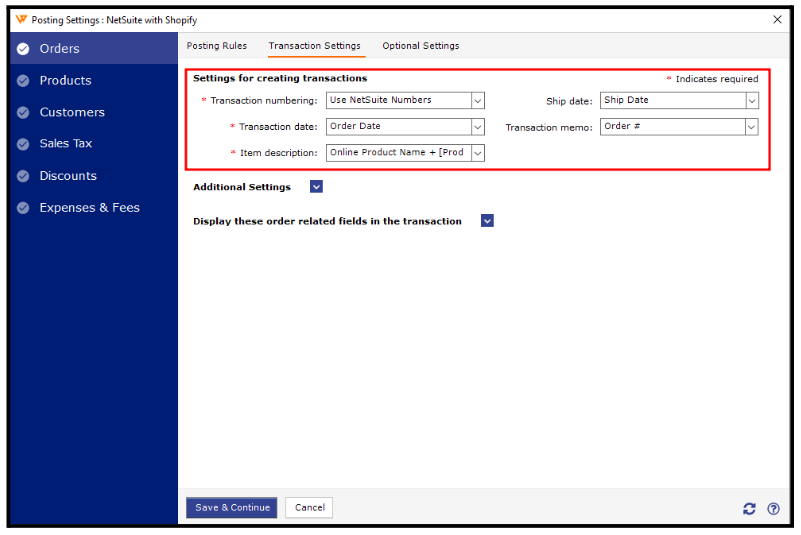
These settings relate to how the Order will post into NetSuite:
-
Transaction numbering: The recommended option is to use the NetSuite Number,
-
Transaction date: The recommended option here is Order Date.
-
Item description: This is a very preference-based setting. However, you may use, NetSuite Description.
Transaction numbering: The recommended option is to use the NetSuite Number,
Transaction date: The recommended option here is Order Date.
Item description: This is a very preference-based setting. However, you may use, NetSuite Description.
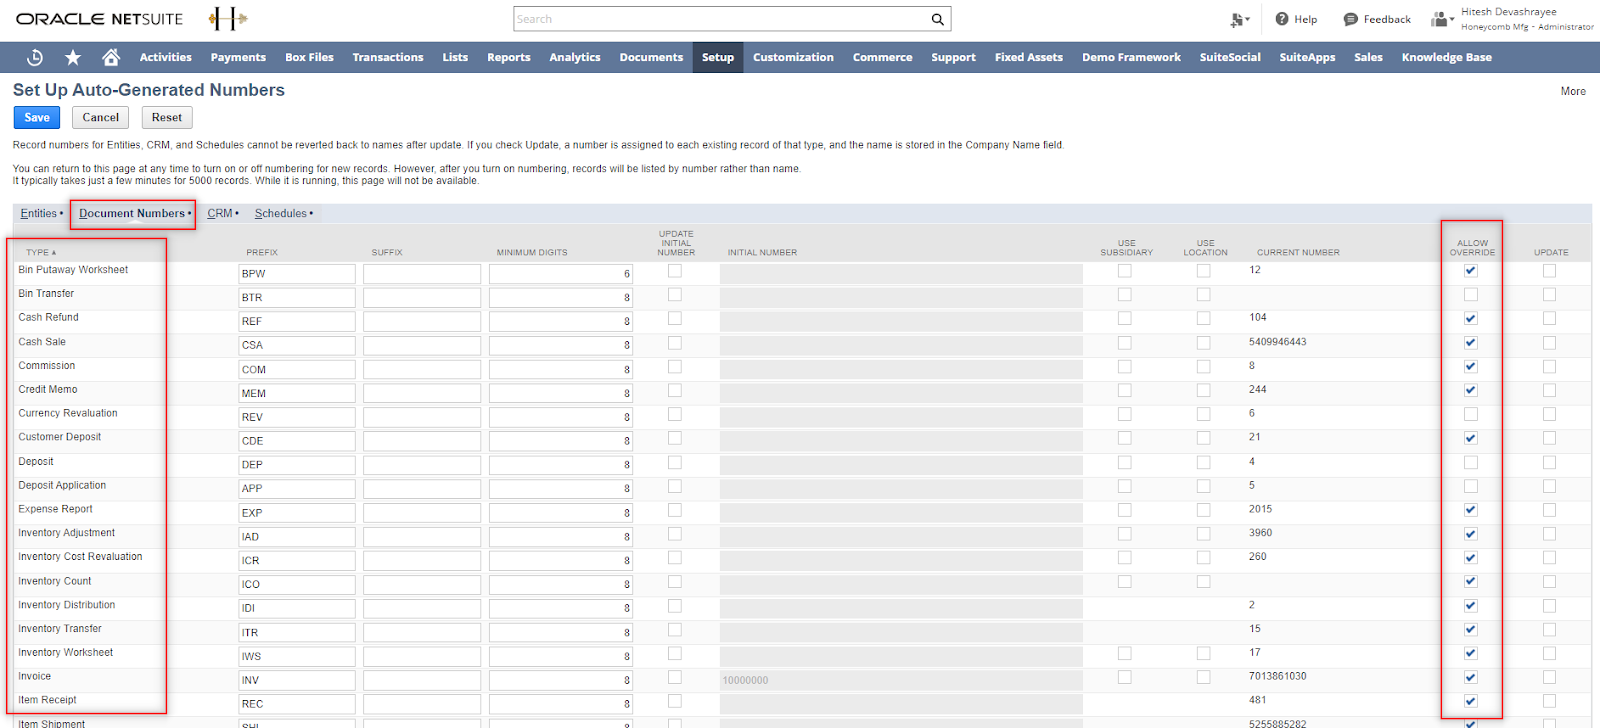
Note: Please note that to use NetSuite transaction numbers, you need to enable this setting in NetSuite.
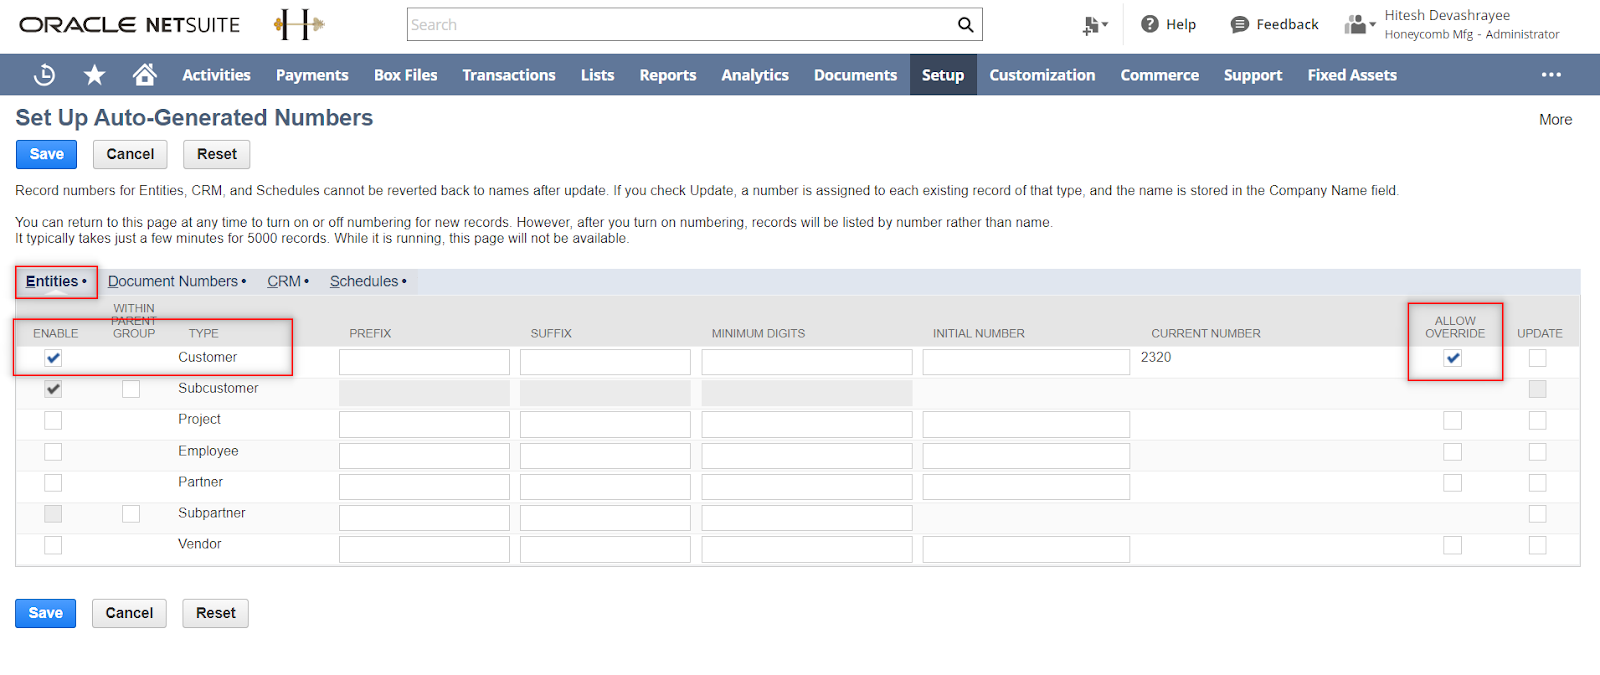
In NetSuite: Go to Setup > Company > Auto-Generated Numbers. Once you're on the auto-generated numbers page, you need to check "Allow Override" for the Customer under the Entities Tab. Then on the same page, go to the “Document Number tab” and check "Allow Override" for the transaction type you would select for the orders. Once done, click on Save on the upper left side of the page.
(Please follow the snapshots below)

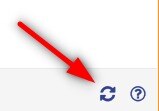
Refresh data while configuring settings: At any time if you have added something to NetSuite to fit one of the recommended settings and it does not have the Blue Plus Icon, then click the Refresh Icon in the lower right of the configuration screen to refresh the new data in NetSuite so it shows in Webgility.
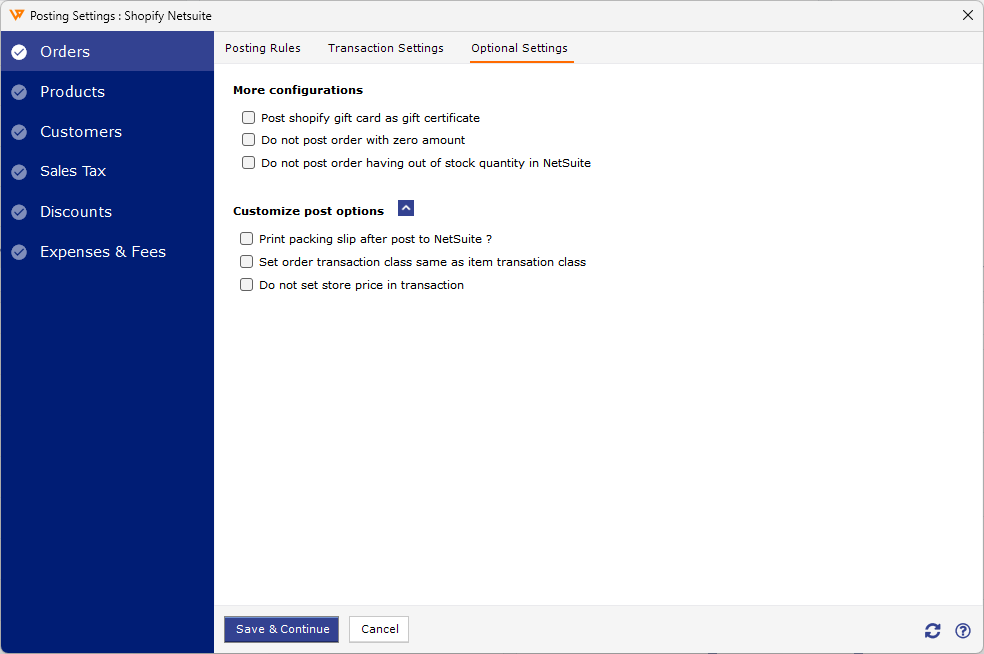
Optional Settings
The following settings on this screen are optional. You may enable or disable these settings depending on your business requirements.
Products
This area is where you configure how the products in your sales channel match the NetSuite item list.
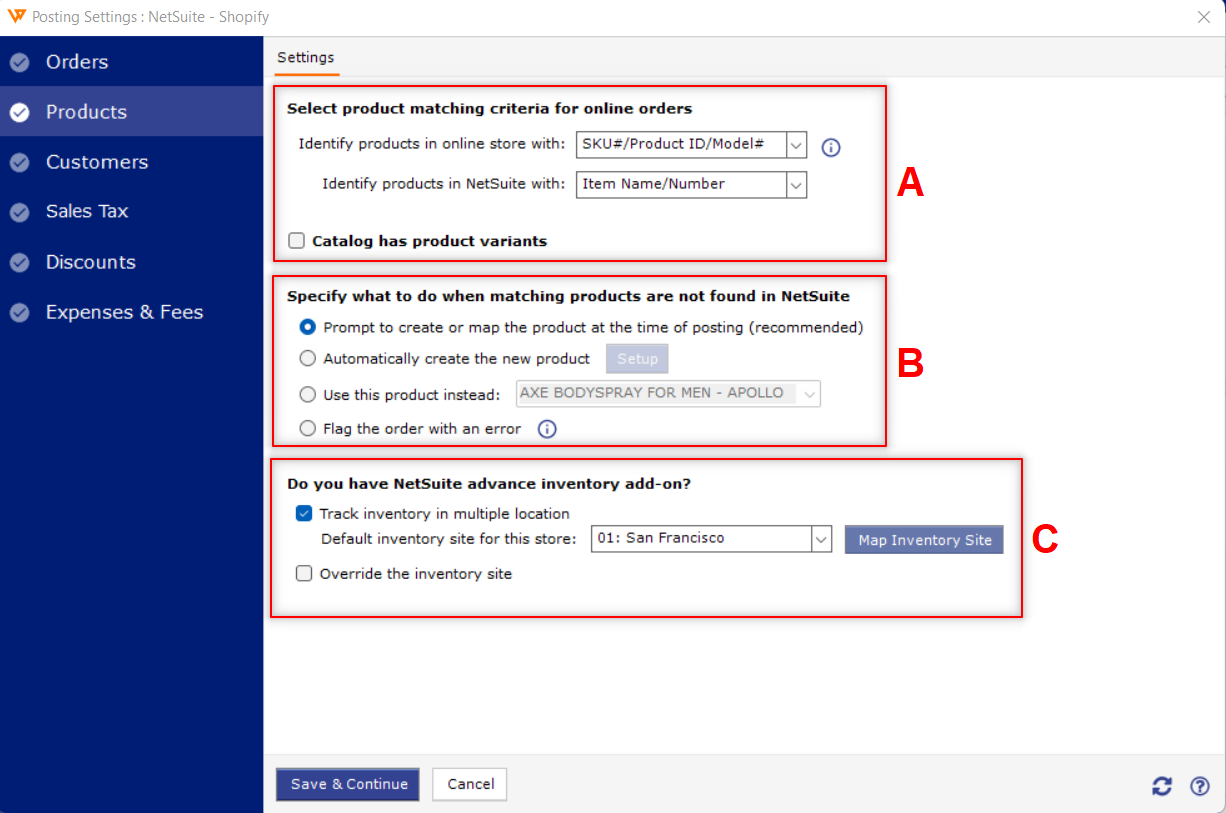
A. The most successful way clients have matched items is by using the sales channel SKU with the NetSuite item name.
B. This configures how Webgility Desktop will behave when posting an order that does not match or isn’t mapped to anything. The recommended setting is Prompt to create or map the product when posting.
C. If you do not see this area do not worry as it is only visible if you are using NetSuite Enterprise with advanced inventory turned on. If you see it, you must select your default inventory site.
Customers
This section of the posting settings covers how Webgility Desktop will behave if a customer is a returning customer or a brand new customer in NetSuite.
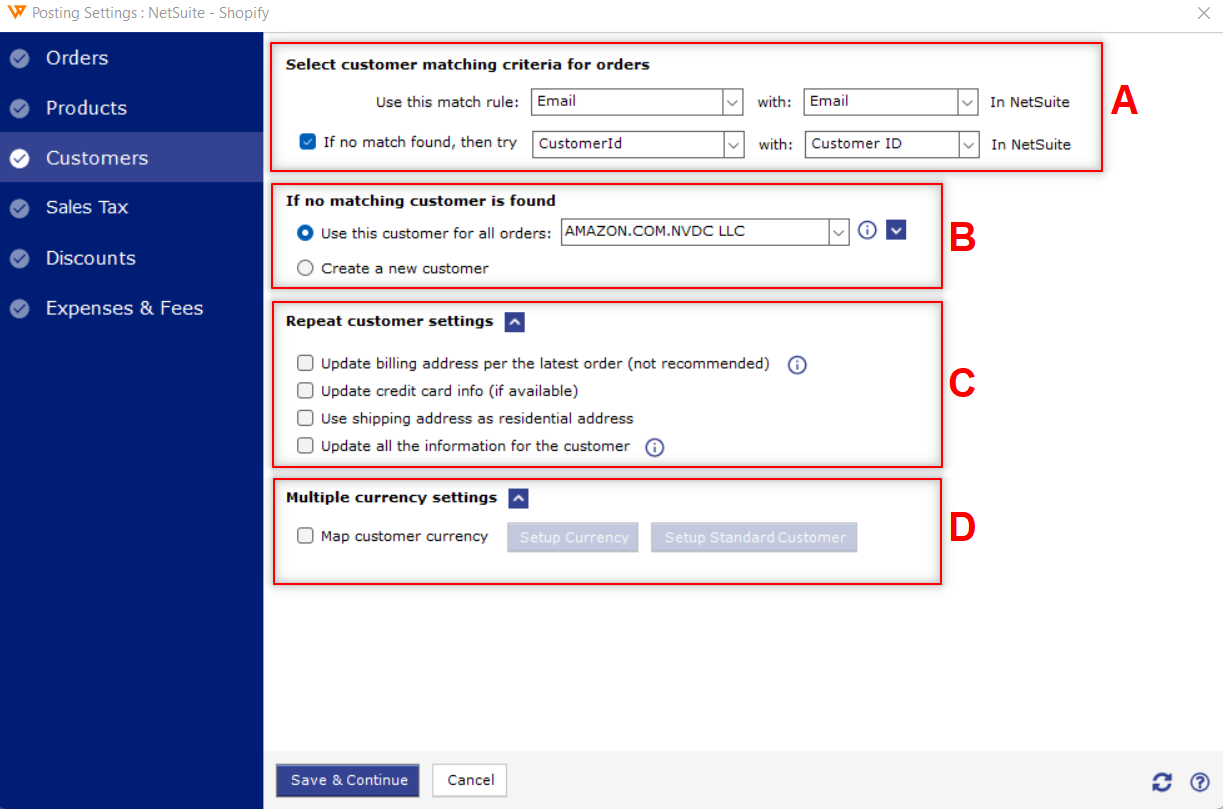
A. This is the matching area. The criteria selected here will compare the selected information about a customer on the sales channel order, to what already exists in NetSuite.
-
For the first matching rule, we suggest Email to Email
-
For the second matching rule use Customer ID to Customer ID
For the first matching rule, we suggest Email to Email
For the second matching rule use Customer ID to Customer ID
B. This area tells Webgility Desktop how to behave if an order has a customer that it has not seen before. You can select an existing customer as a default, or have it create a new customer. We generally advise setting this to a default standard customer unless you are doing wholesale or some other operation where the customer data for each order needs to be posted into NetSuite.
Note: even if you use a default customer, the real customer’s billing and shipping information will be populated into the transaction Ship and Bill To fields.
C. These advanced options are best left unchecked unless you are working with a Webgility Onboarding Specialist. This area allows you to work with a sales channel that accepts orders in multiple currencies and is for advanced users only. If you require multi-currency, please speak with your Implementation Specialist to help with the setup.
Note: Please note that to use NetSuite transaction numbers, you need to enable this setting in NetSuite. In NetSuite: go to Setup> Company> Auto-Generated Numbers. Once you're on the auto-generated numbers page, you need to check "Allow Override" for the Customer under the Entities Tab.
(Please follow the snapshots below)

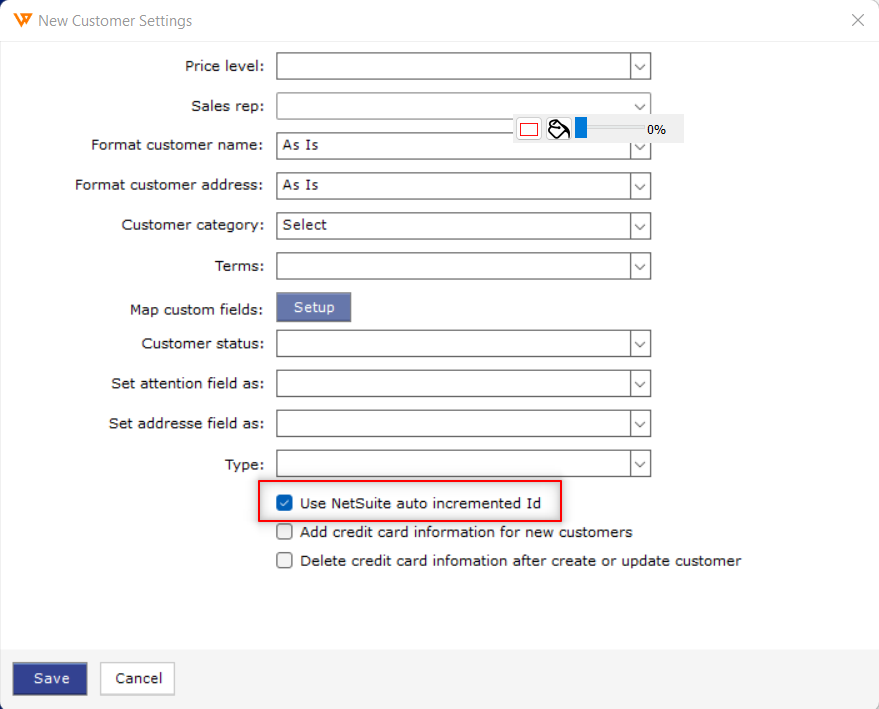
You may also enable the option Use Netsuite Auto Incremented ID in WD customer settings. In Webgility Desktop, Go to Connection > Accounting > Sync Settings. Now on the posting settings window, go to the Customer section and click on the Setup (image below). On the Setup window, check the box Use Netsuite Auto Increment ID.

Sales Tax Settings
Sales tax settings can vary quite a bit between different clients with different sales tax needs. You will want to work with a tax specialist and inform your Webgility Onboarding Specialist of how you need this configured. The settings shown below are recommended for a simpler configuration.
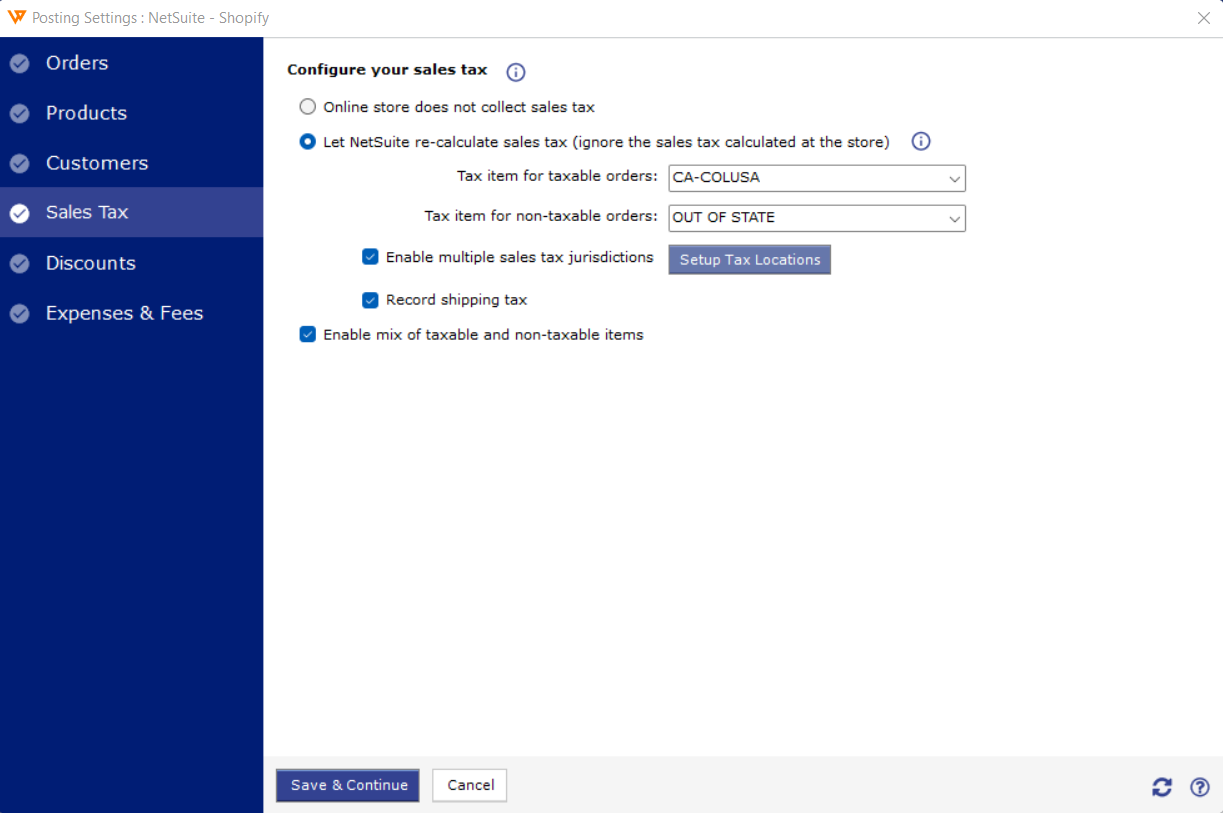
Let NetSuite re-calculate (Ignore sales tax calculated at the sales channel)
1. Select a default Sales Tax line item to use when there is a sales tax charged.
2. Select your Non-Tax sales tax item.
3. If you enable the Multiple Sales Tax Jurisdiction option it will give you the option to map the relevant tax item in NetSuite to record the tax amount separately when it is collected from multiple different locations.
4. Select the option Record Shipping Tax if you collect this amount on the sales channel.
5. Check the box if you sell a mix of taxable and non-taxable goods and select the taxable and nontaxable items.
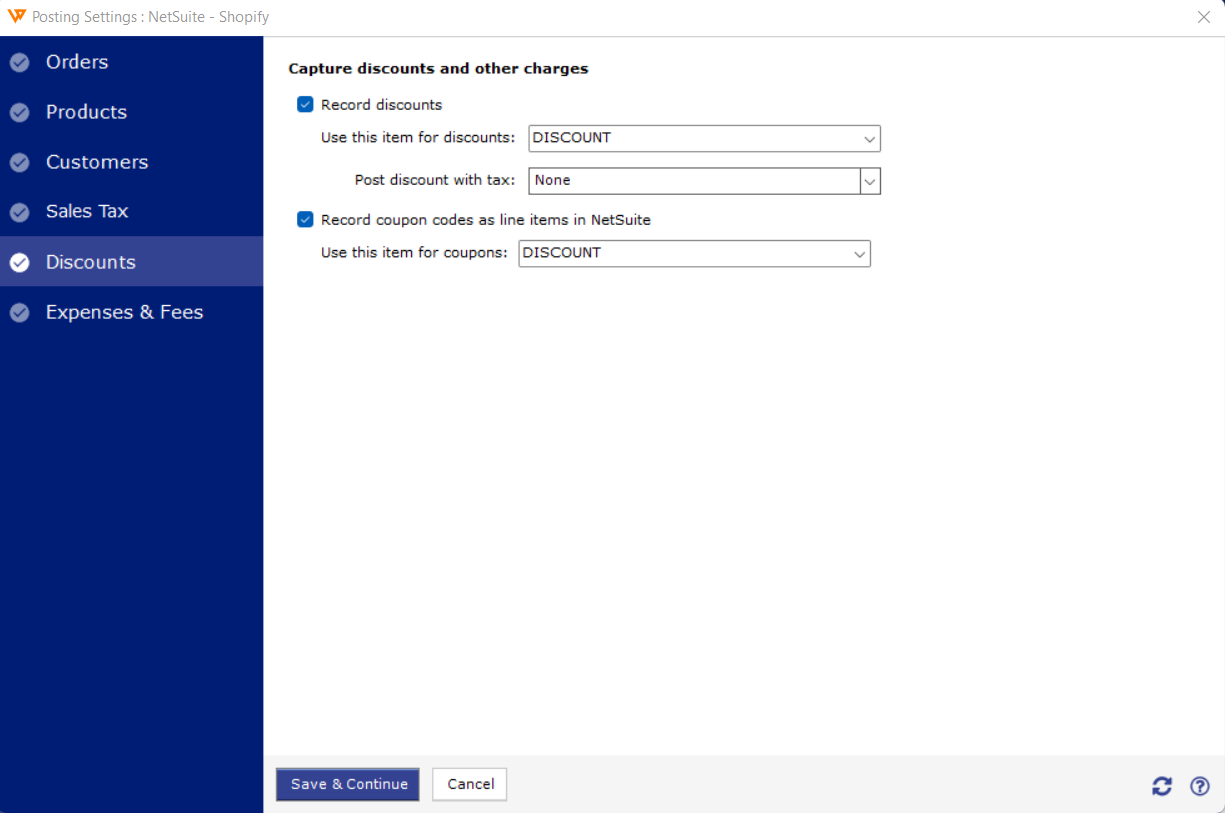
Discounts
This area will tell Webgility Desktop how to manage discounts coming from your sales channel orders. If your sales channel does coupon codes and discounts you will need to enable them via the check box.
Once enabled, choose a Discount item for Webgility to use for the discount. You will also need to set whether your discount is applied before or after tax. Usually, it is before tax. If this is the case you can choose None.
Expenses & Fees
If you are using Shopify or a marketplace like eBay or Amazon, you will see a section for Expenses and Fees. Expenses and fees are best set up with a Webgility Onboarding Specialist.
You can skip this section if you do not wish to record the transaction fee in NetSuite.

Feel free to reach out to our Support team if you need any further assistance.