How to Connect with Channel Advisor
Follow these steps to connect Webgility Desktop with Channel Advisor:
If you are connecting your first sales channel in Webgility, after you log in you will be prompted to Add Store. If this is not the first sales channel that you are adding you can navigate to Integrations> Stores> Add New Store.
-
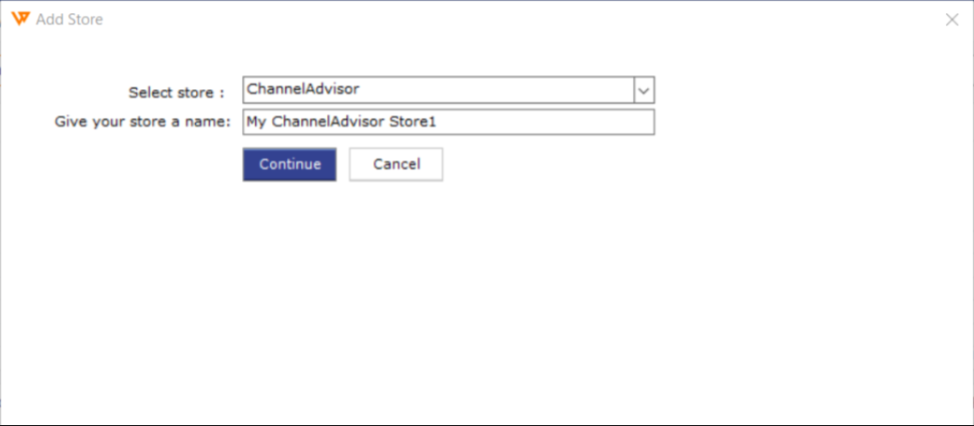
In the Add Store screen, select the sales channel type as Channel Advisor and give your sales channel a name. Click Continue
In the Add Store screen, select the sales channel type as Channel Advisor and give your sales channel a name. Click Continue
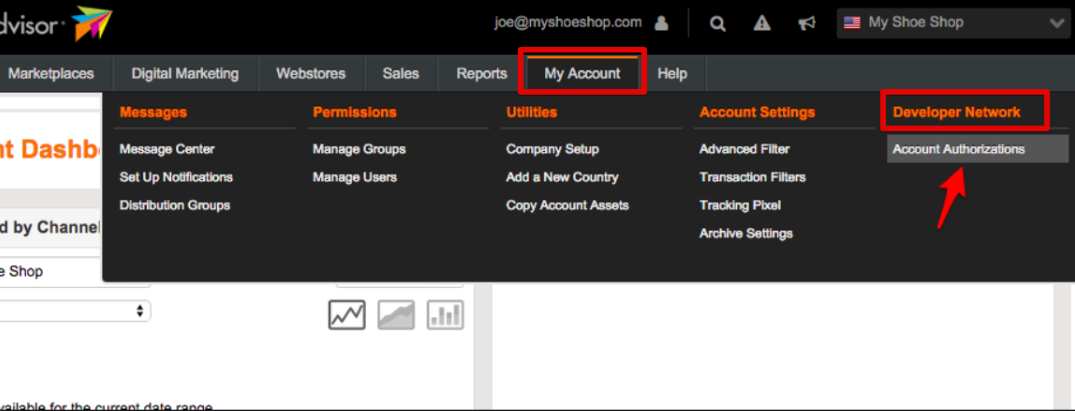
2. log in to your Channel Advisor account as an administrator, then go to My Account> Developer Network> Account Authorizations.
3. On the Developer Authorizations page, click on the [+] next to Account List to expand your list of available accounts.
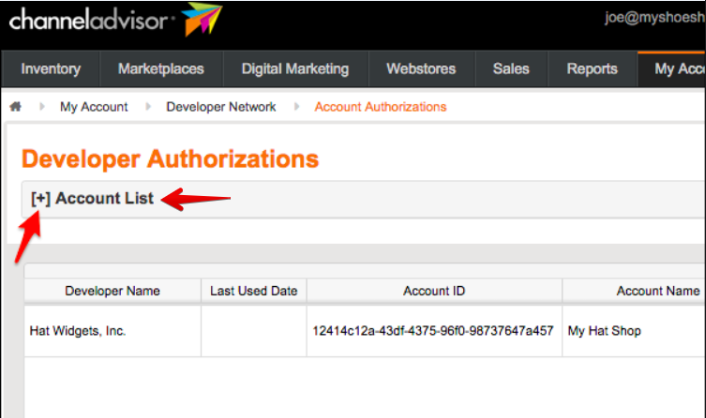
4. Find the Profile ID for the desired account. Copy the Profile ID.
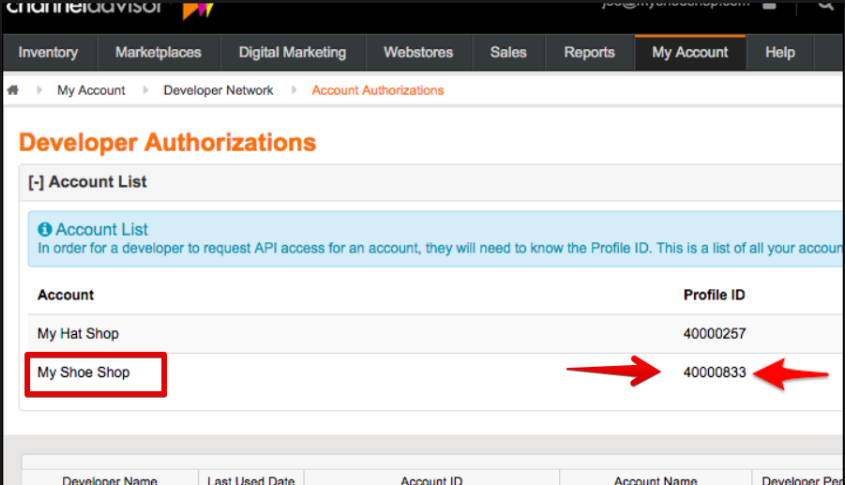
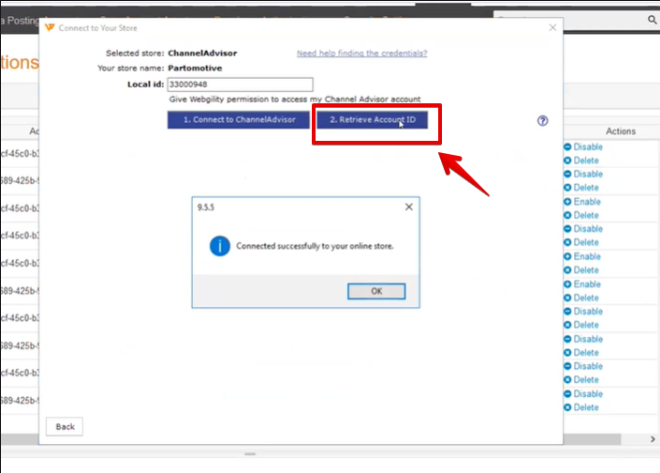
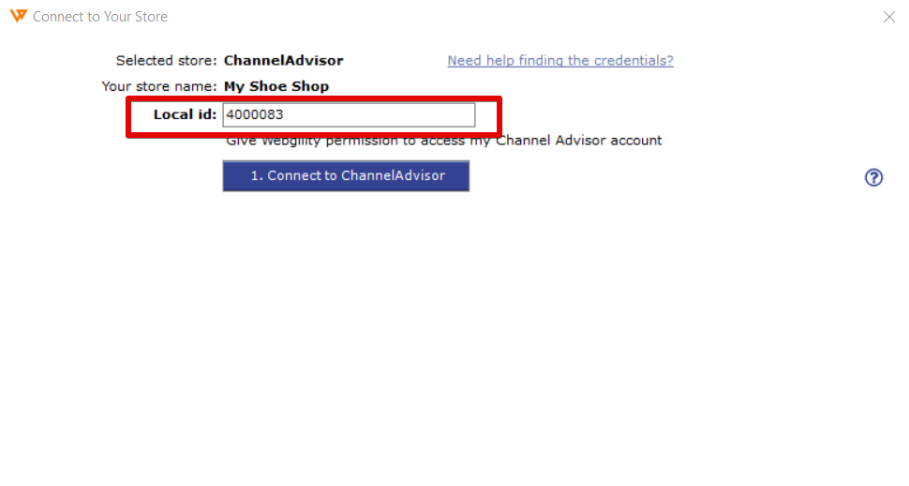
5. Paste the profile ID copied from the Developer Authorizations page in Webgility and click on Connect with Channel Advisor.
Note: In order to see the steps to locate the Local ID/Profile ID, you can also click on Need help finding the credentials link.
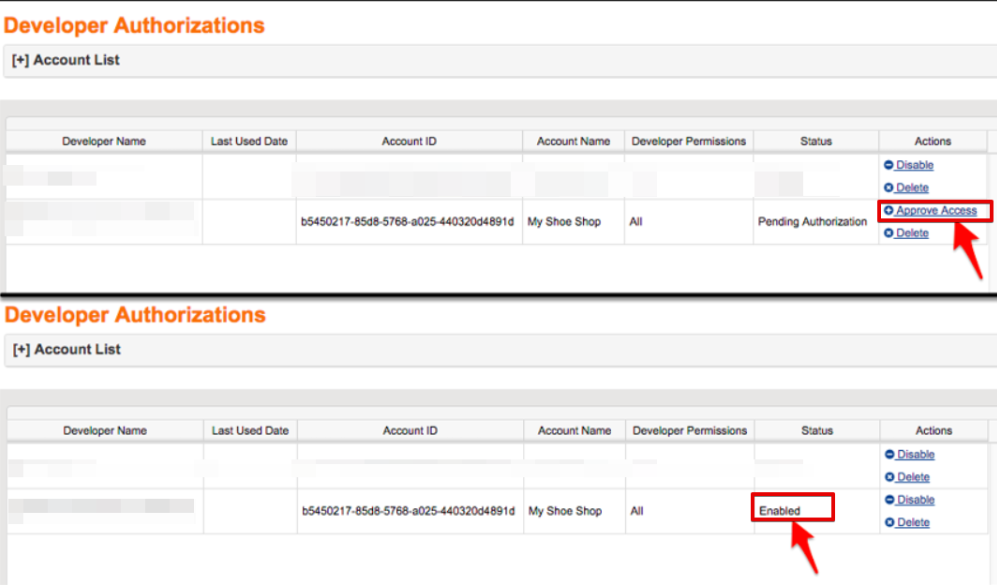
6. A new window will open and take you to the Developer Authorizations page of Channel Advisor. Under the Account List, find the newly created authorization eccDesktop-Webgility. Under the Actions column, press the Approve Access link. Be sure the Status changes to Enabled.
7. Open Webgility, click on Retrieve Account ID, and wait for the message Connected Successfully to your Online Store.
8. Click Ok and then Continue.
