Overview:
Webgility desktop can be configured to retrieve the Tracking ID from Quickbooks Desktop and post the Tracking ID to your online store marking the order as shipped.
When you process the shipping of your online orders in QuickBooks using QuickBooks Shipping Manager, you have to update the tracking IDs from QuickBooks to your online store manually.
When using Webgility Desktop to post the orders into QuickBooks and QuickBooks Shipping Manager to ship your orders, Webgility Desktop can retrieve the Tracking ID after you paste it into the Sales Order or Invoice in QuickBooks and send it back to the online store updating the shipping information and changing the order status to shipped.
Below are the steps to access and configure the settings for retrieving tracking id:
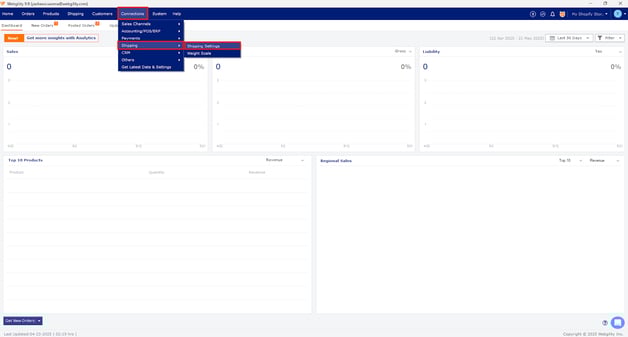
In Webgility desktop application, navigate to the ‘Connections’ and then select ‘Shipping’ and ‘Shipping Settings’
This will open the Shipment Settings window for shipping. Select Yes here, then select the QuickBooks Shipping Manager check box under Use Webgility to get shipment details from other applications..
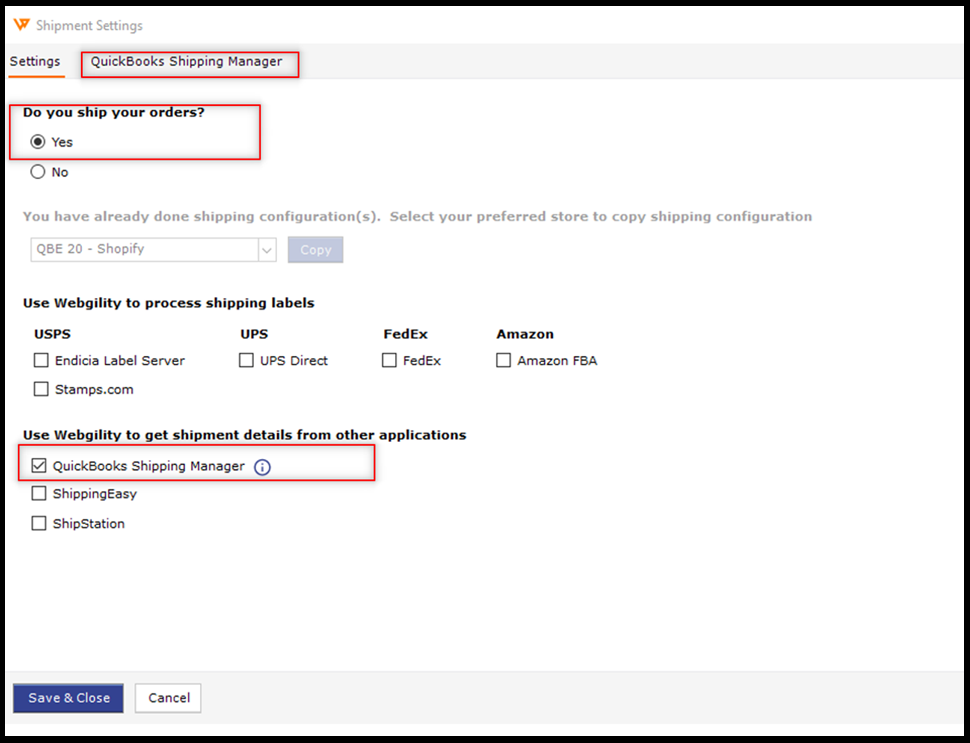
Now on the same page, select the QuickBooks Shipping Manager tab on the top to access the settings for retrieving the Tracking ID (Image below):
There are a few options for retrieving the Tracking ID:
General Settings for “QuickBooks Shipping Manager” in Webgility Desktop.
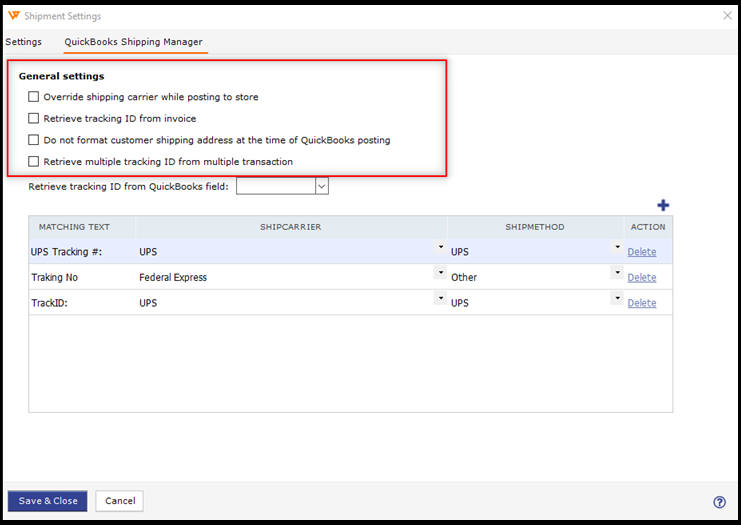
Override Shipping Carrier while posting to store
Example: The shipping carrier selected at the store is UPS. If the option is selected, it will override the shipping carrier chosen in Webgility Desktop
Retrieve Tracking ID from Invoice
Example: If a Sales Order is posted to QuickBooks and converted to an Invoice, this option will retrieve the Tracking ID from the Invoice. If the option is not selected, Webgility Desktop will retrieve Tracking ID from the Sales Order.
Do not format Customer Shipping address at the time of QuickBooks posting
If selected the shipping address will not be formatted while posting orders in QuickBooks.
This comes in handy for example: If you end up with a dash showing in the shipping address in QuickBooks, you can select Do not format customer shipping address at the time of posting to QuickBooks. This will remove the dash.
(Dash in the address shown in QuickBooks)

Retrieve Multiple Tracking ID from Multiple Transaction
If the orders from your store typically have multiple Tracking IDs from multiple shipments select this setting.
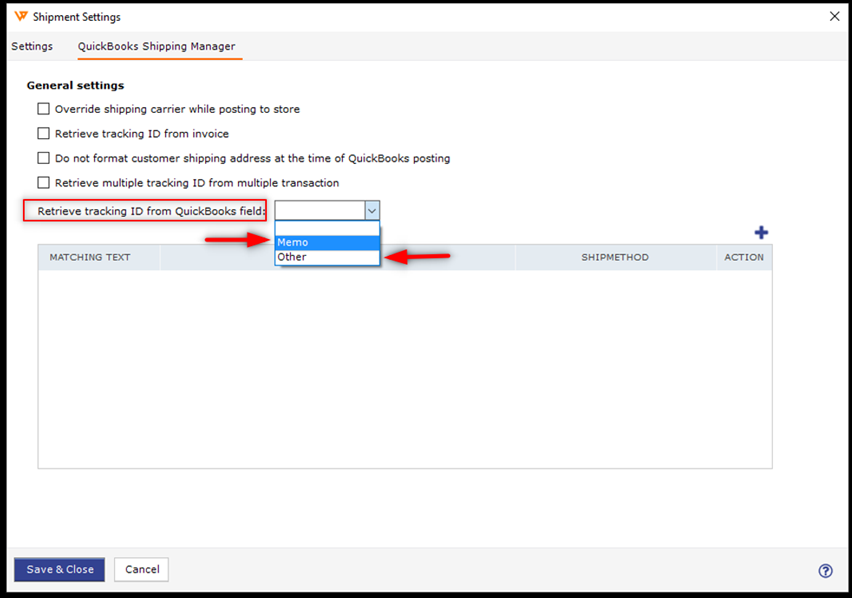
You can retrieve the Tracking ID without using matching text If you update the Tracking ID in the Memo or Other field in the order in QuickBooks. You will need to select the option in the dropdown “Retrieve Tracking ID from QuickBooks Field” (Memo or the Other field). This will look in the selected field and pull the information from there.
If you are not using the Memo or Other fields, you will need to set up Matching Text to retrieve the Tracking ID.
On the Sales Order or Invoice, you will need to copy the shipping text leading up to the colon, this will be the Matching Text Webgility Desktop will look for to grab the Tracking ID.
For example, as shown below, UPS Tracking #: this will be the Matching Text.

You will need to add the matching text to the form using the + plus sign on the top right of the matching text area. If you have multiple different matching texts, you will need to enter them into this form and save them.

Retrieving Tracking ID process (Manual):
Once orders are posted to QuickBooks from Webgility Desktop and the orders have been shipped via QuickBooks shipping manager and the Tracking ID has been pasted into the Sales Order or Invoice, follow the steps mentioned below:
-
To manually retrieve the Tracking ID and post it to the store, go to the Webgility Desktop order dashboard and go to the posted orders tab
-
Select the order or orders you want to retrieve the Tracking ID from QuickBooks
-
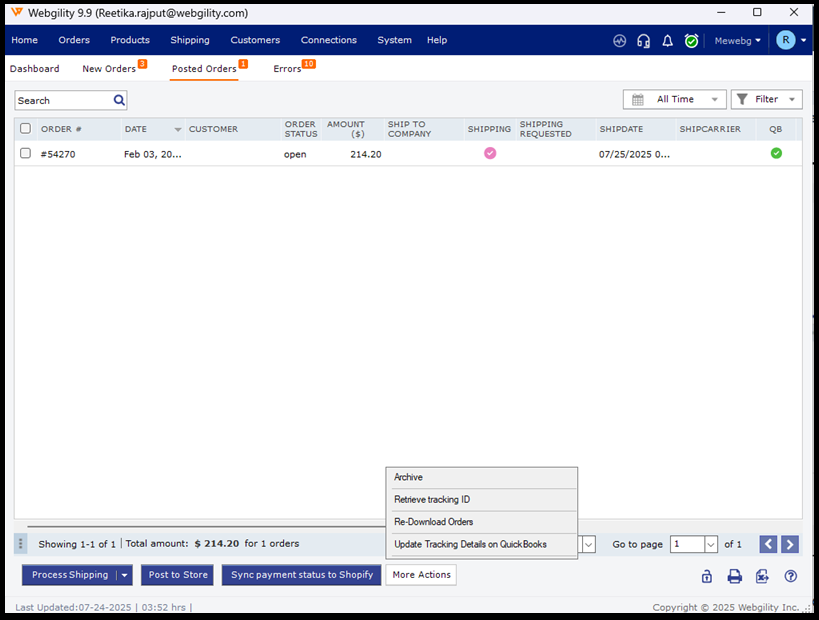
At the bottom of the Webgility Desktop dashboard, select More Actions and then select Retrieve Tracking ID.
-
Webgility Desktop will get the Tracking ID of those orders from QuickBooks and update them in the order details in Webgility Desktop.
-
The Tracking IDs can then be updated to the online store with a Shipped order status by using the Post to Store option in Webgility Desktop.
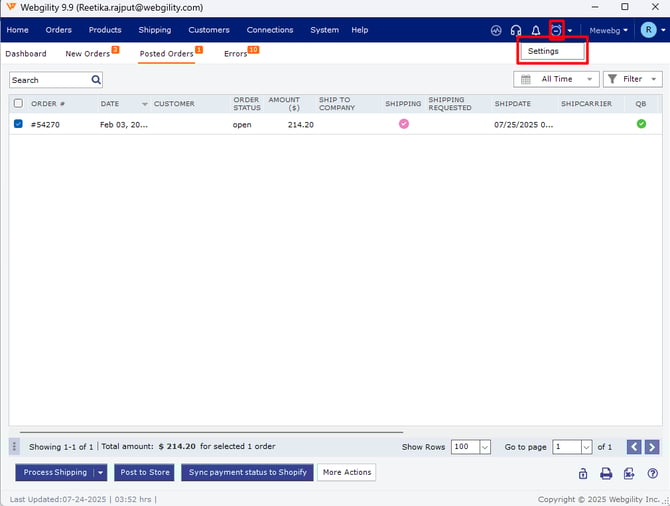
Please navigate to the Posted Orders tab and then click on ‘More Actions’ button and then select Retrieve Tracking ID.
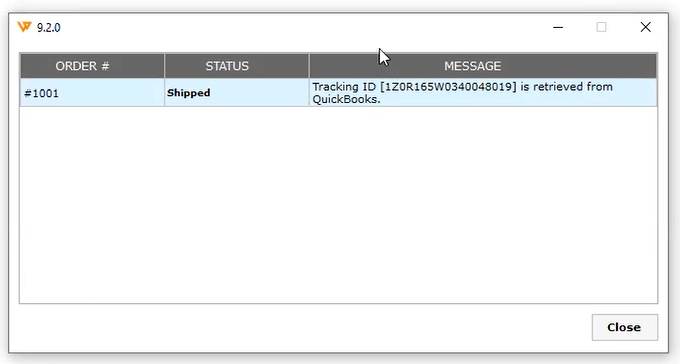
You will get a confirmation message Tracking ID is retrieved from Quickbooks.
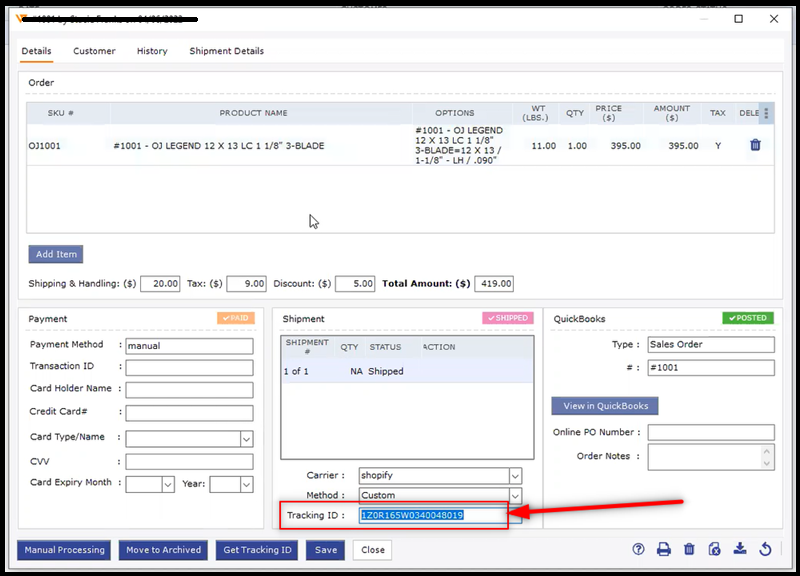
Once the tracking ID has been retrieved, you will be able to see it in order details tab under Shipment
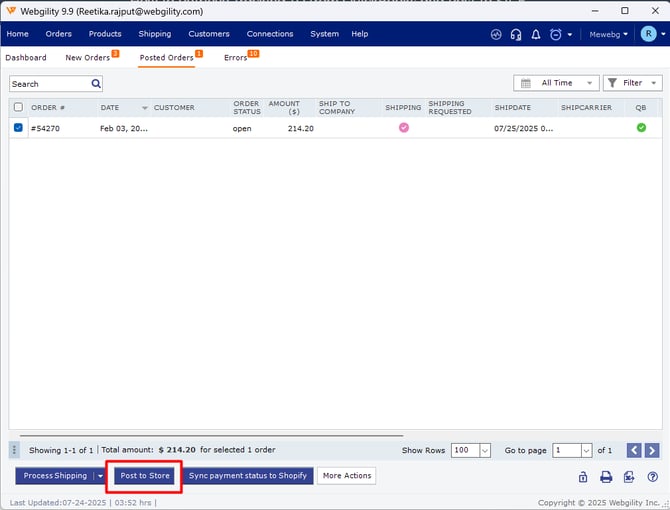
Once you have retrieved the tracking ID’s from your QuickBooks company file, you can update the same in the order at your Sales Channel. Please select the order and then click on Post To Store button and this will do the needful.
Retrieving Tracking ID process (Automatic):
You can automate the process of retrieving the Tracking ID and posting it to the store.
Click on the clock icon in the upper right corner of the Webgility Desktop and select Settings to open the Scheduler settings window.
In the Scheduler settings, enable the option Retrieving Tracking ID from QuickBooks and specify the condition when to retrieve the Tracking ID, for example, if the order Must be paid or do not care.
Also enable the option Post update to store, once done, select the frequency on the right side of these 2 options.
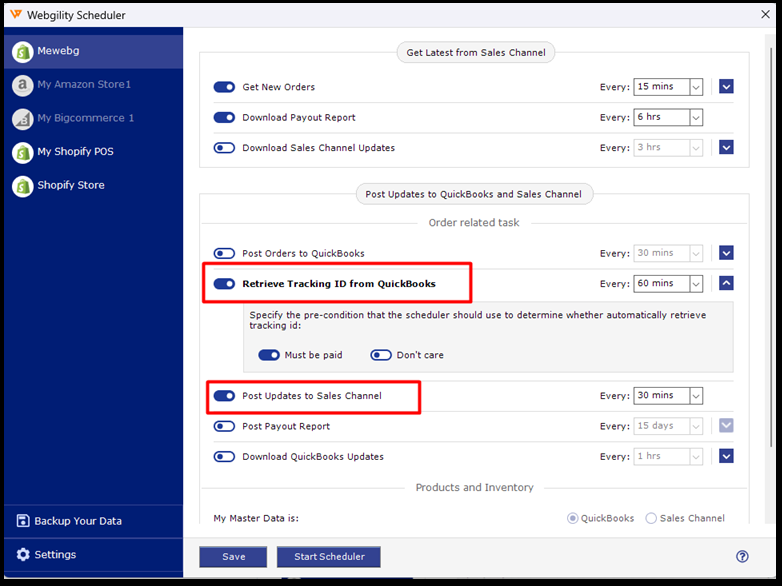
After making the above changes, select Save in the Scheduler settings. You will need to make these settings in the Scheduler for each store you wish to retrieve and send the Tracking IDs