How to access the Product Catalog:
The Products Module view is the center of control for your inventory. To access it login to Webgility Desktop.
1), Go to Products. This is the main hub for viewing a snapshot of your inventory. It will display both QuickBooks and sales channel products and allow you to easily identify which ones have been mapped and which are currently matching.
2). On the top right of every catalog in the Products section, you will see an ↻ icon. Clicking this will instruct Webgility Desktop to scan your QuickBooks and the current online store for any updates to the inventory.
3). The Product Module is one consolidated view of all the products from your current Sales Channel and QuickBooks. Separated into two sections it allows you to easily identify which ones have been mapped and which are currently matching.
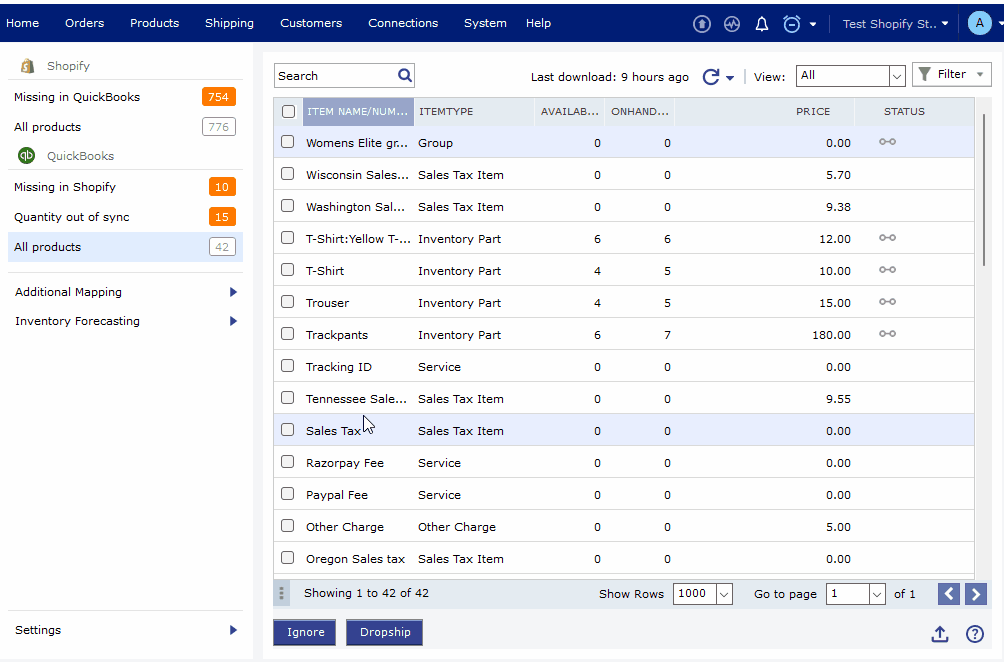
QuickBooks Products
This view allows you to review all the products from your item list in QuickBooks. The column with the light blue header shows the matching criteria.
1). Click the ↻ icon on the top-right to scan your QuickBooks and download all the updates.
2). On the bottom right of this screen, there are three actionable icons:
3). Mark as Drop-Ship: This button will flag the items as a product that is fulfilled via drop-shipment. This can affect the product in a couple of ways:
-
It can produce a Purchase order (PO) when an order with the flagged item is posted to QuickBooks
-
Item flagged as drop-ship will be removed from any shipments generated within Webgility Desktop
4). Ignore: This button will flag the items as an Ignored item.
-
Ignored items are removed from the syncing functions.
-
Ignored items may still appear within orders and posted to QuickBooks.
5). Export to CSV: This button will export the items selected via the tick box in the left column to a CSV file. When selected, a prompt will appear asking where to save the file.
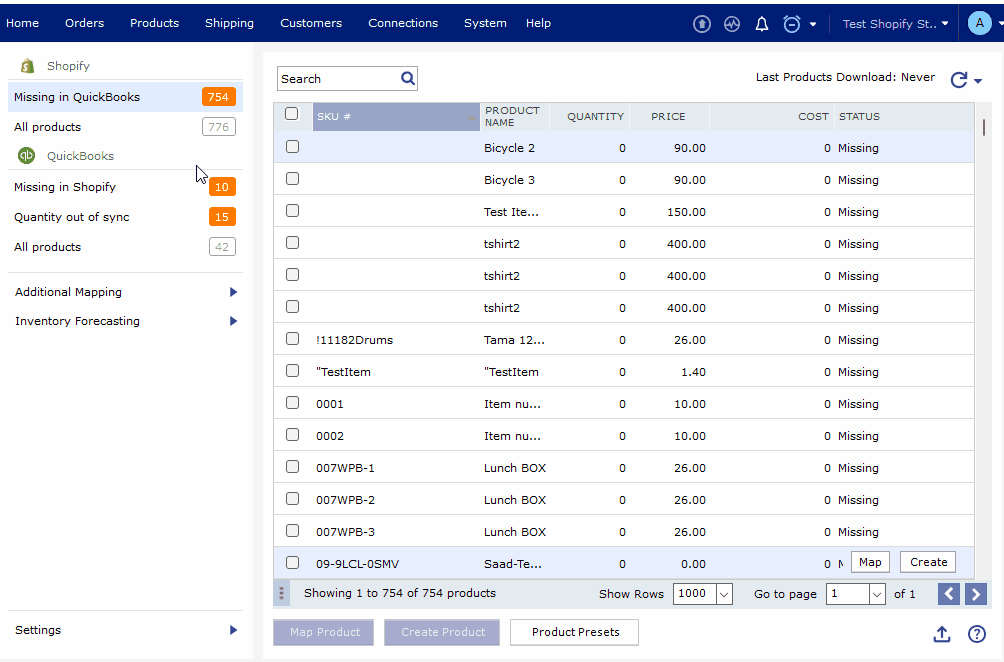
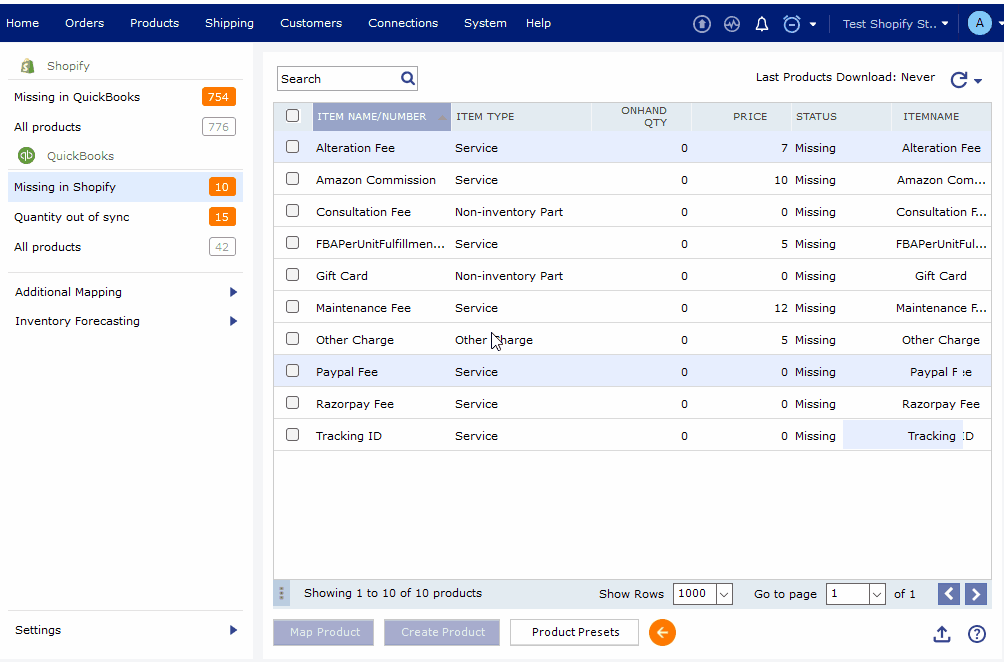
Sales Channel Products
This view shows the list of current products in your Sales Channel. In some cases, depending on the shopping cart or marketplace, this may show every product you have ever sold on the channel. As in the QuickBooks products area, the light blue header denotes the matching criteria. This screen also has an ignore option in the lower right, which functions the same as the option from the QuickBooks Products screen.
Matching Products
Under your current Sales Channel, from the ‘All Products’ catalog, you can filter out the ‘Matched’ products this screen displays products that match exactly.
This means you will see items that are matched or mapped from your Sales Channel to QuickBooks.
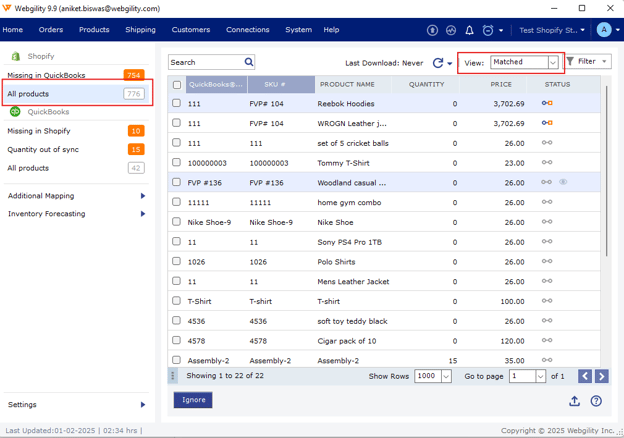
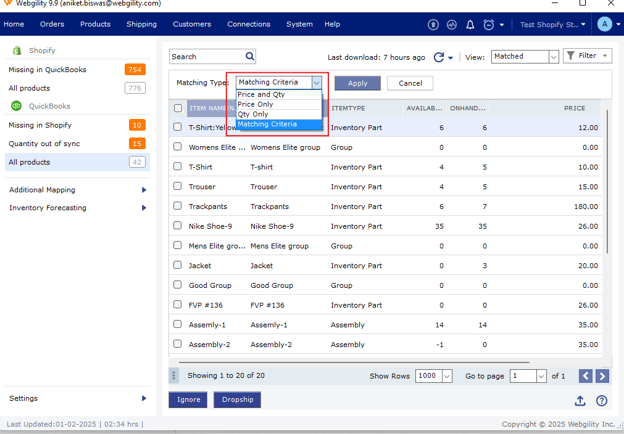
Clicking the Filter button on the right opens up the ability to omit one or more of the criteria to display so that you can see items that are synced in part but not fully.
You can filter the matching based on Price & Qty, Qty Only, Price Only and, Matching Criteria
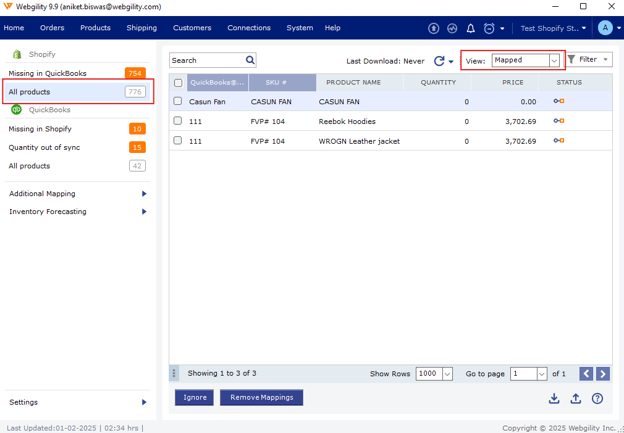
Mapped Products
This screen displays products that you have manually mapped between QuickBooks and your Sales Channel. From this view, you are able to delete mappings made in error or export existing mappings to a CSV file from the icon buttons in the lower right.
Note: For any of the above screens, double-clicking a product will give you a pop-up with more details.
