Overview:
With tax mapping you are able to ensure that the correct county tax item in your accounting solution is used in each transaction. This feature applies to both QuickBooks Desktop and NetSuite.
Some online channels combine both state and county tax into a single tax line in the online order, while others split the tax into both state and country tax collections in an online order as seen below.
In order to map your taxes, there must be tax items or groups already in your accounting solution that mimic what is being charged in your online channel. Learn how in the following steps.
1. Ensure that in your accounting solution you have created a tax item for the county tax for each state you have to collect taxes for.

Note: The tax item in QuickBooks Desktop can be combined as the state percentage plus county percentage, as some online channels include both in a single tax line in the online order. Or, the tax can be split into both state and county tax calculations in an online order.
For NetSuite Users Only: if your tax items in NetSuite are individual tax items or items within a tax group, enable this setting in the File > Advanced Settings > Additional Setting.
2. Navigate to the taxes segment of the Sales Channel configuration in Webgility Desktop. This can be found by going to Connections > Accounting/POS/ERP > Sync Settings > Sales Tax Tab. Click on refresh button in bottom right hand side in order download latest item data from Quickbooks. Now, select the option to Let QuickBooks calculate taxes and choose a place to hold tax items for in state tax and select the tax item for out of state tax.
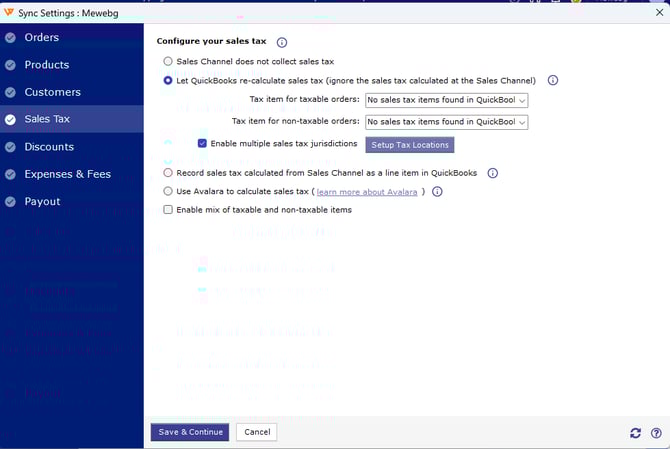
Then, check the box to Enable multiple sales tax jurisdictions and click Setup Tax Locations.
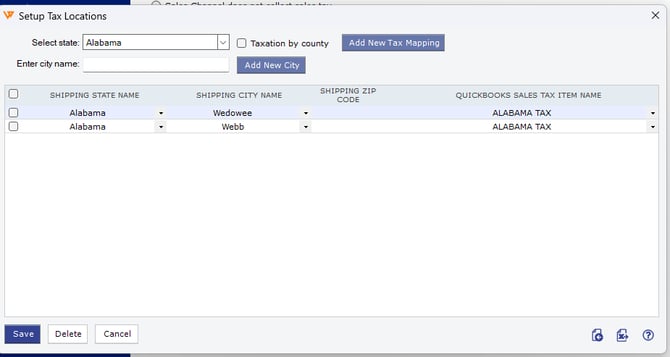
3. Select the box for Taxation by county and choose your state and county. Then select the sales tax item within your accounting solution for each corresponding county. Click on Add New Tax Mapping to add other states, counties, and tax items. Repeat this process until completed then click Save > Save & Continue, and then close the configuration.
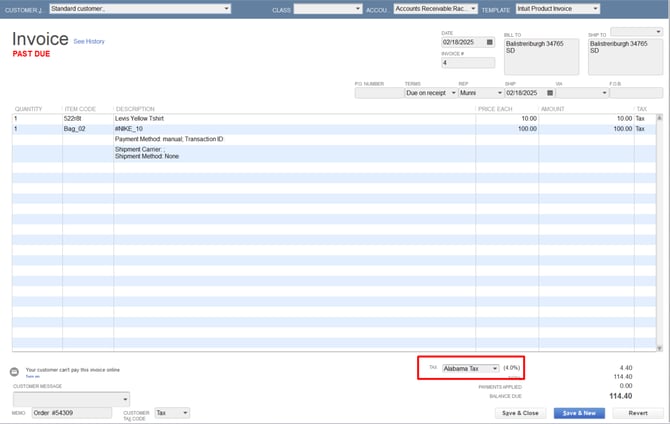
4. When the order is posted to QuickBooks Desktop, the correct tax item in QuickBooks Desktop will be selected based on the shipping city and zip code as well as the tax mappings in Webgility.