How to Connect a Trading Partner with SPS Commerce and Webgility Desktop
This article provides step-by-step instructions on how to connect a trading partner with SPS Commerce and Webgility Desktop. By establishing this connection, businesses can seamlessly exchange purchase orders, invoices, and other EDI documents between SPS Commerce and Webgility, ensuring smooth data flow, reduced manual entry, and improved order management efficiency.
Follow these steps to connect a trading partner with SPS Commerce and Webgility Desktop.
Connecting to SPS for EDI documents in Webgility Desktop functions in much the same way as connecting to a sales channel.
Steps to follow:
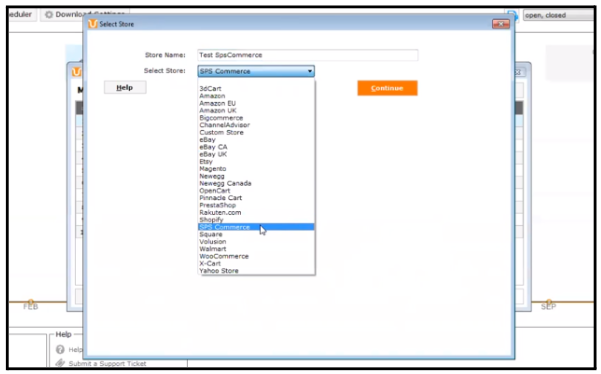
1. To get started, navigate to the ‘Connections’ section, choose ‘Sales Channel’, and click on ‘Add Sales Channel’. Next, select SPS Commerce from the list of available sales channels and provide a name for your first EDI partner.

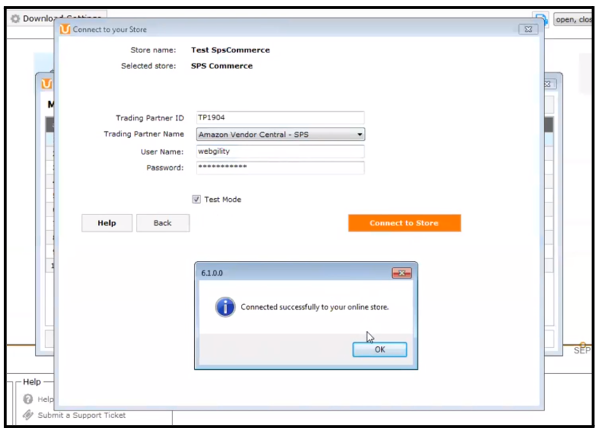
2. Once you click Continue, you will be asked to provide your Trading Partner ID from SPS Commerce. This ID is a unique code assigned by SPS to identify your account with a specific Trading Partner. Please input this ID in the first field, then choose the appropriate Trading Partner type from the dropdown menu.
Lastly, enter your SFTP Username and Password for SPS Commerce to establish the connection.

Now, connect to your ERP or Accounting System:

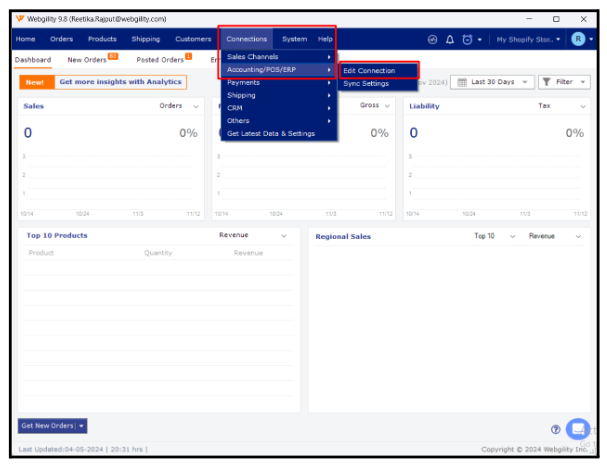
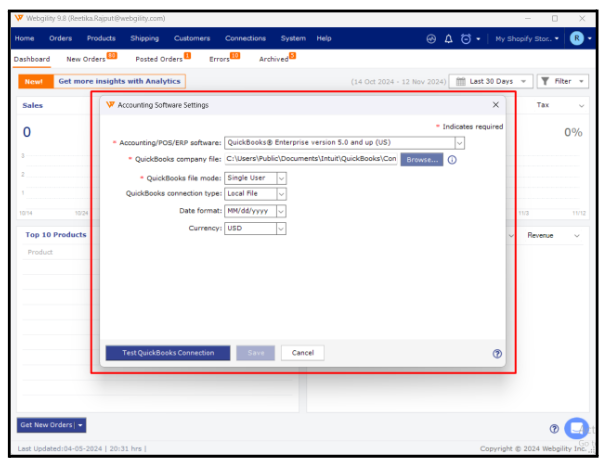
3. your ERP or accounting system. If your accounting system is already linked to another sales channel, you can easily replicate that connection or upload a new file directly from this screen.
Note: Connecting to your ERP or accounting system is solely for creating the data link, enabling you to configure it further. Rest assured, this action will not result in any immediate modifications to your accounting system. Once this is completed, you will be ready to configure your Trading Partner.
