How to Post Transactions Based on Payment Methods in Webgility Online
This article explains how Webgility Online users can post transactions in Webgility Online based on payment methods. It outlines the difference between payment methods and payment gateways, providing examples across various platforms such as Shopify, Magento, BigCommerce, and WooCommerce. The guide walks through configuring posting rules for each payment method within Webgility Online and includes practical tips for maintaining clarity and efficiency, such as removing unnecessary payment options and avoiding confusing naming conventions. By following this guide, users can ensure accurate transaction posting, improved bookkeeping, and a streamlined checkout experience for their customers.
Understanding the Difference: Payment Methods vs. Payment Gateways
Payment Gateways:
Webgility Online allows you to connect to payment services such as PayPal, Stripe, or Shopify Payments. which handle the secure transmission of payment data between the customer, the merchant, and the bank, to download payment fees associated with each order.

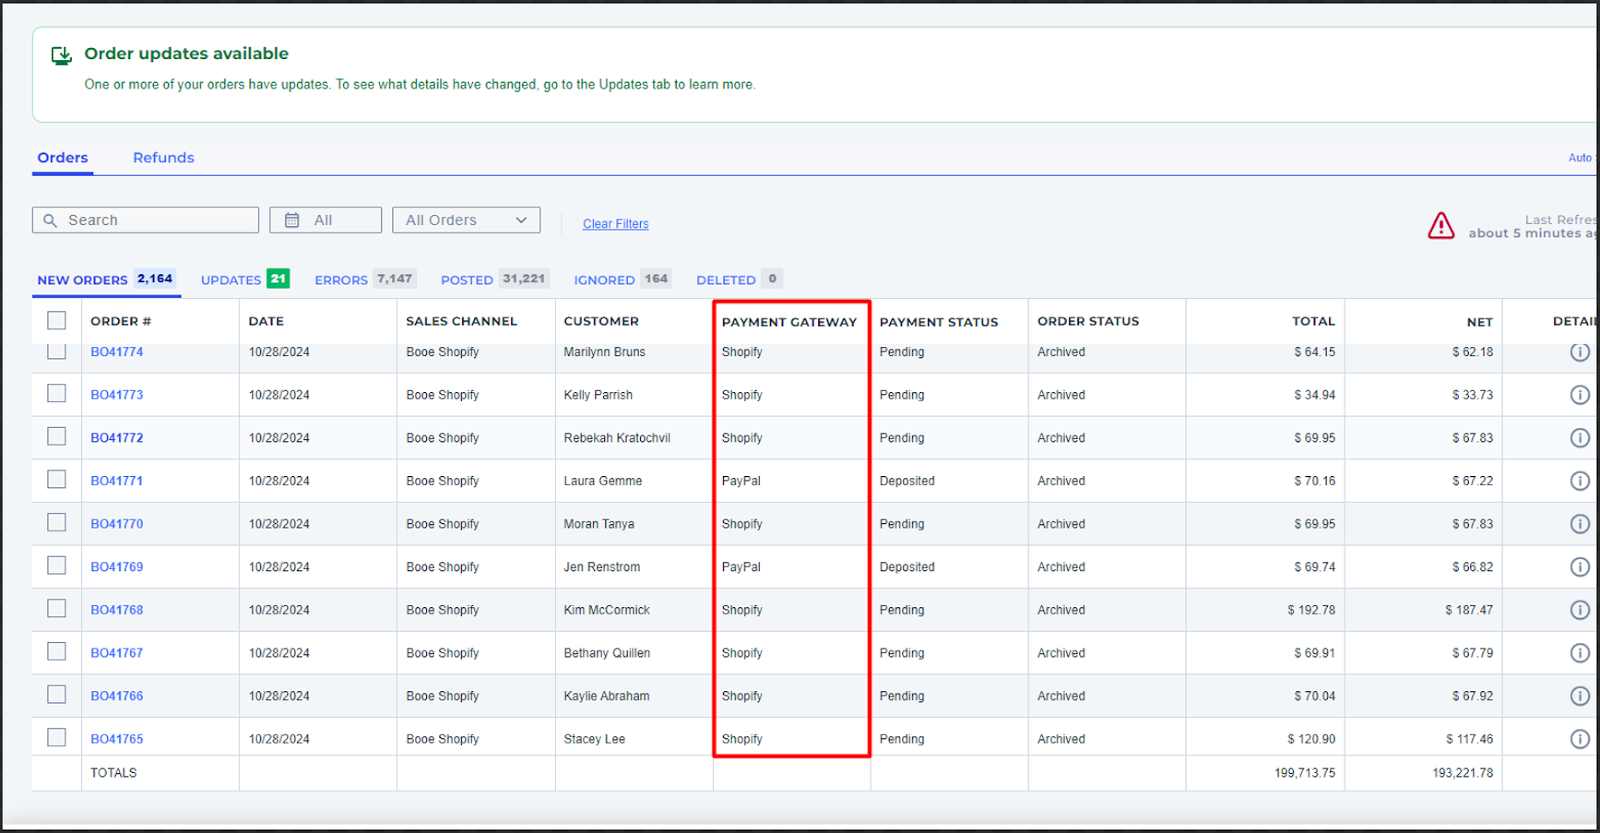
If you have connected to these gateways on Webgility Online, you will see the values in the Payment Gateway field for each order in the Order/Refund table.
Payment Methods:
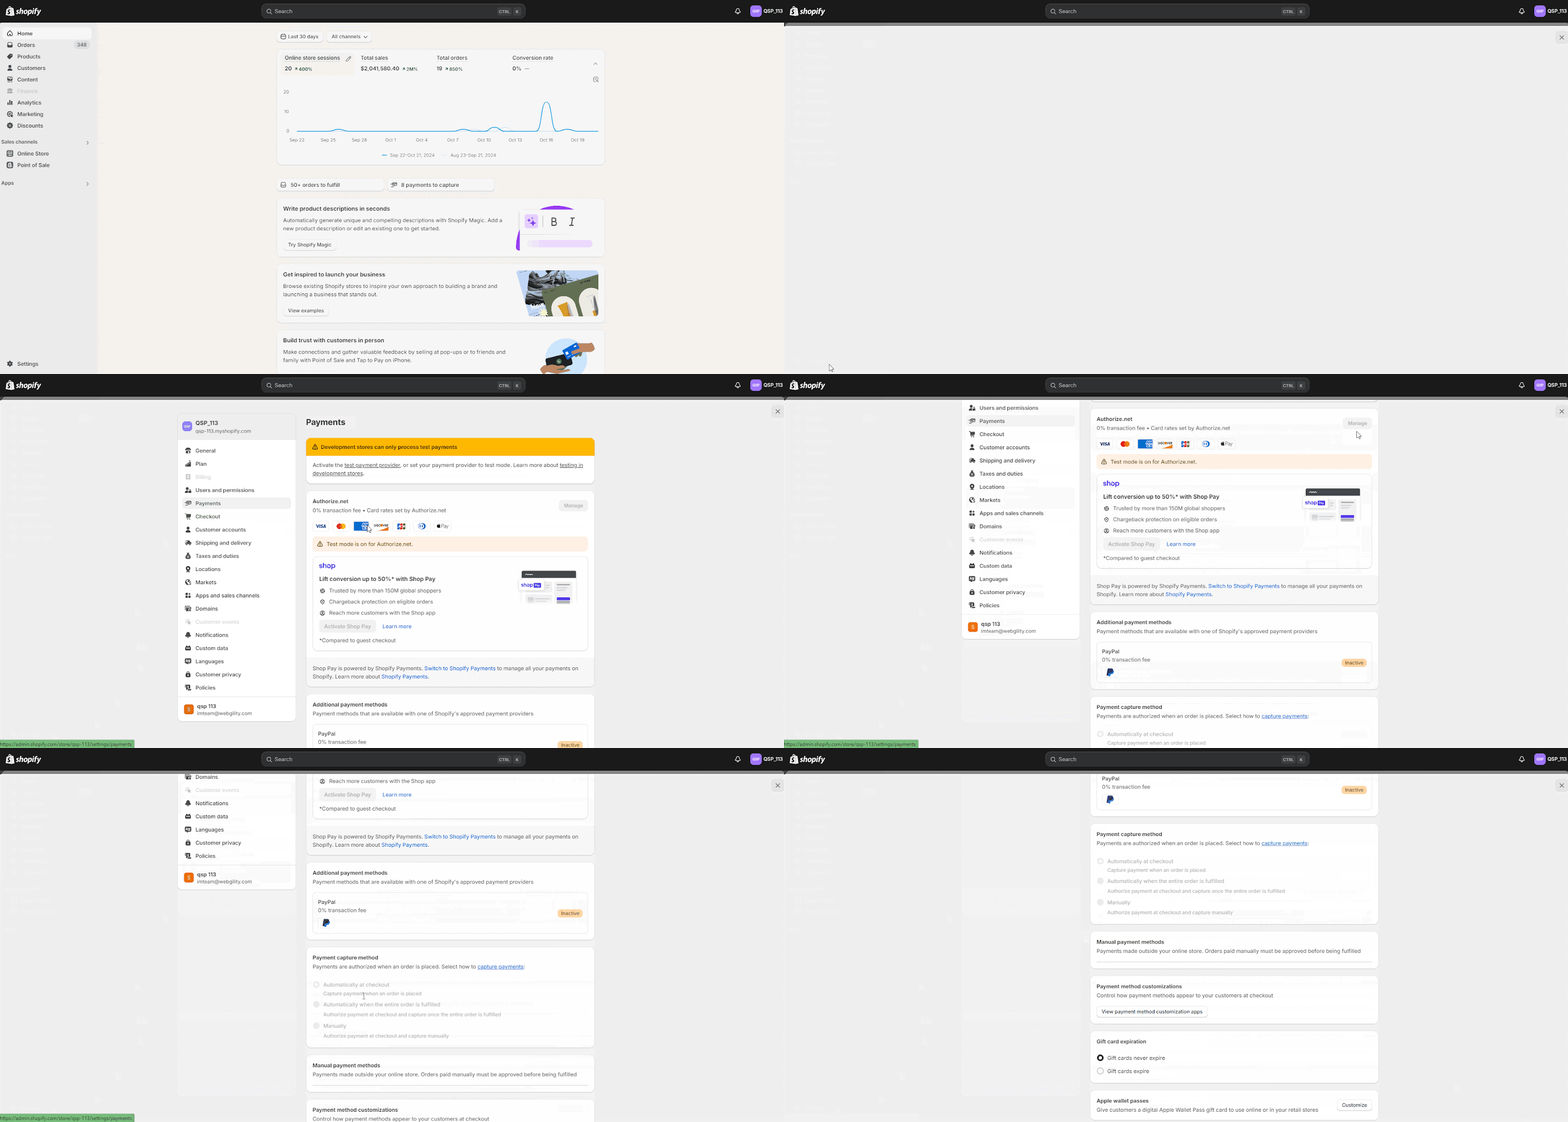
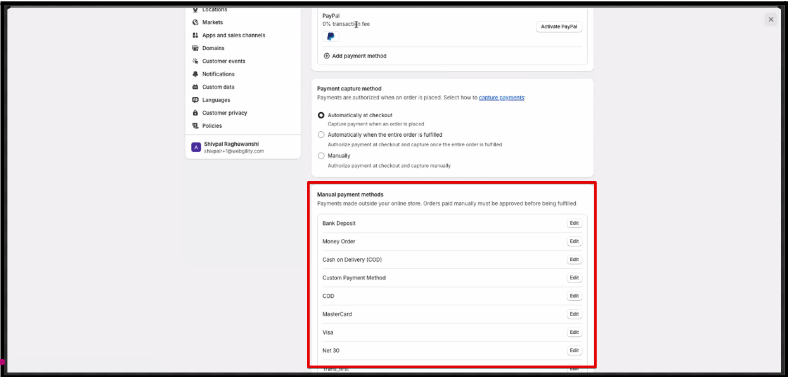
Generally, we download the payment method data for each order from your Sales Channel. The values are from your settings about payments in your Sales Channel. For Shopify Sellers, you can add payment gateways to your payments in Settings, click Payments, or create manual payment methods there.
Manual payment methods are for the payments made outside your online store. We suggest not creating a manual payment method name that can be confused with your online payment gateway, such as Credit Card, Visa, or MasterCard.
Shopify:
In Shopify, go to Settings. Navigate to Payments and add or configure multiple payment methods such as credit cards, PayPal, or manual payments.
For other channels, see the references we have mentioned below:
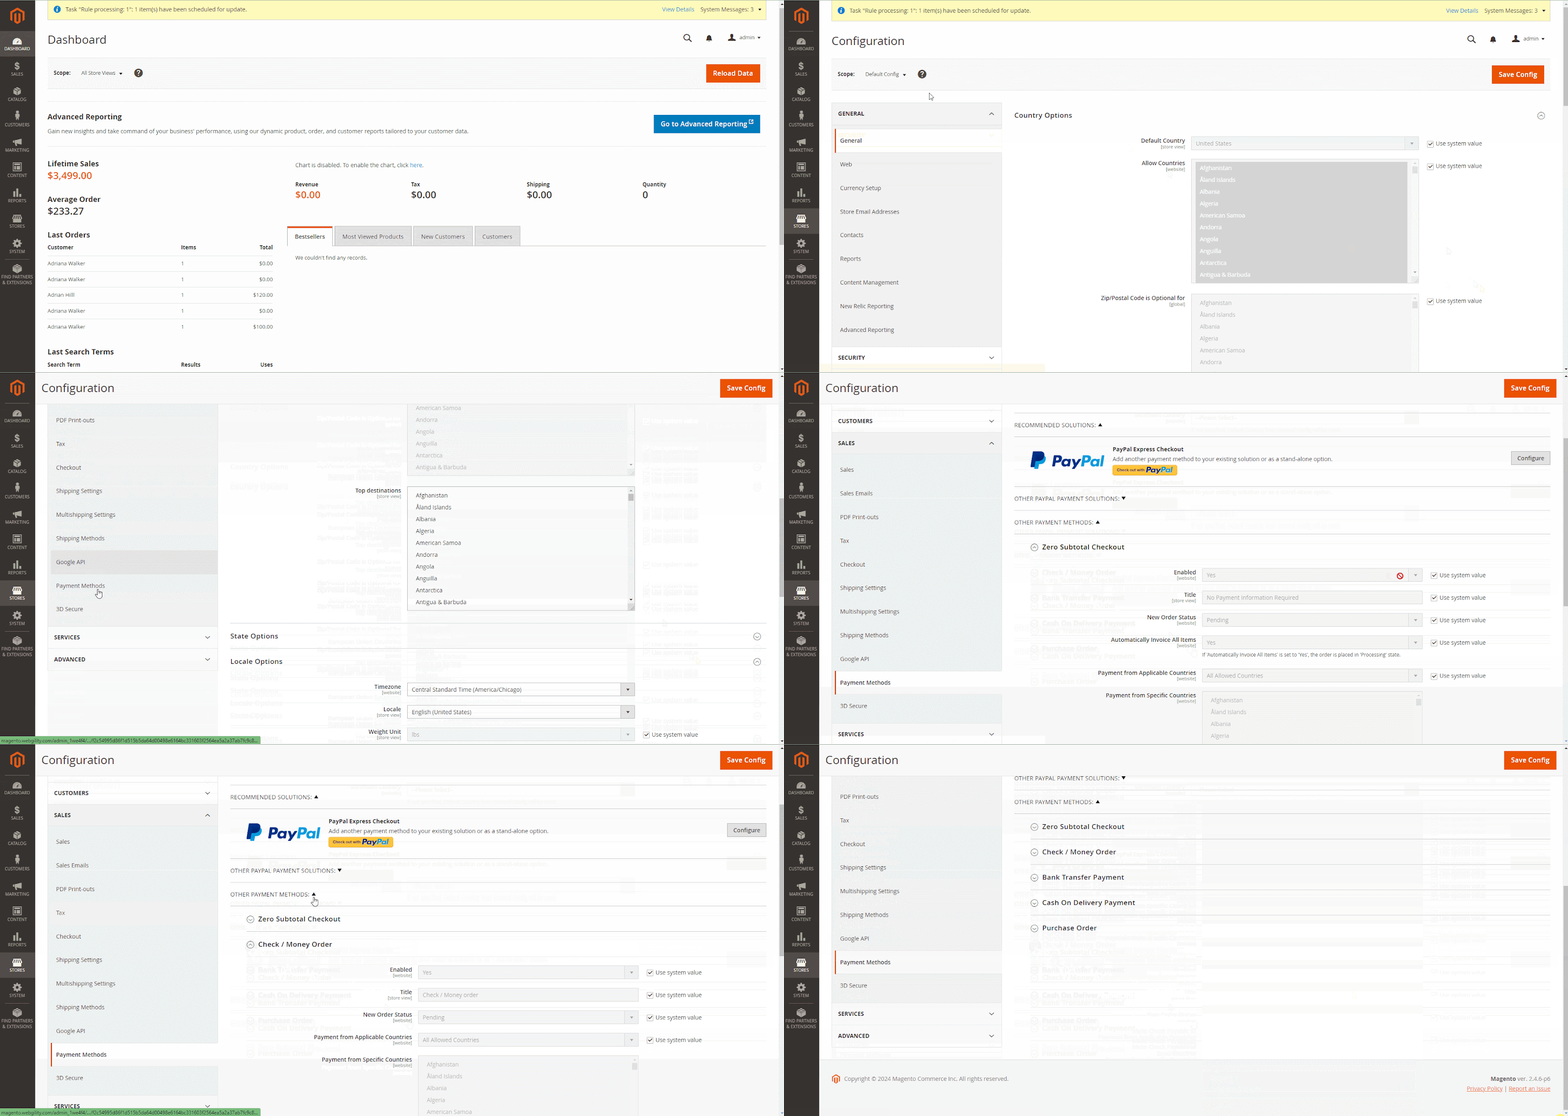
Magento:
Go to Payment Options under Account Settings to add various accepted payment methods, such as PayPal.
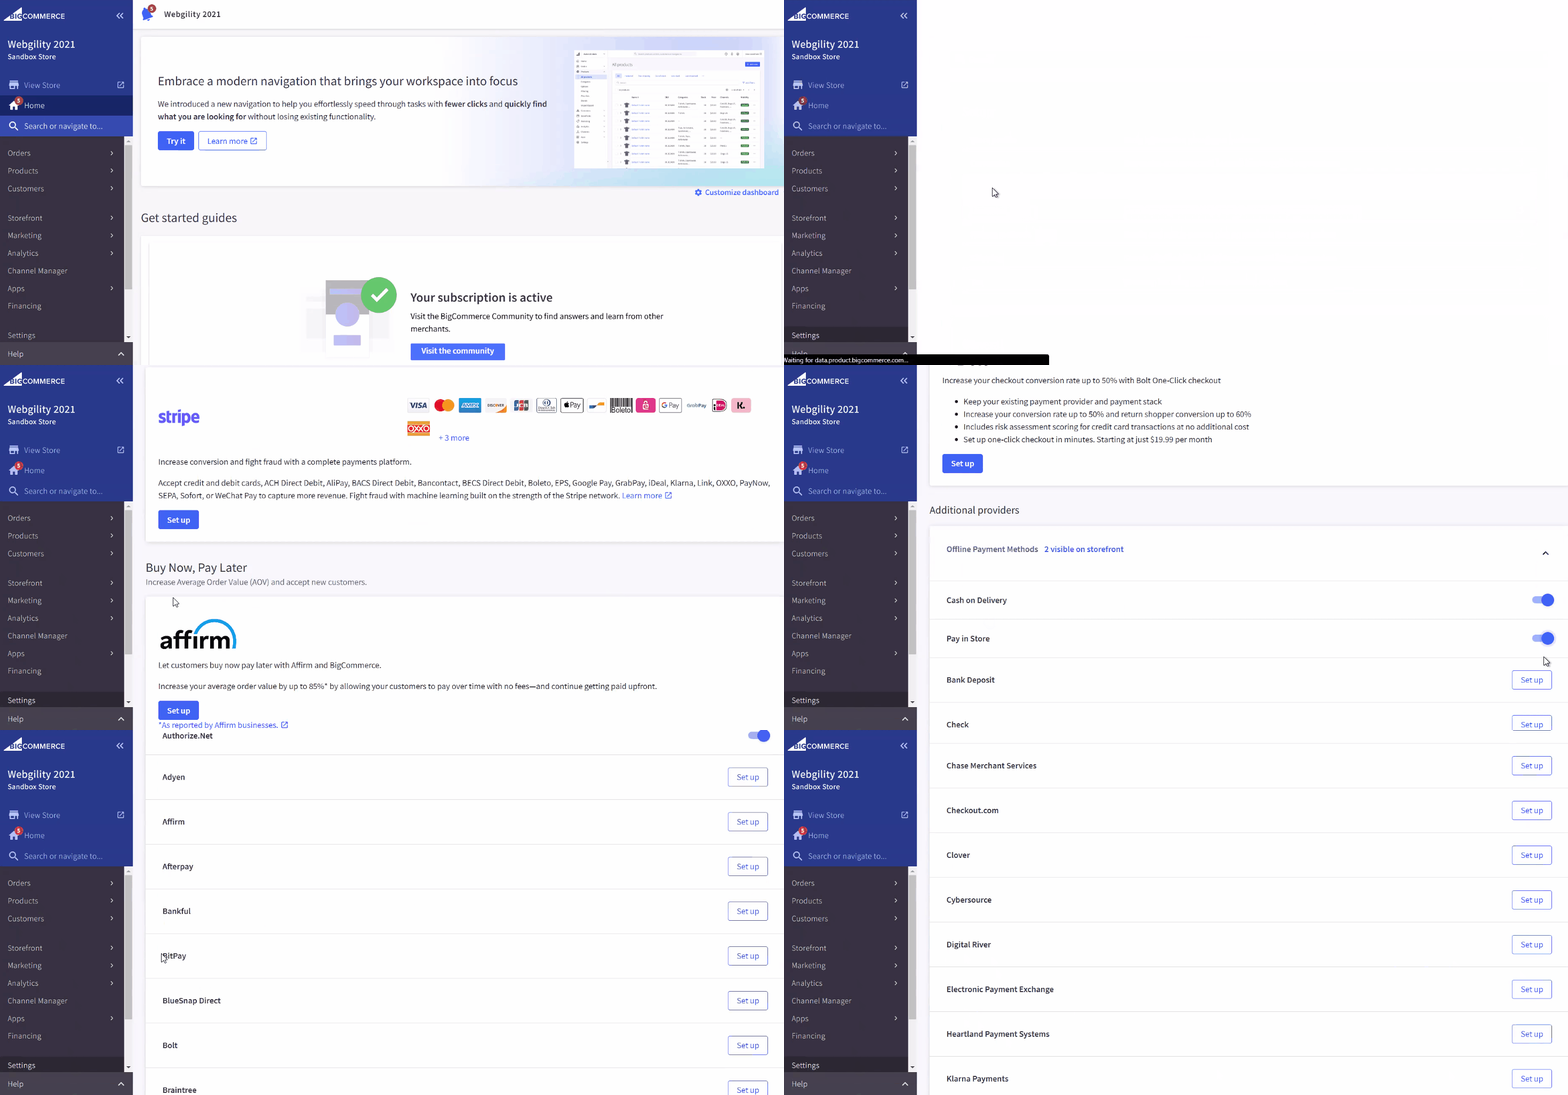
BigCommerce:
In-Store Setup and then go to Payments, you can add manual payment methods, including third-party gateways.
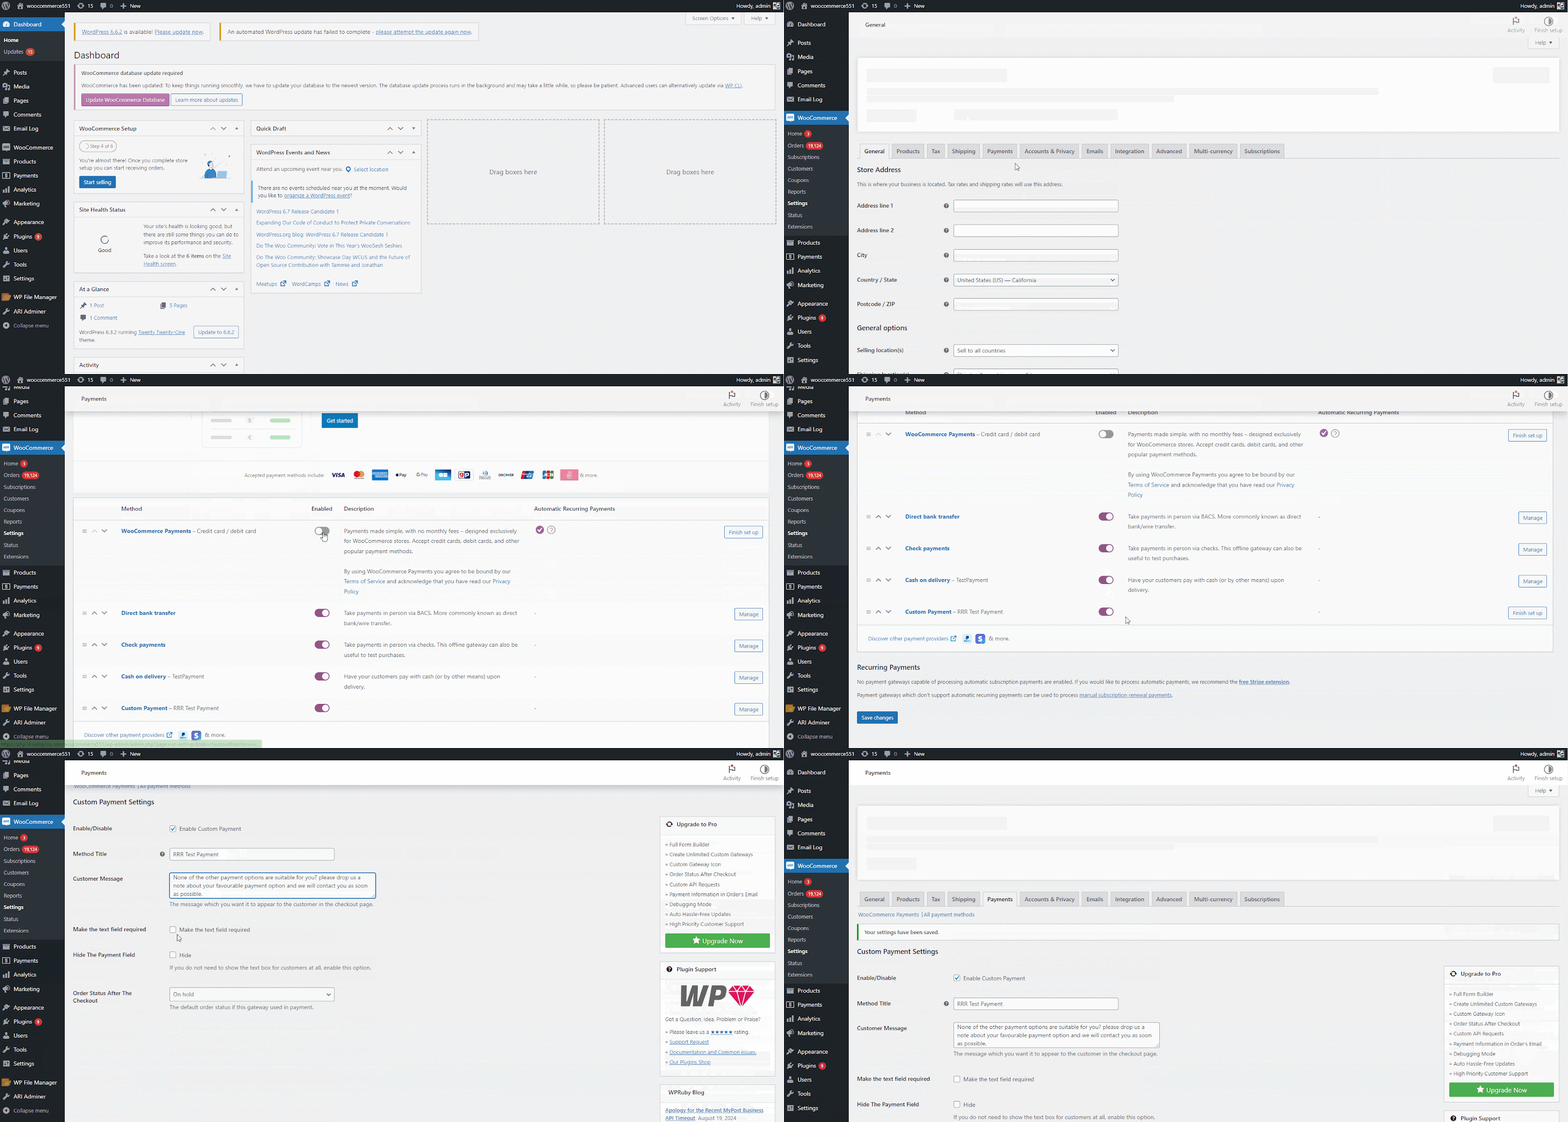
WooCommerce:
Visit WooCommerce, and open Settings, select Payments, where you can configure multiple payment methods and payment gateways for customers to choose from.
Steps to Manage posting rules based on payment methods in Webgility Online
1. Navigate to Payment Settings in Webgility Online
-
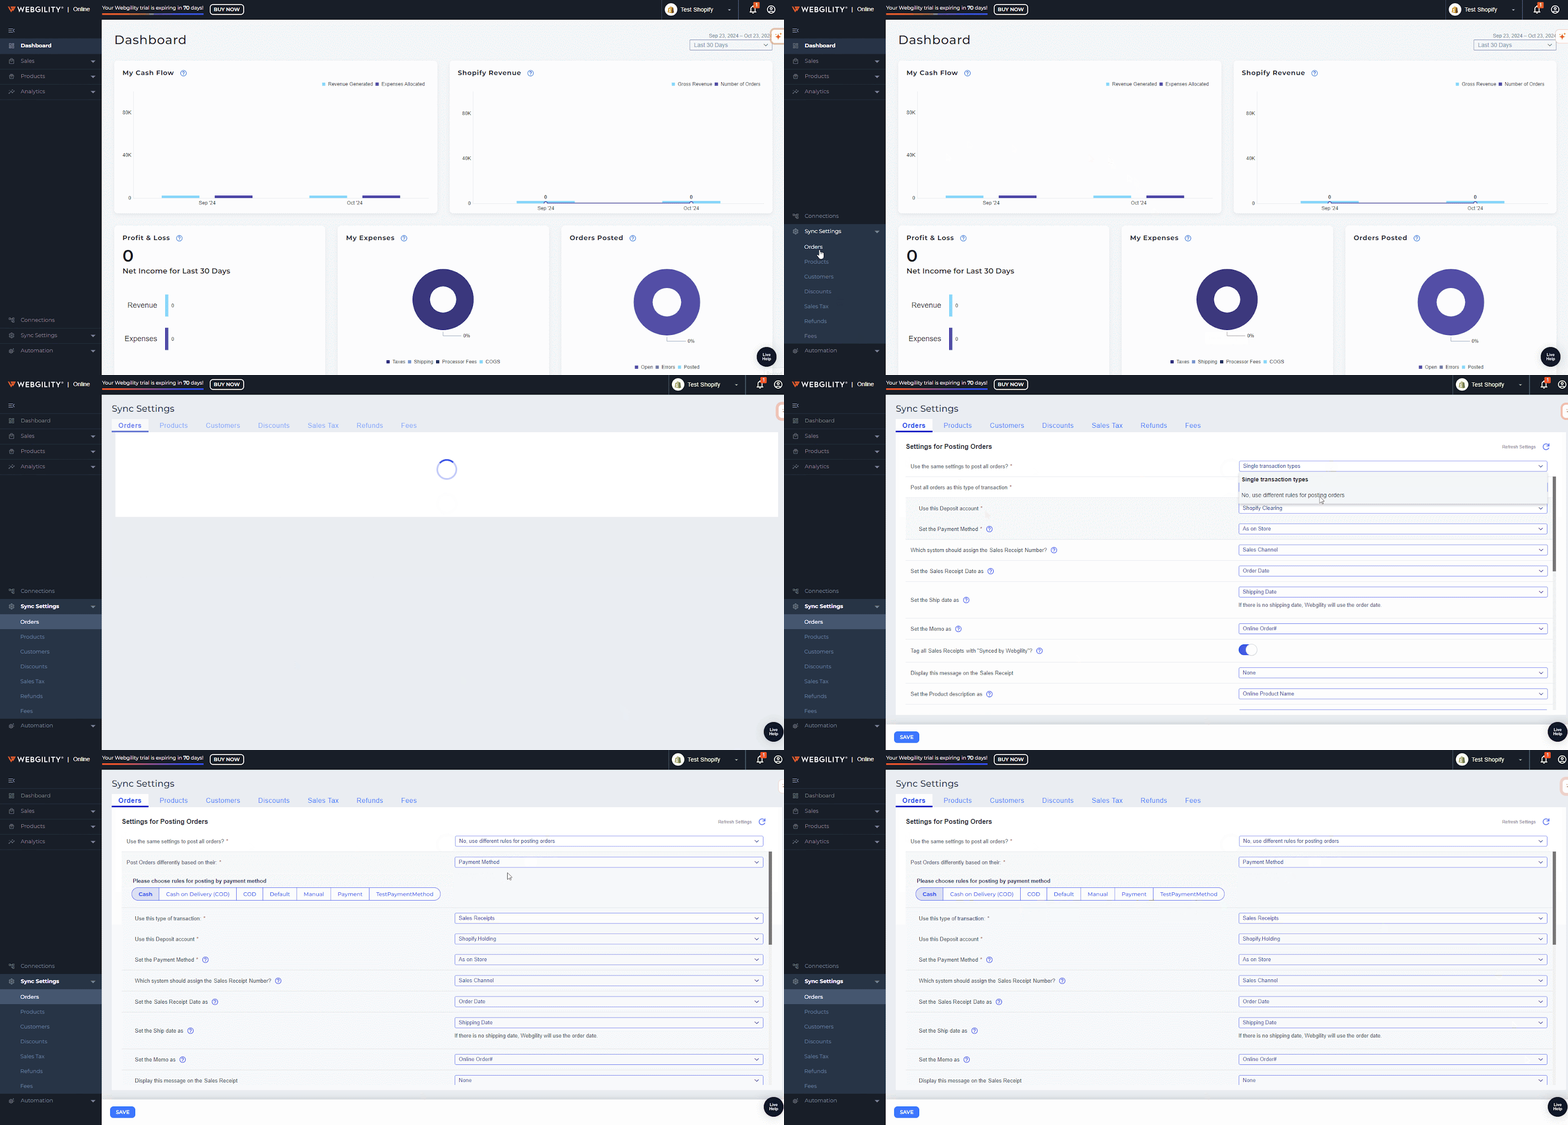
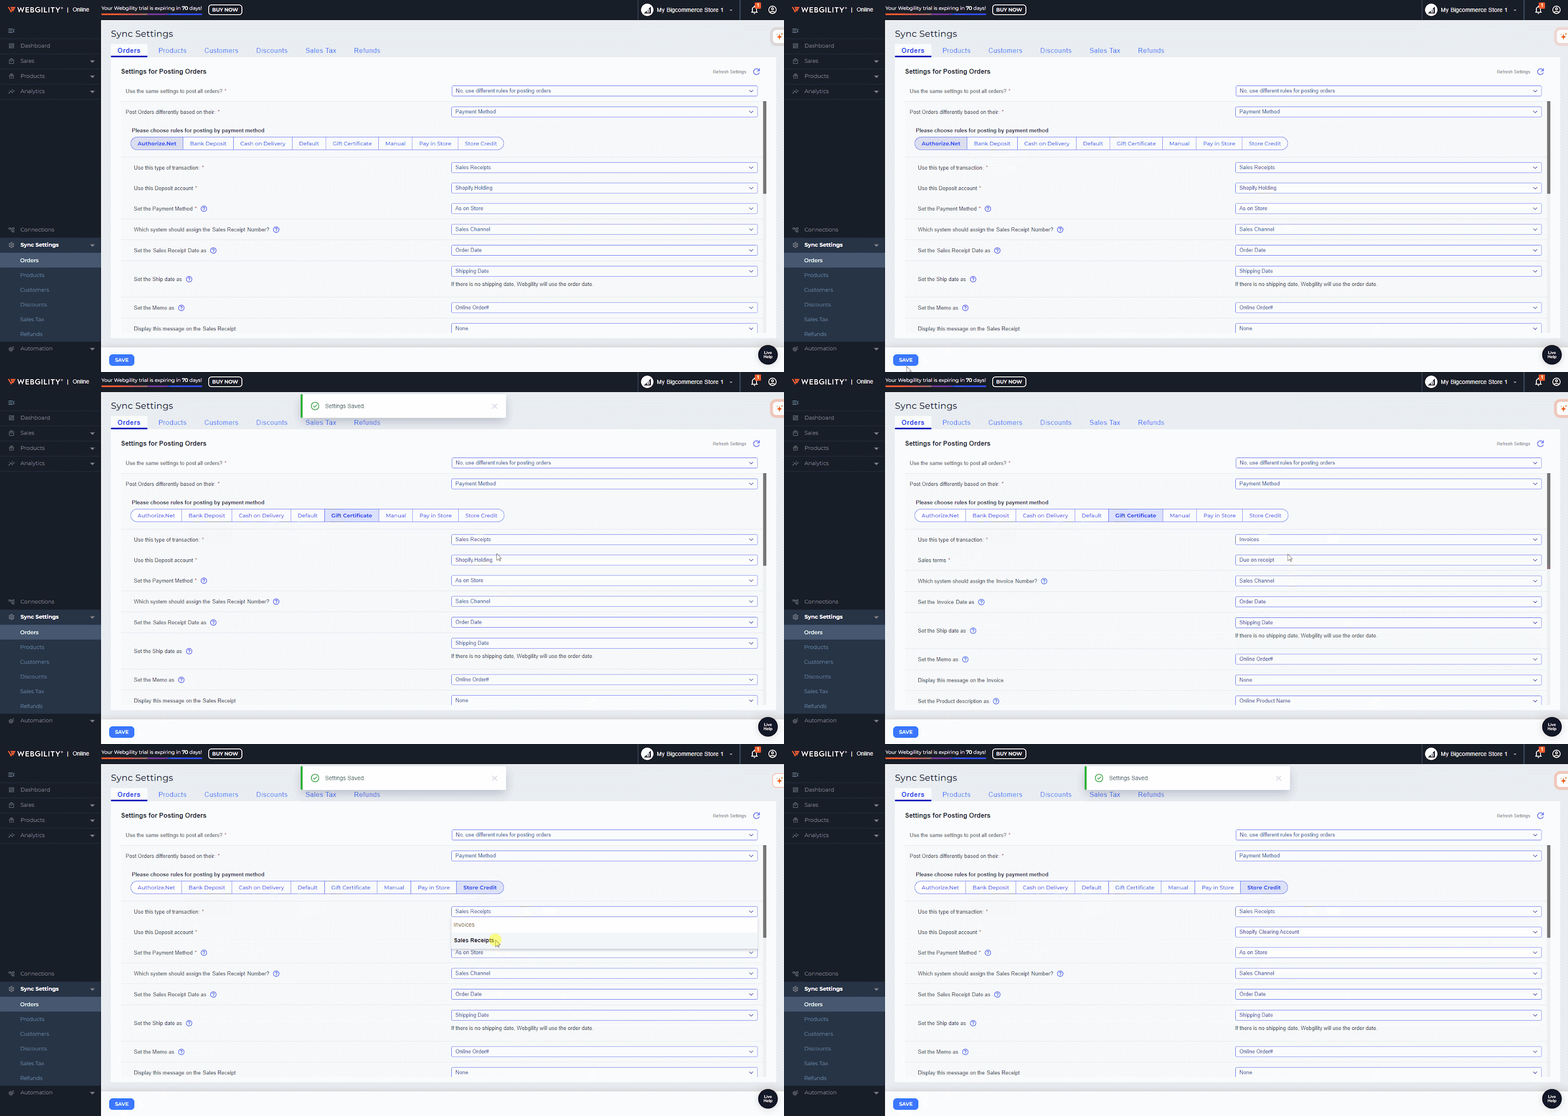
Go to Sync Settings. Navigate to Orders.
-
For the first option Use the same settings to post the transaction type, you can change how you post orders based on payment methods. Select “No, use different rules for posting orders.”
2. Configure Payment Methods
-
Configure the posting rules for each payment method and save the settings.
-
Select the desired Payment Method (e.g., Shopify Payments, Paypal, etc.).
-
Assign specific transaction types and posting rules to each method, including account types, sales reps, terms, and templates.
-
Once done, click Save.
-
-
Select the desired Payment Method (e.g., Shopify Payments, Paypal, etc.).
-
Assign specific transaction types and posting rules to each method, including account types, sales reps, terms, and templates.
-
Once done, click Save.
Pro Tips:
Remove Unnecessary Payment Methods
Streamlining your sales process is crucial for enhancing customer experience. If you identify payment methods that are not essential for your business, consider removing them. Here’s how to do it:
-
Access Settings: Log in to your sales channel's settings (e.g., Shopify, WooCommerce, BigCommerce).
-
Navigate to Payment Methods: Find the Payment Methods section within the settings.
-
Select and Remove: Identify the manually added payment method you wish to eliminate, then click on Delete or Disable.
-
Save Changes: Ensure you save the changes to apply them.
By removing irrelevant payment options, you can reduce confusion during checkout, allowing customers to see only the most relevant payment methods.
Avoid Confusing Names
When creating manual payment methods, choose names carefully. Avoid generic terms that could be mistaken for online gateway options, such as "Credit Card," "Visa," or "MasterCard." This will help prevent any misunderstandings and ensure clarity for your customers.
Conclusion
By managing and organizing payment methods in Webgility Online, you can ensure smoother sales transactions and better bookkeeping.
Use this guide to keep your payment methods updated and well-organized, adding new methods when needed and removing any that are no longer relevant to your business operations.
