How to Connect BigCommerce to Webgility Online
Easily integrate your BigCommerce store with Webgility Online to streamline operations, whether you serve B2C or B2B customers. Follow these steps to get connected and optimize your sales management.
Steps:
If this is the first sales channel you're setting up, please read the getting started process, here.
Login to Webgility Online
-
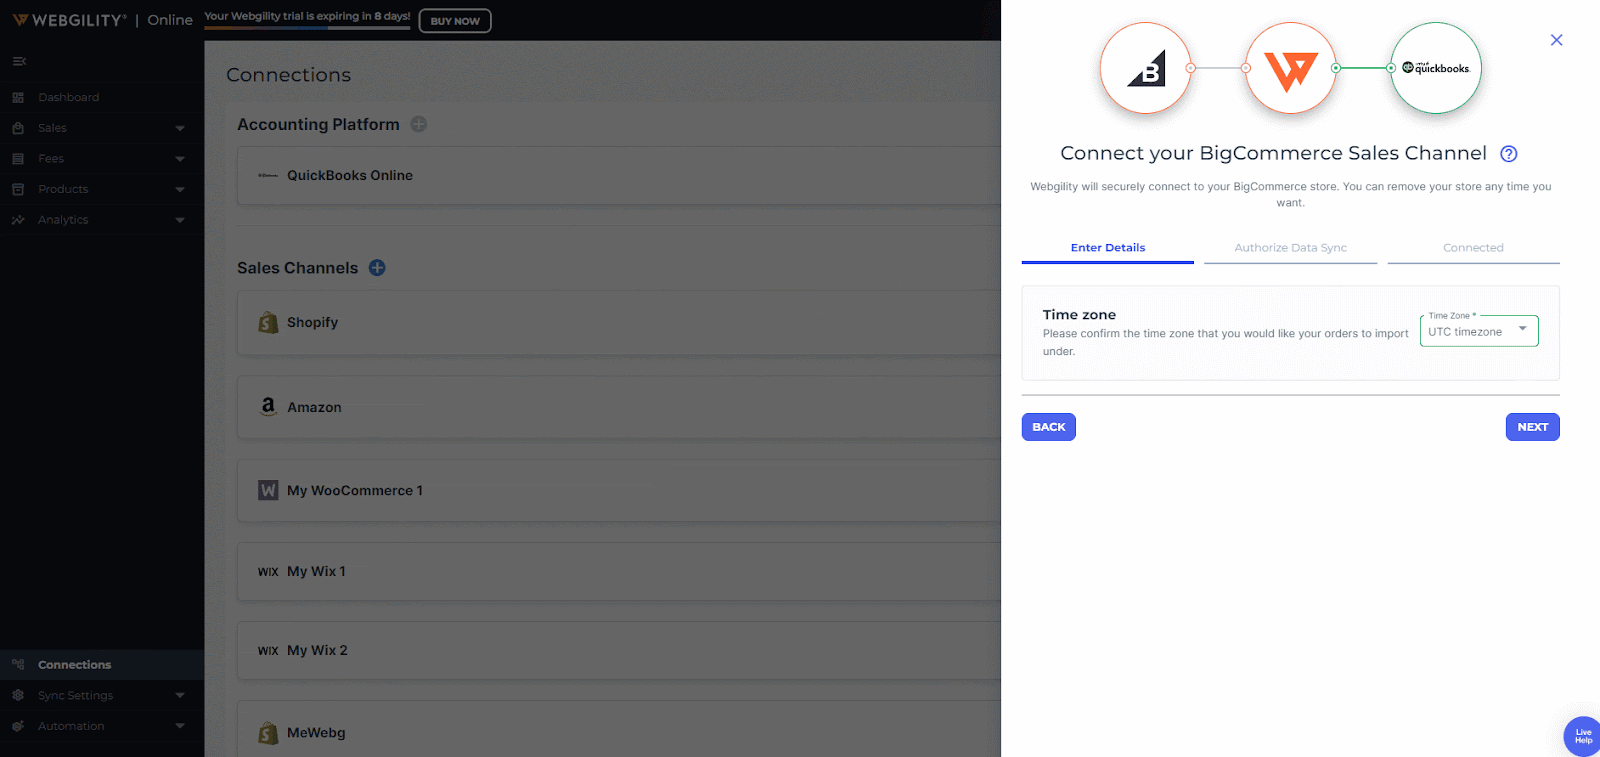
Go to Connections. Click the ➕ sign. Select BigCommerce, and click Continue.
Go to Connections. Click the ➕ sign. Select BigCommerce, and click Continue.
-
Configure Basic Settings
-
In the Add Store Wizard, select your time zone and click Next.
-
Configure Basic Settings
-
In the Add Store Wizard, select your time zone and click Next.
In the Add Store Wizard, select your time zone and click Next.
-
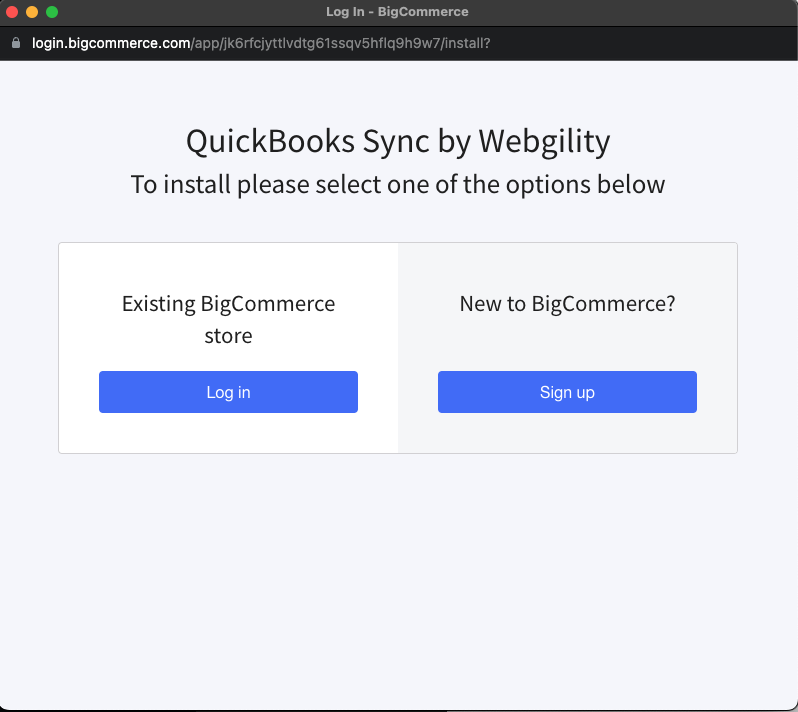
Authorize BigCommerce Access
-
A BigCommerce pop-up will appear, prompting you to log into your BigCommerce account. (Ensure pop-ups are allowed in your browser for this step.)
-
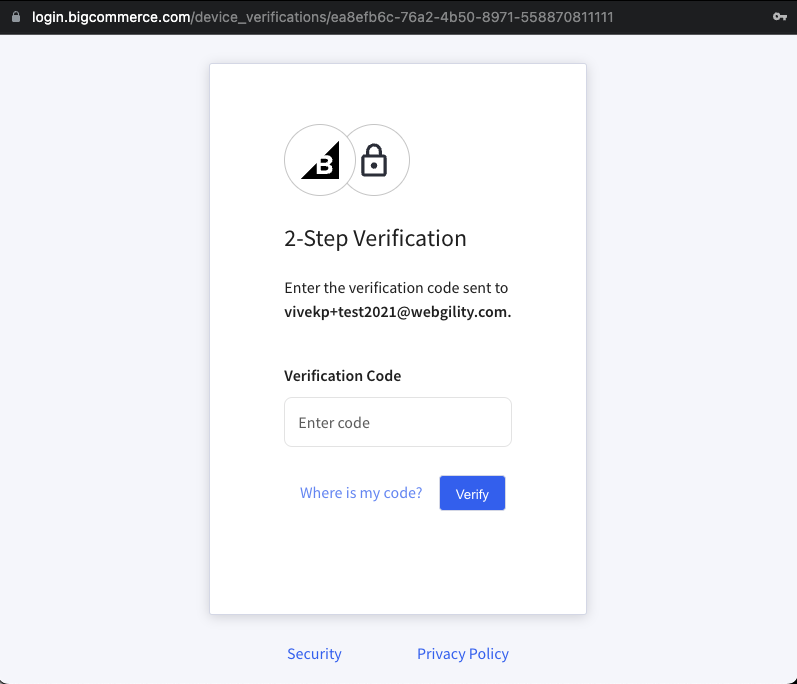
If prompted, complete any two-step verification and click Allow Access. (See below)
-
Authorize BigCommerce Access
-
A BigCommerce pop-up will appear, prompting you to log into your BigCommerce account. (Ensure pop-ups are allowed in your browser for this step.)
A BigCommerce pop-up will appear, prompting you to log into your BigCommerce account. (Ensure pop-ups are allowed in your browser for this step.)
-
If prompted, complete any two-step verification and click Allow Access. (See below)
If prompted, complete any two-step verification and click Allow Access. (See below)
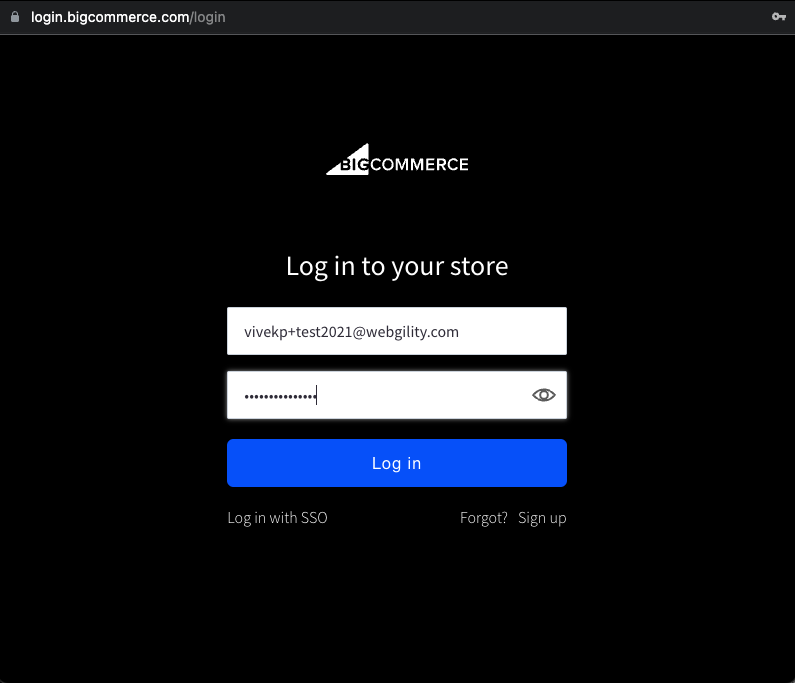
Complete a 2-step Verification if it is required and Allow Access.
-
Begin Data Sync Process
-
After verification, Webgility Online will initiate the Data Sync process.
-
Begin Data Sync Process
-
After verification, Webgility Online will initiate the Data Sync process.
After verification, Webgility Online will initiate the Data Sync process.
Now, let's prepare for B2B connections if applicable.
-
Generate the B2B API Token (for B2B users)
-
If you’re setting up a B2B connection, follow these steps to create an API token:
-
In BigCommerce, go to the B2B Edition.
-
Create a new API account and generate a BigCommerce V3 API Token.
-
-
Generate the B2B API Token (for B2B users)
-
If you’re setting up a B2B connection, follow these steps to create an API token:
-
In BigCommerce, go to the B2B Edition.
-
Create a new API account and generate a BigCommerce V3 API Token.
-
If you’re setting up a B2B connection, follow these steps to create an API token:
-
In BigCommerce, go to the B2B Edition.
In BigCommerce, go to the B2B Edition.
-
Create a new API account and generate a BigCommerce V3 API Token.
Create a new API account and generate a BigCommerce V3 API Token.
Note: If you need additional guidance, see the “How to Create an API Token” section below.

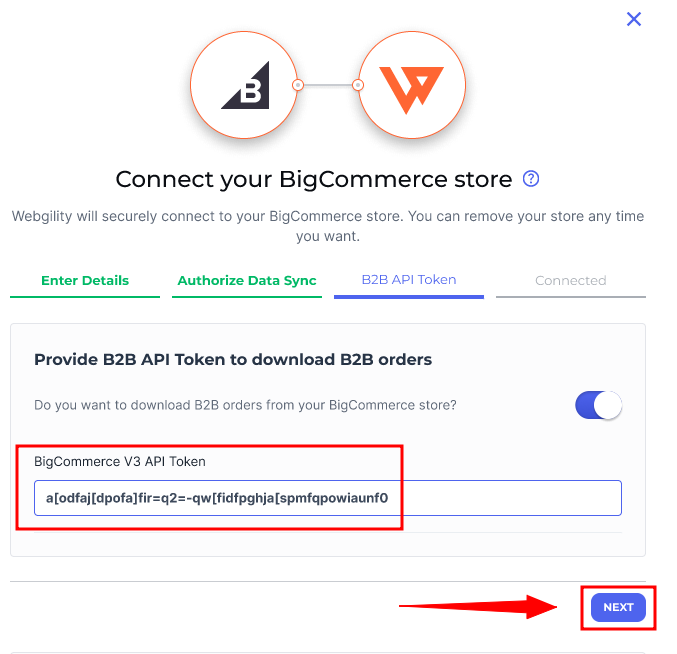
Enter API Token
-
Copy the API token and paste it into the designated field in Webgility Online. Click Next.
Copy the API token and paste it into the designated field in Webgility Online. Click Next.
Complete the Connection
-
Webgility Online will now download data from BigCommerce. This process may take a few minutes.
-
Once complete, you’ll receive a Successfully Connected message. (See below)
Webgility Online will now download data from BigCommerce. This process may take a few minutes.
Once complete, you’ll receive a Successfully Connected message. (See below)
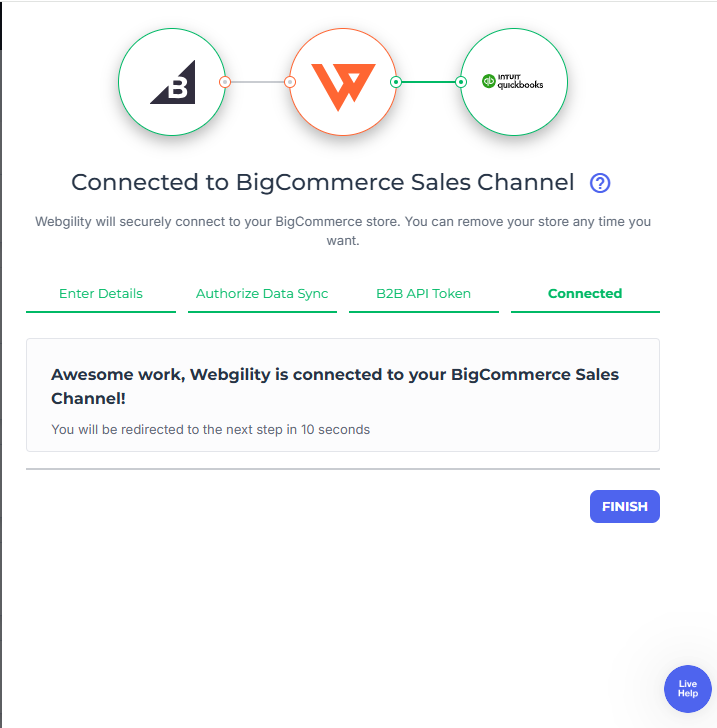
Your BigCommerce store is now connected to Webgility Online! You can start managing your sales channel directly from Webgility Online.
If you still need help, contact our Webgility Support.